
|
Scharnhorst's Line North of Elsenborn #3 |
||
|---|---|---|
| (Attacker) United States | vs | Germany (Defender) |
| Formations Involved | ||
|---|---|---|
| Germany |  |
89th Infantry Division |
| United States |  |
9th "Old Reliables" Infantry Division |

| Total | |
|---|---|
| Side 1 | 4 |
| Draw | 0 |
| Side 2 | 0 |


| Overall Rating, 6 votes |
|---|
|
2.83
|
| Scenario Rank: 804 of 913 |
| Parent Game | North of Elsenborn |
|---|---|
| Historicity | Historical |
| Date | 1944-09-16 |
| Start Time | 08:00 |
| Turn Count | 24 |
| Visibility | Day |
| Counters | 146 |
| Net Morale | 0 |
| Net Initiative | 1 |
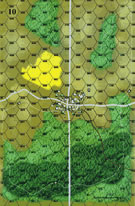
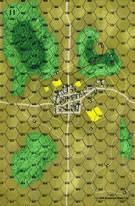
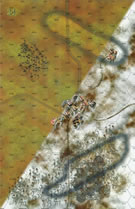
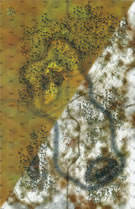
| Maps | 4: 10, 11, 24, 25 |
| Layout Dimensions | 86 x 56 cm 34 x 22 in |
| Play Bounty | 182 |
| AAR Bounty | 165 |
| Total Plays | 4 |
| Total AARs | 2 |
| Battle Types |
|---|
| Inflict Enemy Casualties |
| Rural Assault |
| Urban Assault |
| Conditions |
|---|
| Anti-infantry Wire |
| Anti-tank Ditches |
| Entrenchments |
| Minefields |
| Off-board Artillery |
| Randomly-drawn Aircraft |
| Severe Weather |
| Scenario Requirements & Playability | |
|---|---|
| Afrika Korps | Counters |
| Airborne - IE | Counters |
| Battle of the Bulge | Maps |
| Elsenborn Ridge | Maps + Counters |
| North of Elsenborn | Base Game |
| Introduction |
|---|
|
With repeated infantry assaults failing to break the German position, 9th Infantry Division finally sent help from its attached 746th Tank Battalion. The West Wall's designers had recognized that this point, where the Scharnhorst Line bent to follow the German-Belgian border and a road crossed the ridge line, would be a natural target for any attackers. The well-sited and well-built fortifications could not be broken by infantry alone, but this time the Americans were bringing all of their many advantages to bear. |
| Conclusion |
|---|
|
This time, American firepower made a difference and they managed to take Hoefen, one of the towns along the ridgeline. But elsewhere the German defense remained firm despite the commitment of tank, artillery and air support. The Siegfried Line was living up to its reputation, and allowing the Germans time to recover from the disastrous losses of their retreat across France. |

|
|
|---|
| AFV Rules Pertaining to this Scenario's Order of Battle |
|---|
|
| Heer |
|---|
|


| Army |
|---|
|


| 6 Errata Items | |
|---|---|
| Scen 3 |
US OBA 4x18 not 4x16 (along with 1x24)? Standard value for US 105mm is 18. (Poor Yorek
on 2014 Jan 24)
|

|
The reduced direct fire value of the Heer HMG became 5-5 starting with Fall of France. (plloyd1010
on 2015 Jul 31)
|

|
Strongpoints are single step units and can be eliminated with X results like any other single step unit. (Shad
on 2010 Dec 15)
|
|
|
The standard mix of strongpoints may be downloaded from Avalanche Press: http://www.avalanchepress.com/German_Strongpoints.php This is the standard mix found in Airborne, Airborne-IE, and Edelweiss Expanded. The strongpoint mix in Cassino '44 is different from that of other PG games. (plloyd1010
on 2012 Feb 01)
|
|
|
Strongpoints are affected by the terrain in their hex just like any other unit.
Even though they can't move, they can attack using Assault Combat if an enemy unit moves into their hex.
They may not dig in or benefit from entrenchments.
(rerathbun
on 2014 Apr 21)
|

|
The movement allowance on the counters in Airborne is misprinted. It should be "3." (rerathbun
on 2012 Jan 30)
|
| Too Big A Map - Too Few Germans - Too Many Yanks ! | ||||||||||||||
|---|---|---|---|---|---|---|---|---|---|---|---|---|---|---|
Played ftf with Wayne Baumber and our 7th chronological foray into those Westwall series of downloads. We've had a lot of fun with these and simply playing them as we have in date order really brings to life JUST WHY this campaign was a 'grinder' for both sides. As the German player, one could easily see how this scenario was asking for far too much of the thread-bare defenders, and there will be no-way theycan be expected to successfully defend them all. In my case, I dropped the forward town and my plan was to put all the effort into keeping the other two in the defenders position The German position had three small villages in the area. With such a lack of man-power, it would be impossible to defend them all. Therefore, only two would be defended, whilst the forward village would be forsaken to the enemy advance. Around the other two villages, a network of wire, tank-ditches and minefields were laid thickly around them. The American advance would need to be cautious. Kicking off at 0800, the Americans did indeed advance carefully, having to take into account German AT capability that was hidden, their tanks could not be overly bold. American forces were split so as to bring both towns under assault and through the German defences they picked their way. Despite the best effort of the defenders, the American order of battle proved too strong against such thinly spread forces and they were able to work through to the towns perimeters. Around 1030 hours, the first American soldiers had entered the eastern most town and although not immediately, the fate of the battle was probably sealed for the Germans. However, at this point in time, it is impossible to complete the final part of the report as the records for the battle have been mislaid. What we can discern is that the Americans probably, albeit slowly completed the victory as the Germans would have had no resources available to kick-out any enemy troops that did enter the town. Sadly, when going to start the second session of this battle the set-up locations of the fortifications were mislaid. American victory appeared to be on the way when we left it the time before and we had to settle for that as the result. BUT, do watch this space. If the piece of paper is ever found the second part will be re-fought and perhaps the result here edited. As it stands, this was a standard attacker/defender battle which I felt gave the defender little choice and possibly chance ? For that, as acceptable but expected levels of fun, I give this a very standard 3 |
||||||||||||||
| 0 Comments |
| Battle before the Gates of Morannon | ||||||||||||
|---|---|---|---|---|---|---|---|---|---|---|---|---|
Well, at least it appeared that way with two medium-sized towns ringed with AT ditches/wire/minefields. No Eagles, though, for the Heer. The US has the advantage in: force size; morale; engineers for town assaults/mines; armor; aircraft; and copius OBA. The Heer have five wagons. About the only thing going for the defenders is that the US has to huff it 3000-4000m or so to get engaged. German set-up eschews the the 7-hex town and the one-hex hamlet on B24. An outer perimeter of wire/AT ditches encircles the 6-hex town on B10(NE on the map) and the 9-hex town on B11 (SE on the map) with both having an inner ring of minefields. To have some verisimilitude regarding the latter, I shuffled the minefield counters and placed them without knowing their value. This way, the US "me" really didn't know what was where. The few gaps in the perimeter were filled with entrenched strongpoints or regular units. The US attack proceeds with three groups: (1) 5xINF + ENG + M4 to invest the B24 town (empty) and ring/spot the SE town (being the secondary objective of the US force); (2) the "heavy group" consisting of a company of 5xINF + 5xHMG and the mortars (these move due east along the road to engage the western facing defensive elements); (3) 6xINF + 2xENG + 3xM4 move NE, E, then turn south to attack the NE town along the north road axis. US air is active early (4/7 first turns), but then steady rain arrives through turn 16. US OBA waxes cold and hot. The sole high point for the Heer is a 75/41 taking out a step of M4's via OF as it tries to infiltrate the woods SW of B11 town. Otherwise, most of the action is on B10 with the US following the pattern of pushing up INF/leaders to spot; call in OBA to take out the guns; then bring up the ENG/M4's to capture the entrenched GREN + SP (strongpoint) holding the north road. Meanwhile, steady heavy pounding by the HMG force and an assault chips away at the western defense. Due to the ring of mines, the US infiltration was something like reaching into a closed space, then backing out again. Suffice it to say, by Turn 16 the US owned the B10 town; the B24 town/hamlet; and had inflicted 13 step losses on the Germans. Total VP at this state was US = 42, Germany = 25. A major victory was already attained without need to engage the B11 defensive network. The play/movement was worth a '3' rating, but the seeming inevitability of the US win gives this one a '2' for lack of "fire." All that being said, had the VP award been Three for the Germans holding B10 and/or B11 town hexes and the US Two for the same - rather than the published reversed - I think things might be quite a bit more exciting. For example, with my "suggested" VP disbursement, the corresponding score above would have been US = 36 and Germany = 34: the US would have had to make inroads into the B11 town within the remaining eight turns (including getting themselves reorganized). I also suspect that the US OBA is misprinted and should be 4x18 not 4x16 as written since US 105mm units have an 18 value elsewhere throughout the series. |
||||||||||||
| 0 Comments |