
|
No Time to Lose North of Elsenborn #2 |
||
|---|---|---|
| (Attacker) United States | vs | Germany (Defender) |
| Formations Involved | ||
|---|---|---|
| Germany |  |
9th Panzer Division |
| United States |  |
3rd "Spearhead" Armored Division |

| Total | |
|---|---|
| Side 1 | 1 |
| Draw | 0 |
| Side 2 | 4 |


| Overall Rating, 7 votes |
|---|
|
3.14
|
| Scenario Rank: 647 of 913 |
| Parent Game | North of Elsenborn |
|---|---|
| Historicity | Historical |
| Date | 1944-09-15 |
| Start Time | 12:00 |
| Turn Count | 12 |
| Visibility | Day |
| Counters | 50 |
| Net Morale | 1 |
| Net Initiative | 1 |
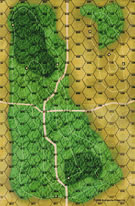
| Maps | 3: 22, 25, 9 |
| Layout Dimensions | 84 x 43 cm 33 x 17 in |
| Play Bounty | 147 |
| AAR Bounty | 159 |
| Total Plays | 5 |
| Total AARs | 3 |
| Battle Types |
|---|
| Ambush |
| Inflict Enemy Casualties |
| Road Control |
| Surprise Attack |
| Urban Assault |
| Conditions |
|---|
| Hidden Units |
| Off-board Artillery |
| Severe Weather |
| Scenario Requirements & Playability | |
|---|---|
| Battle of the Bulge | Maps |
| Elsenborn Ridge | Maps + Counters |
| North of Elsenborn | Base Game |
| Introduction |
|---|
|
With three of the best American divisions - 1st Infantry, 9th Infantry and 3rd Armored - steadily chewing through the West Wall defenses, the German command became desperate to stop them. "Ninth Panzer Division armor will attack the enemy," raged corps commander Friedrich-August Schach, "and throw him back behind the West Wall. There is no time to lose." Accordingly, the badly-depleted panzer division moved out to confront the Spearhead Division, itself rapidly losing its own strength. |
| Conclusion |
|---|
|
The German ambush worked well, as the small battle group shot up about half of Task Force Lovelady's tanks. But 9th Panzer had lost control of its subordinate units and even the division commander's firing brought no improvement. |

|
|
|---|
| AFV Rules Pertaining to this Scenario's Order of Battle |
|---|
|
| Heer |
|---|
|


| Army |
|---|
|


| 4 Errata Items | |
|---|---|

|
The reduced direct fire value of the Heer HMG became 5-5 starting with Fall of France. (plloyd1010
on 2015 Jul 31)
|

|
All SS PzIVH tanks should have a movement of 8. (Shad
on 2010 Dec 15)
|

|
The movement allowance on the counters in Airborne is misprinted. It should be "3." (rerathbun
on 2012 Jan 30)
|

|
The M18 has a special rule in Battle of the Bulge but it applies globally: "A two-step M18 unit can fire one anti-tank shot and move half its movement allowance (retain fractions) in a single impulse. The order in which it does these two actions is the player's choice." (Shad
on 2010 Dec 15)
|
| Ambush & Hidden Forces - Excellent Little Scenario For FTF Gaming | ||||||||||||||
|---|---|---|---|---|---|---|---|---|---|---|---|---|---|---|
So it was to game number 6 in our chronological battles through the Westwall for Wayne and I. So far, it had employed 3 scenarios each from 'North of Elsenborn' and 'Westwall' taking us now to the last battle for the 15th Sept 1944 and they had all been typical hard-battled Siegfried Line encounters (just like the real-thing). I looked forward to this one as it gives the opportunity to use hidden forces and launch an ambush attack on the invading Amis. That said, some care needs to be taken by the German defenders. The ambush location is VERY far from the road and towns that need to be invested and Rain squalls cut down visibility to 6-8 hexes. So your forces will not always be able to see the enemy. It can be an easy mistake to make to either fire to soon or indeed too late (even worse). Positioning and Timing Sir .. Its all down to positioning and timing !. Here is the report to this short 12 turn encounter As reported in the Homeland Security report, the American Third Armored Division had been trying to pres s through the Schill line. As in that last played scenario, this pitted the 9th Panzer Division against them. Although it had been a tough battle further up the line, the Americans had breached part of the wall there and run up dominant winners. Here, some revenge and balancing of honours would be sought. The Americans here were advancing cautiously up the main road investing towns as they went. The Germans deployed here had with them a platoon of Panthers, varied tank destroyers, PzIV’s and some AT guns, as well as their infantry troops. They deployed either side of the road hidden amongst the rising ground and foliage. This however left them some distance from the hamlets that they were protecting, but if timed well, could make for an effective ambush. One other problem was the weather. The rain squalls were reducing visibility. Would they be able to see far enough to affect the ambush planned ? This would be more difficult given that vision was variable. At Midday, American troops were sighted. A tense wait for half hour followed whilst the Americans advanced. They committed some armour to a forward town and then began sending out some more M4’s that way. As the second section of M4’s came into sight, the Germans opened up against the second batch of tanks destroying 1 step. Meanwhile, German infantry, about two companies of them, positioned on a hill nearest the villages that had been occupied by the earlier American AFV’s streamed forward before the enemy could advance to the next hamlet. The immediate American reaction was to withdraw the reinforcing vehicles back out of sight and leaving the advanced forces up in the air somewhat. For the next 45 minutes, both sides jostled for positions as GI’s were deployed forward against the defending grenadiers. The American Hellcat platoon also maneuvered at speed threatening would be German attacking AFV’s. For a brief moment around 1.30pm, the gloom lifted a little. At this point, some German infantry ventured forward against the American vanguard and threatened to enter the built up area they were occupying. The US forces had no choice but to fire out at them and in doing so, cut many of them down. Before these AFV’s had time to contemplate any celebration, more German armour and 75mm AT guns, previously unsighted, revealed themselves by unleashing fire from 2000m from both sides of the town. The carnage from the crossfire was complete. All the M4’s, 1 step of Scotts and a number of M3’s were wiped out when hit by the fearsome German 75mm and 88mm shells. This whipped the Americans into aggressiveness. Suddenly, what remained of their armour plus their infantry began attacking moves to which the Germans also responded. On the stroke of 2pm a fearsome exchange took place near the American entry point. The Panthers and Hetzers took out the Hellcats and some M4/76’s as well as the ubiquitous M3’s. But the US troops responded by also eliminating both the Panthers and Hetzers which was achieved by bravely closing down on the range. In all, the short sharp combat in this quarter cost 4 German tank steps and 5 US tank steps with 3 steps of M3’s smashed. However, it did give the Americans an outside chance of inflicting more damage on the now disorganized German troops involved, and for a while, they were able to pick off some remnants of these German forces. But the Germans still possessed the trump cards. They had zeroed in OBA, more heavy tanks available in the PzIVH's, and plenty of infantry holding the hamlets. The Americans would not possibly be able to advance further with what they had remaining. At 2.30pm, the Americans finally retired putting the melee down to experience. Things would have to be re-thought here rather than a proud straight advance up the road. 9th Panzer had redeemed itself on the same day as other of its elements and attached Landeschutzen had succumbed to American forces elsewhere, albeit with a stout struggle (see Homeland Security AAR). The Westwall battles would drag on. Westwall step casualties over the six chronological battles to date amount to :German : INF 84, OFF 16, AFV 10, APC 0, GUN 12 American: INF 49, OFF 4, AFV 41, APC 22, GUN 0 I think Wayne mentioned that if the Germans set up well then they should win. Possibly true, but after he left and I was cogitating the just played battle, it did occur to me that IF say, when the Germans opened up they had rolled low numbers and missed, and American return fire was successful, then the battle could have flowed far differently. Its certainly not beyond the realms of feasibility ? Anyway, I initially gavethis a 3, but considering all the nic-nacs attached and the chance of variable results, I'm going to bang it a 4. MB has written up two good scenarios out of the three that I have played from this pack and the other was a '3' result I think. So far, North of Elsenborn is all good ! |
||||||||||||||
| 0 Comments |
| No Time to Lose | ||||||||||||||
|---|---|---|---|---|---|---|---|---|---|---|---|---|---|---|
When I first looked at this scenario, part of Mr Hughes's and I's ongoing West Wall saga I thought it looked hard for the US, on second glance I thought it looked hard for the Germans. On playing the game it is possibly tough for the Americans but well worth playing. As all German units are hidden I am not sure if this one is really suitable for solitaire play. The scenario is played over three maps with the US entering on the middle one and the Germans deployed on the two outer boards. The Germans can't move until they can see the US and the Americans have to stay on the road until fired upon or they see a German unit. The key to this game is of course the German set up and German players judgement as to when to spring the ambush. Vince let two platoons of armour move past his hidden Panther but fired on the third, he then revealed his main infantry force who raced for two remaining towns empty of American troops. VPs are based on step losses and road and town control only on the central board, NOTE the Germans control all these hexes at the start of the game.The next few turns after the second were a little cat and mouse as both forces tried to gain some kind of advantage, Vince though had kept most his armour hidden and that curtailed my movement some what, particularly the M3,s who lurked in woods for most of the game. The German commander then pulled off the winning move, he sacrificed a GREN unit by moving adjacent to the town forcing the US armour to fire this spotted the hex and a second ambush occured with cross fire from hidden tanks and guns blowing away the US forces. The US commander was stung to action and after gathering his scattered M3's and M4's swarmed those pesky Panthers destroying the whole platoon. Too little too late even though hex VPs were equal the US had suffered heavy enough losses for the German commander to gain a well deserved victory.To win this one the US player has to be bold and lucky, he has to get up the road and into all the town hexes before the Germans, and force them to attack. Therefore he has to win the initiative and he has to risk losses. In this game Vince rolled 6 for the initiative six times on the bounce which did not help my cause. However ignoring that the best player won on the day, Vince's set up was excellent and the German set up is the real key to this scenario. |
||||||||||||||
| 0 Comments |
| Like throwing rocks at a bottle. | ||||||||||||||
|---|---|---|---|---|---|---|---|---|---|---|---|---|---|---|
Played Double-blind. No matter how many you throw, you just never seem to hit it! There are certainly ways I could have played it better, but still... The Americans hid their vehicles in the woods in the south and led with the infantry. About when the lead infantry company reached the first town, the Germans realized their mistake. Specifically, they (meaning I) should have moved some armor in behind the towns/fields to form a block. The battle opens with a German 75/41 winking out a halftrack. Followed by artillery falling on the exposed American infantry. A German infantry company, with an AT gun, begins moves into the southern forest. The American moves to investigate (because an OP has appeared), presumably with armor (as the infantry has been accounted for). The PzIV and Panther move to backup the AT gun. M4/76s, M18, and a couple of halftracks appear in front of the German infantry. The German infantry jump the tanks, and the AT lets loose with a couple shots, missing. The panzers move up. The Yank tanks, having done quite well during the assault, withdraw. Parting shots from the Germans keep missing (I have never seen so many low rolls). As the Americans run back down the hill, with the panzers behind, the Hetzers and Stug move in front of the south town from the west side of the map. German infantry closes in on the towns. The Hetzers and Stug take the worst of the dual between the M4s in the woods beside the town (at least I got 1 hit that time). The M18 runs out of sight, and the Panzers get 1 hit on the retreating M4/76s. Otherwise the Hetzers and Stug are beaten off. The German infantry take some losses, but largely contain the American infantry. The panther finally does some real good, obliterating a M4/76. The PzIV does a road run to get some victory points back. The game ends in a bare American victory of 33 to 32. If I could have gotten even half of the expected AT hits, I would have won. Sheesh! |
||||||||||||||
| 0 Comments |