
|
San Manuel and the 2nd Armor Nihon Silk #10 |
||
|---|---|---|
| (Defender) Japan | vs | United States (Attacker) |
| Formations Involved | ||
|---|---|---|
| Japan |  |
2nd Mobile Artillery Regiment |
| Japan |  |
2nd Mobile Infantry Regiment |
| Japan |  |
7th Tank Regiment |
| Japan |  |
Shigemi Reserve |
| United States |  |
161st "First Washington" Infantry Regiment |
| United States |  |
716th Tank Battalion |

| Total | |
|---|---|
| Side 1 | 1 |
| Draw | 0 |
| Side 2 | 1 |


| Overall Rating, 2 votes |
|---|
|
4.5
|
| Scenario Rank: --- of 913 |
| Parent Game | Nihon Silk |
|---|---|
| Historicity | Historical |
| Date | 1945-01-24 |
| Start Time | 10:00 |
| Turn Count | 26 |
| Visibility | Day |
| Counters | 153 |
| Net Morale | 0 |
| Net Initiative | 0 |
| Maps | 2: 34, 35 |
| Layout Dimensions | 56 x 43 cm 22 x 17 in |
| Play Bounty | 188 |
| AAR Bounty | 165 |
| Total Plays | 2 |
| Total AARs | 2 |
| Battle Types |
|---|
| Hill Control |
| Inflict Enemy Casualties |
| Rural Assault |
| Urban Assault |
| Conditions |
|---|
| Entrenchments |
| Off-board Artillery |
| Reinforcements |
| Terrain Mods |
| Scenario Requirements & Playability | |
|---|---|
| Battle of the Bulge | Counters |
| Guadalcanal | Counters |
| Kokoda Trail | Maps |
| Nihon Silk | Base Game |
| Introduction |
|---|
|
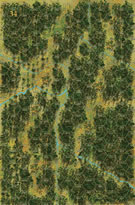
The Japanese garrison in San Manuel, Philippines numbered over a thousand men, with the rifle elements concentrated in the under strength 1st Battalion, 2nd Mobile Infantry. Augmenting the infantry, the garrison boasted 40 medium and five light tanks of the 7th Tank Regiment, about 15 75mm and 105mm artillery pieces from the 2nd Mobile Artillery, a few 47mm antitank guns, at least 25 machine guns, and 15 or more light mortars. The defense formed around the tanks in earthen revetments, with 75 revetments in San Manuel, each ringed with rifle pits and at least one machinegun position. Initially, tanks occupied 25 to 30 of the revetments, while Colonel Shigemi held out 10 to 15 tanks as a mobile reserve. Tanks and infantry could move rapidly from one revetted strongpoint to another. The Japanese oriented the defenses principally against attack from the west, southwest, and south, but they did not neglect the other approaches entirely and disposed their weapons in depth for all-around defense. Considering the tactical importance of the ridge north of town to both attacker and defender, it is almost incredible that the Shigemi Detachment stationed only a platoon of infantry there. The 161st Infantry made no such mistake. The regiment had to seize the ridge to secure its northern flank. Colonel Dalton's plan for the reduction of San Manuel called for a converging attack. The 2nd Battalion led the main effort, striking from the north; the 1st Battalion, in support, moved in from the west and southwest from the south side of the road to Binalonan. The 3rd Battalion was at this time in corps reserve, but the 161st Infantry was strengthened by a reinforced company of the 716th Tank Battalion and Company D, 98th Chemical Battalion, along with its 4.2 inch mortars. |
| Conclusion |
|---|
|
On 24 January the 1st Battalion's secondary attack started first, behind a fifteen-minute artillery and mortar preparation. The effort failed. Supporting tanks could not cross a tree-lined drainage ditch on the southwest side of town, and Japanese 47mm anti-tank fire destroyed one tank and temporarily disabled four others. A sixth tank was immobilized when it attempted to hurdle the ditch. Pinned down, partially in the open, the 1st Battalion lost 6 men killed and 55 wounded during the day. The supporting tank company lost another 2 men killed and 8 wounded. Late in the afternoon both the infantry and the tanks withdrew westward to covered positions. The first attacks by the 2nd Battalion met with no greater success. Company F, striking down the ridge, advanced fifty yards into San Manuel, but a Japanese counterattack, spearheaded by three tanks, drove the company out of town at midmorning. The 2nd Battalion launched another attack shortly after 1730, with Cannon Company M7's and Antitank Company 37mm guns in close support. At dark the battalion had a tenuous hold on the northern part of San Manuel, and its supporting weapons had knocked out five Japanese tanks and reduced the volume of machinegun and rifle fire that had been slowing the attack. |
| Additional Notes |
|---|
|
Use the Marine Corps 37mm from Guadalcanal for the American 37mm AT. |

|

|
|---|
| AFV Rules Pertaining to this Scenario's Order of Battle |
|---|
|
| Imperial Japanese Army |
|---|
|


| Army |
|---|
|


| Marine Corps |
|---|
|

| 1 Errata Item | |
|---|---|

|
The M18 has a special rule in Battle of the Bulge but it applies globally: "A two-step M18 unit can fire one anti-tank shot and move half its movement allowance (retain fractions) in a single impulse. The order in which it does these two actions is the player's choice." (Shad
on 2010 Dec 15)
|
| Nihon Silk, scenario #10: San Manuel & The 2nd Armor | ||||||||||||
|---|---|---|---|---|---|---|---|---|---|---|---|---|
This is my AAR from over a year ago. In my game, it starts out pretty interesting as both sides have same objectives and both sides have some mobility if they choose to use it. The Japanese did try to send a small blocking force south, to town hex number 1007 but the Americans beat them to activation. Sides get automatic reinforcements in the early try turns so the map turns into complex puzzle. The terrain modifications I made on this scenario makes the game very playable, as most of the jungle hexes are now light jungle, making vehicle movement easier and spotting/LOS better with only the elevation of 60 & 80 on board 35 as heavy jungle. Some other modifications in the scenario rules smooth things out as well. As I want this to be playable. Something in the Pacific with armor and a nice mix of units! By turn six it was turning into a bloodbath as the Americans pressed their attack harder on the first day than maybe historical. The Japanese Shinhoto’s & Ho-Ni 1’s, if dug-in to get those defense modifiers, evened things out a bit. The American pressed their armor too far ahead of their infantry, as they didn’t respect the Japanese ability to stop them. It was their demise! In the South, the American attacking force pretty much got blunted but they did draw enough energy from the Japanese main force and even their reinforcement group that the American Northern force made some progress in the hills above San Manuel. But there was no way to take San Manuel it’s self. The Americans were too sent. In the end, the out come was a Minor Japanese Victory. Pretty Historical for day one of this battle and it setup of day two, which helped wear the Japanese down. In my game: The Japanese’s received 30 points for controlling all the San Manuel hexes, 5 points for controlling on entrenchment and 55 points for destroying enemy steps. For a total of 90 points! The American’s received 5 points for controlling town hex 1007 on board 34, 20 points for controlling all the 80 elevations hexes above San Manuel, 5 points for controlling one entrenchment and 52 points for destroying enemy steps. For a total of 82 points! Japanese win by 8 points, a minor victory. On a side note, both sides lost two leader counters each. It could have been higher, but the dice rolls help some escape. |
||||||||||||
| 0 Comments |
| San Manuel & the the 2ed Armor or When the Threes Priests speak, genuflect! |
|---|
|
The axis set up in a perimeter around the big hill and in San Manuel. Their mortars and the 105s were in hexes 1910 and 1809 to provide support anywhere in the perimeter. Cleverly the Axis provided a 10-1-1 Col. giving the Axis artillery every chance to fire as much as possible. The Axis spot the Allies 5 points right off the bat by not attempting to defend the village on bd. 34 in hex 1007. To do so would wreck the perimeter. Also if the Axis defend too far south they will not be in a position to support the northern side when the time comes. At hex 1701 the Allies leap unto the board on their trucks and half tracks and unload in and around bd 35 hex 0209. The transport then headed back to pick up more advancing platoons. The artillery now was active for both sides. On their first reinforcement roll the Axis are successful and their armor instantly dash down the road to bd. 35 hex 0412. This gave the Allied Shermans pause. Then on turn three the Allied reinforcements arrive on the first roll! Unbelievable. That changes things again. Not rushing south early to help the opposite side of the perimeter now looks pretty smart for the Axis. Now the slow grind begins. First San Manuel fell after a bitter fight. The Axis assault bonus made this a tough nut to crack. But accurate fire from the M7s and a special Allied assault force made up of an Engineer, Flamethrower, and an Infantry platoon, lead by two good Lt.s, with a assault factor of 24, proved to be the answer to Axis tenacity. The Axis entrenchment at 0605 followed in short order. At each occasion the M7 Priests either wiped out the defenders or softened them up for a powerful assault. Remember, even a leaderless, Japanese infantry piece that is reduced and demoralized will defend on the 5 column on the assault table giving it a 50/50 chance of getting a result. With this in mind the Allies should put as much firepower unto a assault target as possible. The Priests were just what the situation called for. Give me 3 Hail Marys and an Act on Contrition! Meanwhile at the Eastern flank the Allies move down the road with their armor leading en masse. The Axis armor and ATGs took their shots, and missed, everyone, even the crossfire shots. Then on the next turn the Allies get the initiative and engage the Axis armor destroying three Axis tank platoons. This broke the Axis back. Once the Axis armor was destroyed the Allied tanks could move forward with no fear. The second Axis entrenchment at 0613 then fell to an Allied combined arms assault. By 1215 the Axis had scored only 24 points and the Allies had scored 83, eliminating 50 Axis steps along way. Many of the surviving Axis units were either disrupted or demoralized and were scattered all over the place. The Axis had little chance of recapturing any geographic objectives and had they, the outcome would not have changed because of the large point differential. Allied win. This was a fun scenario. The Axis have a real dilemma at the set up. The Allies too have their problems. Not knowing when reinforcements will arrive is a situation both sides have to account for. Even though it was a little large for my taste, I'll give this scenario a solid 4. |
| 0 Comments |