
|
Koepang, Day One Nihon Silk #2 |
||
|---|---|---|
| (Attacker) Japan | vs |
Australia
(Defender)
Netherlands (Defender) |
| Formations Involved | ||
|---|---|---|
| Australia |  |
2/40th Infantry Battalion |
| Japan |  |
3rd Yokosuka SNLF Parachute Unit |
| Netherlands |  |
Timor Garrison Battalion |
| Netherlands |  |
VIII Infantry Battalion |

| Total | |
|---|---|
| Side 1 | 8 |
| Draw | 0 |
| Side 2 | 0 |


| Overall Rating, 9 votes |
|---|
|
3.56
|
| Scenario Rank: 372 of 913 |
| Parent Game | Nihon Silk |
|---|---|
| Historicity | Historical |
| Date | 1942-02-20 |
| Start Time | 11:00 |
| Turn Count | 40 |
| Visibility | Day |
| Counters | 60 |
| Net Morale | 2 |
| Net Initiative | 2 |
| Maps | 2: 34, 35 |
| Layout Dimensions | 56 x 43 cm 22 x 17 in |
| Play Bounty | 161 |
| AAR Bounty | 147 |
| Total Plays | 8 |
| Total AARs | 5 |
| Battle Types |
|---|
| Delaying Action |
| Exit the Battle Area |
| Inflict Enemy Casualties |
| Conditions |
|---|
| Hidden Units |
| Reinforcements |
| Scenario Requirements & Playability | |
|---|---|
| Afrika Korps | Counters |
| Kokoda Trail | Maps |
| Nihon Silk | Base Game |
| Introduction |
|---|
|
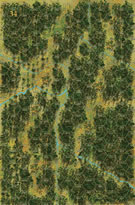
Because the paratroopers had suffered heavy casualties dropping directly on Manado airfield the commander decided not to drop the Yokosuka 3rd SNLF directly on the Penfui airfield located in Koepang, the capital of Dutch or West Timor. The Drop Zone chosen lay 10.5 miles northwest of the airfield. With the Australians and Dutch standing in their way, this wouldn't work unless the Allied units were tied down defending against the seaborne landing of the bigger SNLF force. |
| Conclusion |
|---|
|
The first group of Japanese paratroopers found themselves bogged down engaging the Allies, who had prudently guarded the roads through the jungle. The Rikusentai did not want to be delayed in seizing Penfui airfield, their main objective, so they headed through the jungle and recommended to the second group of paratroopers that they do the same. |

|

|
|---|
| AFV Rules Pertaining to this Scenario's Order of Battle |
|---|
|
| Army |
|---|
|


| Imperial Japanese Navy |
|---|
|


| East Indies Army |
|---|
|


| 3 Errata Items | |
|---|---|
| Scen 2 |
In the original DIY PDF version, the one Dutch Tank Leader and Eliminated Armored Cars & Tanks should count double for points not just the AC's. This was corrected in laser-cut reissue. (JayTownsend
on 2011 Sep 07)
|

|
1 counter in the mix is printed with the INF symbol, rather than the mortar weapon symbol. It does not effect the unit's function. (plloyd1010
on 2013 Mar 11)
|

|
The HMG units in counter mix are printed with the standard INF symbol, rather than the heavy infantry symbol used for HMG and WPN units. The misprint does not effect the units' function. (plloyd1010
on 2013 Mar 11)
|
| Nihon Silk, scenario #2: Koepang, Day One | ||||||||||||
|---|---|---|---|---|---|---|---|---|---|---|---|---|
*This looks to be an interesting scenario pitting the Australians & Dutch against the Japanese Naval Airborne Troops. In this scenario the Japanese have already landed about 10.5 miles from the airfield objective in thick jungle terrain with some dirt roads mixed in here and there but they will try to avoid direct contact with the Allied force and try to exit one of two points off the map. No airborne landing rules in this scenario. The Allies also have reinforcement that roll to come on the map starting on turn 3, so the original starting force must block the Japanese as road blocks before the get too far west or north. *The Japanese come on the map in the far southeast and use the road until they make contact with the Allied units, form here they spilt off into two groups trying the make the Allies do the same, so they are not too strong and they have to spread out in many different blocking positions making them weaker. *Once all the Allied reinforcement arrive, the Allies decide to go on the offensive and send one attacking force North and one attacking force South to attack both groups of Japanese and at the same time some units remain to block both exit points from the Japanese. So far the plan is working to the Japanese advantage. *In the North, it becomes a slugfest and both sides start losing too many steps. In the south the Japanese find a gap and exit 7 steps. *The scoring system of points is like this: The Japanese get points for exiting units and eliminating Allied steps, the Australians & Dutch get points for remaining Japanese on the map at the end of 40 turns and for eliminating Japanese steps. *After all was said and done, the Allies had 24 points and the Japanese had 34 points for a minor Japanese victory. To tell you the truth, as few dice rolls here or there and it could have been a draw or the other way, a Japanese Major victory but if I had transferred more Allied units for the North, once they had the situation under control, to the South, they would have blocked all the Japanese from exiting and would have destroyed more Japanese units, for mostly likely an Allied minor victory. So a few strategies different can really change the outcome for either side. *I thought with all this jungle, it would be a slow scenario but not at all, it was very fun to play and the first 10-12 turns is all about positioning and movement, so it plays faster then you think. Small errata: Should have one Dutch Tank Leader and Eliminated Armored Cars & Tanks should count double for points not just the AC's. |
||||||||||||
| 0 Comments |
| Scylla and Charybdis |
|---|
|
In this scenario a reinforced battalion of SNLF paratroopers needs to cross two jungle infested boards to exit the board. A large group of Austrailians and Dutch stand ready to make this a difficult transit. Both sides are ably led. Given the difficulty of crossing through jungle it is expected that much of the battle will occur on the few roads available, only one of which leads directly to the objectives for the Japanese. Do not make the mistake that I did as the Allied force commander! Your maximum possible victory point total is 30 (those are all the points available to the Allied player by either causing losses or denying exit to the Japanese. As a result, your losses will matter significantly to the final victory tabulation. Do not enter into a slugging match, your job is not to kill them all, it is to delay them by using the least amount of force, a substantially different task than what it appears to be on the surface. As you can tell from what I just wrote I didn't follow that advice, got invovled in a nasty set of firefights (the Japanese broke into two sections, one cutting through the jungle to the north and one heading straight towards the crossroads) and had some great success in stopping the bulk of the Japanese advance by the 24th turn but by then I had already lost 32 VPs worth of steps and would continue to bleed enough to produce a Japanese victory by turn 30. If my goal had been simply to keep the Japanese on the board I could feel justified in my actions but by engaging too heavily I gave the Japanese the opportunity to win by destroying my force. Due to the challenge to the defending player in this one I give it a "4". There is a lot of tension as to how to balance the defense, which is hard to inject into a scenario. This one will bear replaying. Also there are some hidden Allied forces which can lend themselves to a face to face play despite the scenario length (40 turns). A good time is had by all. |
| 0 Comments |
| Faked 'Em Out | ||||||||||||
|---|---|---|---|---|---|---|---|---|---|---|---|---|
This scenario pits a battalion of SNLF paras against a mixed group of Australians and Duch East Indies troops in a 40-turn race to see how many Japanese troops can exit the north or west edges of the board from the roads. The starting Australian force of 2 companies and an HMG platoon have to slow down the advancing Japanese long enough for a mixed Australian and Dutch force to enter from the west and deploy. The Dutch have tankettes and armored cars supporting 8 platoons of infantry, 2 HMGs, and 2 81mm mortars, and the Australian reinforcements have 4 platoons of infantry and an HMG. The time limit seemed like more than enough, and the tough Japanese force moved northwest from the board edge on the road heading for the northern exit point, and skirted assault hexes as fights occurred, leaving the assault troops to catch up later, which worked pretty well. The allies got their reinforcments on turn 4, and the armored cars headed out at full speed to try to support the Australians holding the villages on the eastern branch of the road on the western board, and just managed to get there in time to watch the Australian defenders get just short of wiped out. The armored cars succeeded beyond hope for turn after turn, losing a step to each unit but keeping their morale and preventing a Japanese rush for an otherwise undefended exit point. The reinforcements arrived but the strength of the Japanese force pushed past turn after turn, risking casualties as they withdrew from assaults several times and brushing off morale checks, but they had to deal with an armored car step holding the very exit hex in the north. As Japanese assault stacks pushed past, other stacks started taking the first of the Japanese casualties as allied troops bottled them in along the north edge, where they had to wait their turn to assault the armored cars and then exit the board. In the middle of the board, an Ensign, a Para Infantry and a PMG had bogged down for a while when assaulted first by the tankettes and then by the Dutch colonel leading 3 Infantry, but the tankettes died quickly and the Dutch colonel lost a morale check and became demoralized, leaving his units to fend for themselves. The Japanese demoralized or disrupted the rest of the stack but caused no step losses before deciding to exit the assault and make their way to the north. They succeeded, picking up some other Japanese platoons that had been seperated from the main body when left behind either in assaults or to avoid tying down the main force while they regrouped. By this time, the allies had the northern exit bottled up, but had left only the mortars and some Australian stragglers, with no leaders anywhere in sight, holding the road to the west. It became a race, and again the armored cars made an attempt to force assault action on the Japanese force, succeeding in holding them for a turn, but with stacks of Australians and Dutch troops nipping at their heals, they succeeded in getting the ensign and the last 3 steps of troops off the board by the end of turn 33. Even though the Japanese had already exited more than double the number of remaining troops from the board, the race to see if those last SNLF paras could make it or not was a nail-biter. In the end, the count came to 50 points for the Japanese, 20 of those exit and 30 casualties, to 6 casualty points for the allies. Major Japanese win in a big way. Great game. |
||||||||||||
| 0 Comments |
| Koepang Day 1 or Compass!, Compass!, We don't need no stinkin compass! |
|---|
|
Both side draw mediocre leaders. The Allies set up in the extreme lower right hand corner of Bd 35. Also another 2 platoons and an HMG on hex 1208 on bd 34. The Axis entered bd 35 south end and another two companies entered 0717 on bd 35. Despite the fact the Allied reinforcements entered at 11:45 they made good progress through the jungle & by 1:30 pm were within 4 hexes of road exit hex 1208. Amazingly no units got lost in the jungle during this move. They had also inflicted 15 step losses on the Allies and only had taken one in return. Unfortunately the other two companies got bogged down on the road. They were just now entering bd 34. This represented 6 platoons out of 15 that started the game. In addition one of the quality leaders the Axis had, a 10-1-0 Ensign, was KIA by a sniper leaving two platoons leaderless in the jungle. Over time the Axis were able to push the Allies back to the 1208 road exit on bd 34. The Allies were worn down by assaults and a failure to recover. The Axis were slowed by numerous disruptions & demoralizations but few step losses. The scenario ended at 1715 when the last Japanese platoon exited. The Japanese exited 23 steps and eliminated 39 Allied steps. The Axis lost 6 steps. All that adds up to a Axis major victory. Rating 2. I still can't believe that during the whole scenario only two Axis units were "lost" in the jungle. That is the thing I like about this game system. You just never know what will happen next. |
| 0 Comments |
| Another Unbalanced, Unplaytested, Unworthy Mess | ||||||||||||||
|---|---|---|---|---|---|---|---|---|---|---|---|---|---|---|
This was a super extended, 9-session playout with me playing the defending Australians & Dutch. I had the AFVs in this, way-to-long, one-sided conflict simulation, which did the Allies no good, but at least kept the armored vehicle counters out of the Treadasaur's lethal mits. He served his usual penance with a SNLF infantry-heavy force that unfortunately kicked the stew out of my guys, in spite of the poor sets of leaders that we both drew. I say that this one is unsuitable for anything but solitaire play, as I think that it is virtually impossible for the Allies to do more than be a doormat for the invading Japanese. It doesn't look to me like this scenario was play-tested at all. The historic outcome is pretty much guaranteed by the end of turn 16. We played with the FOW and excess initiative rules, plus these two house rules: 1) Road Movement for Mechanized & Foot Units All FOOT & MECHANIZED units may move on roads at the rate of 1/2 a Movement Point (MP) per road hex, just like MOTORIZED units, and 2) Standardized Movement for Mechanized Units All mechanized units may move through clear hexes at a movement cost of only 1 movement point (MP) per hex, instead of 1 1/2. Add one to this cost if moving up, across, or down slopes hexes. Anytime I don't have to keep track of how many 2/3 of a move per hex, is a good time. Who thought that this was a good idea in the first place? Oh, and did I mention that I hate very long (40 turns) jungle scenarios, where units wander around aimlessly, nearly at will? The Aussies and Dutch took a terrific pounding throughout this unpleasant game and were only able to eliminate a handful of the Emperor's steps. The Allies slowly gave unground, as position after position collapsed, and their morale fell through the floor. Some units took 16 turns to recover their morale, after only a few turns of combat. Nipponese close assaults were all successful, but the delays caused by the need to overcome the defenders again and again, did slow the Japanese wave down a lot. It took all 40 turns to exit all the required Sons of Nippon. Our final step losses were: 42 for the Allies and 5 for the Japanese. A victory for the Emperor's scrambling soldier-sailors! I lost count of the number of enemy platoons that exited. By the end, I was happy to see this poorly-designed scenario in the rear view mirror. Wish that I had not picked the stronger-looking Allied side in this bashing. Going 9 innings with this mix of units is not for the faint of heart. We agreed that, at best, this howling dog deserves a rating of 2, and the recommendation that it is really only worth playing as a solitaire game. |
||||||||||||||
| 1 Comment |