
|
Manado: Getting Their Feet Wet! Nihon Silk #1 |
||
|---|---|---|
| (Attacker) Japan | vs | Netherlands (Defender) |
| Formations Involved | ||
|---|---|---|
| Japan |  |
1st Yokosuka SNLF Parachute Unit |
| Netherlands |  |
Manado Troop Command |

| Total | |
|---|---|
| Side 1 | 7 |
| Draw | 2 |
| Side 2 | 2 |


| Overall Rating, 12 votes |
|---|
|
3.5
|
| Scenario Rank: 399 of 913 |
| Parent Game | Nihon Silk |
|---|---|
| Historicity | Historical |
| Date | 1942-01-11 |
| Start Time | 10:00 |
| Turn Count | 12 |
| Visibility | Day |
| Counters | 34 |
| Net Morale | 2 |
| Net Initiative | 1 |
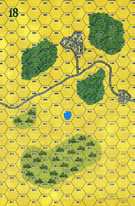
| Maps | 1: 18 |
| Layout Dimensions | 43 x 28 cm 17 x 11 in |
| Play Bounty | 139 |
| AAR Bounty | 135 |
| Total Plays | 11 |
| Total AARs | 7 |
| Battle Types |
|---|
| Airfield Control |
| Inflict Enemy Casualties |
| Paradrops |
| Conditions |
|---|
| Entrenchments |
| Hidden Units |
| Terrain Mods |
| Scenario Requirements & Playability | |
|---|---|
| Nihon Silk | Base Game |
| Road to Berlin | Maps |
| Introduction |
|---|
|
The Yokosuka 1st SNLF planned to parachute onto the Langoan airfield, securing it until relieved by the much larger seaborne Sasebo SNLF forces who planned amphibious landings on both sides of the Minahassa Peninsula in the northern Celebes. To ensure the linkup a second parachute drop on January 12th could reinforce the operation if needed. The Dutch, however, would not give up without a fight. |
| Conclusion |
|---|
|
The next day the 2nd Drop Group jumped from 18 transports, but by then the 1st Group had already secured the airfield and were sweeping into the now abandoned town of Kakas losing only 32 dead and as many wounded. The Dutch lost 140 troops killed and 48 captured, as well as three of their armored cars. They were in full retreat from the advancing seaborne force of over 2500 troops supported by light tanks. The mostly reservist Dutch home guardsmen and native militia of 1500 started to dissolve. |

|
|
|---|
| AFV Rules Pertaining to this Scenario's Order of Battle |
|---|
|
| Imperial Japanese Navy |
|---|
|


| East Indies Army |
|---|
|


| 1 Errata Item | |
|---|---|

|
The HMG units in counter mix are printed with the standard INF symbol, rather than the heavy infantry symbol used for HMG and WPN units. The misprint does not effect the units' function. (plloyd1010
on 2013 Mar 11)
|
| Nihon Silk, scenario #1: Manado: Getting Their Feet Wet | ||||||||||||
|---|---|---|---|---|---|---|---|---|---|---|---|---|
Posting #1 *In this scenario, the Japanese only have 12 turns to try to capture the Dutch airfield Langoan and eliminate as many steps as possible, in fact both sides have the same objectives, so this should be interesting and fast. Also, this scenario has Naval Japanese Paratroopers. *The Japanese faired pretty well with drop zone landing, yes there are a few disrupt or demoralized units and there is certainly some scattered units but compared to other drops I have had, this one isn’t too bad. Also 3 units and one leader are delayed a few turns, and two units and one leader landed off board so they will arrive later as well. The Dutch have a nasty entrenchment adjacent to the airfield with most of their forces dug-in around and a few Infantry units and an Armored Car unit (Overvalwagen) in reserve in the near by town. *The Japanese don’t have too much time to play around with, so they must get organized fast and when should I commit the Dutch from the town or should they just go attack the scatter Japanese units to keep them from getting to the airfield? This should be fun. Posting #2 *In this scenario, the Dutch proved a hard nut to crack but they didn’t crack. The Entrenchment & dug-in units surrounding the airfield with the backup units in the town north of the airfield hitting the Japanese at just the right time, helped blunt the Japanese. The Japanese will need help from the seaborne 1st SNLF to win the airfield this time. The Dutch win a Minor victory with a 3 point lead, mostly because they controlled the airfield, as believe it or not the steps eliminated were even at three each. *The Japanese just could never pull it all together in the 12 turn time period and the entrenchment just kept pouring the fire out on the exposed Japanese Paratroopers. The Dutch almost paid the price earlier, losing a step of AC’s to the Japanese 37mm AT gun but pulled that unit back to the airfield. An Interesting scenario for both sides to try. |
||||||||||||
| 0 Comments |
| Pile Up on the DZ | ||||||||||||
|---|---|---|---|---|---|---|---|---|---|---|---|---|
First shot at this new (for me) module. The Dutch are holding an airfield on board 18 (town hex in the east side of the board) against about a battalion strength SNLF Airborne drop, supported by a 37mm AT gun that arrived in a floatplane using the lake in the middle of the board, along with a leader. The Dutch have a single entrenchment that has to be set up adjacent to the airfield. Using the impartial leader selection here on the site, the Japanese got great leaders and the Dutch got mostly poor, with one pretty good LT. The good Dutch LT I set up in the entrenchment with an INF and an HMG, the armored car started on the airfield hex, and I spread out the rest along the south edge of the central jungle hexes, with one last INF and an LT in the central jungle hex to move and reinforce any trouble spots. The Japanese AT gun started trading ineffective fire with the Dutch in the southwest hex of the jungle after the Dutch revealed themselves there first. The Japanese airborne drop arrived on turn 3, and with a lot of 1s rolled, there ended up being the Japanese commander and an Ensign along with 4 platoons stacked in the Assembly Point hex, so I displaced one platoon and the Ensign into another hex per stacking rules. The rest of the force scattered all over the place, but in the end, more than half ended up in the drop zone or within a hex or two of it. One platoon went off the board but succeeded in coming in on turn 6, and a scattered leader was within 3 hexes of that edge to lead the unit towards the action. The Japanese succeeded in assaulting the southwestern and south central jungle hexes quickly, while first blood drawn was against the armored car when it ventured around too close to the AT gun. The remaining AC step failed its morale check, and spent the next few turns running away. The Japanese managed a lot of kill shots, with a handful of single INF steps fleeing while Dutch leaders died in place. In the 11th turn, the Japanese commander leading 2 HMG and 1 INF succeeded in taking the airfield in assault while another Japanese stack with a good LT and 2 INF assaulted the entrenched Dutch in the adjacent hex. On the final turn, the Dutch armored car made an attempt to get back to the airfield, hoping at least to prevent a Japanese capture of it by contesting ownership in that last turn, but the Japanese destroyed the AC unit in the assault, and the Dutch in the entrenchment were stuck trading ineffective blows with another stack of Japanese troops and were unable to try for an attack to retake and hold the airfield. In the end, Japanese win, 16 points to 6 for a Major Victory. Great game. Gave this one high marks because there was that slim chance of the Dutch at least contesting the field to drive down the Japanese victory points right to the end. |
||||||||||||
| 0 Comments |
| Manado Getting their feet wet. |
|---|
|
The Axis assembly point was designated at 0709 and came in 15 minutes late. During the drop four platoons scattered on the board but out of the DZ and 2 more scattered off board. The rest of the Axis units landed in the DZ and took no step losses. The Dutch setup with 1 HMG, 1 Armored Car, & 1 Inf + a 9-0-1 Lt. in hex 1209. In addition 1 HMG, 1 Inf + a 8-0-1 Lt. dug in on the airfield. Then there was the Inf and an 8-0-0 Major in hex 1207. Then to the west in the jungle a 9-1-1 Lt. and 2 Inf. in jungle hex 1007. The Axis hoped to avoid a fight in the jungle which could get bloody. But the position of their DZ and the open ground around the the DZ conspired to force an attack through the Jungle. In addition a platoon landed in the jungle next to the Dutch positions. The Dutch assaulted on their turn and eliminated a step from the Axis platoon that had just landed there. Several Axis platoons including the Commander came to their rescue and the fight for the jungle was on! By 11:15 the Axis had 7 platoons fighting in the jungle copse. They had lost an additional step but had caused 2 Allied Inf steps to be eliminated and in addition a step from the Armored car platoon. A special event sniper had killed the Dutch 9-1-1 Lt. Now the Allies were stuck leaderless in the jungle. Meanwhile other Axis units were closing on the airfield. The Allies caused several disruptions and demoralizations to Axis units coming next to the airfield entrenchments. At the same time the Axis commander was still stuck in the jungle fighting it out with the leaderless Allied units. Finally at 1230 the Axis assault went in vs the airfield. The Allies lost 3 more steps on the airfield entrenchments with the Axis suffering only disruptions. At 1pm the Allies lost 2 more steps at the airfield. But at the last gasp the Allies counter assaulted into the airfield loosing another step but contesting possession of the airfield. But the Axis had scored 11 points to the Allied 2 for a major victory. Very good scenario. As usual with Para drops the condition and location of the dropped troops contribute a lot to the flow of the scenario. This was a good drop for the Axis. They were able to get going quickly because they were mostly concentrated on the DZ. Dutch leadership was mediocre at best. This could turn out vastly different with a relocated DZ and or a scattered drop and an improvement in Dutch leadership. |
| 0 Comments |
| I Never Gave the Dutch a Chance |
|---|
|
Played solo in one 120 minute session. I received my Nihon Silk yesterday and wanted to try at least one scenario this weekend. I chose scenario 1 because it's small and I was curious to try the airdrop rules. I did not spend much time analyzing the situation before setting the Dutch defenses and that was a critical mistake. I set up a few Dutch positions in row 11 and did not move them into the jungle at the first opportunity. The net result was the Japanese were able to get adjacent to the dug in Dutch under cover of the jungle. The Japanese only lost 1 step on the way and were all in good order except for 1 PARA unit when they started assaulting the Dutch positions. Four turns later and it was all over; the Dutch 7/6 morale combined with bad leadership turned a precarious position into a disaster. Japanese major victory. I rated the scenario a "3"; it's a solid small scenario. If played against an opponent, I recommend the better player takes the Dutch because I believe they're more difficult to play than the Japanese. I really liked the airdrop rules and I am looking forward to try them again in a larger scenario. |
| 0 Comments |
| "It wasn't exactly boxing, sir. It wuz two guys just slugging it out..." |
|---|
|
The Japanese are tasked with landing near an airfield, taking it from the Dutch and destroying enough Dutch steps to make the trip worthwhile. The Dutch meanwhile have pretty much the same idea, kill Japanese and hold the airfield. The Japanese landing comes off reasonably well and they take a couple turns to get organized. There is certainly the urge to move forward prematurely but I was able to keep within my self. I was helped by the fact that I lost no steps in the landing so was not starting from a deficit. I noticed that Jap actually considered a sortie by the Dutch to kill some scattered PARA. Luckily my Dutch were able to do that in a simpler matter. One unit landed virtually on top of the Dutch defenses and was summarily dispatched by DF. I have to admit that I didn't consider anything other than a hedgehog defense around the airfield for the Dutch. They simply don't have the morale or the aggreagate strength to go chasing around after the Japanese. the Japanese decided to approach the airfield from the south where they ran into the entrenchment and a host of Dutch. The first assault on the perimeter was on turn 6 and the assaults piled up bodies from both sides. While the Japanese were able to reach the airfield it remained under assault at the end of the game (They were only able to reach it on turn 11 of 12 so complete control was probably out of reach given their approach). Total losses were 13 Dutch, plus one armored car verus 10 Japanese for a Japanese minor victory. Both sides rolled well in assaults and the Dutch were particularly effective with opportunity fire. A perfectly reasonable first scenario. A good one to learn the airdrop mechanism and a straightforward slugging match afterwards. I give it a solid "3". the novelty of having the Dutch, however, is something that merits play in any event. |
| 0 Comments |
| Getting Their Feet Wet in Blood | ||||||||||||
|---|---|---|---|---|---|---|---|---|---|---|---|---|
This AAR was written on my CSW Blog and contained pictures. You can see them starting here: http://talk.consimworld.com/WebX?14@@.1dd17da2/14811 SITREP Turn 1 1000 hours: The Yokosuka 1st SNLF Parachute Unit makes its drop outside of Manado. Many units scatter wildly. The Dutch East Indies Troop Command Manado reacts by firing at the Japanese units that drop nearby. The reaction force of one infantry platoon and an armored car platoon move out of the town and try to trap the SNLF platoon that landed near the airfield. Minor adjustments are made in the airfield defense. SITREP Turn 2 1015 Hours: The Japanese Paratroops assemble from the drop and begin to move on the airfield. It looks like they will move into the Jungle just to the west of the airfield and then approach under cover. The lead element comes under long range MG fire from the Dutch with no effect. Just to the north of the airfield, the SNLF platoon that scattered there is caught in a cross fire from the airfield and the reaction force. A firefight ensues to no effect. SITREP Turn 3 1030 Hours: The Japanese continue to move forward and bring their forces together to form up for the assault. Firefights continue north of the airfield and to the south west to no effect. SITREP Turn 4 1045 Hours: The Japanese paratroopers move forward and consolidate their lines. The right flank makes contact with the Dutch defenses and undergoes ineffective fire from the defenders. The lone SNLF platoon north of the airfield disengages form the Dutch reaction force and engages the airfield defense. The Dutch adjust slightly. SITREP Turn 5 1100 Hours: Most of the Japanese force makes contact with the Dutch troops. Firefights ensue with little to no casualties. SITREP Turn 6 1115 Hours: The firefight continues along the line with the Dutch forces resisting well in their dug in positions. The Japanese start taking casualties with one platoon falling back and another going to ground. As more Japanese troops move up, one platoon and the Company Commander get lost in the jungle. SITREP Turn 7 1130 Hours: The Japanese concentrate fire on the center of the Dutch line breaking one platoon that falls back to the airfield. A platoon on the flank goes to ground. But the Dutch are able to send a reserve platoon into the line to fill the gap. This is going agonizingly slow for the Japanese. SITREP Turn 8 1145 Hours: The Japanese reduce and assault the center of the defense destroying one Dutch platoon but the other defending platoon holds fast. The Dutch again reinforce the position but now they have to thin the lines to do so. The Dutch reaction force attempt to pull back but takes casualties doing so. The commander of that force is KIA. SITREP Turn 9 1200 hours: The Japanese paratroopers press the attack. The assault on the woes side of the airfield has some success with the Dutch losing a step from the reinforcing platoon; but the dug in platoon holds steadfast. A furious firefight takes place north of the airfield with the Dutch losing badly. Although they inflicted the first step loss on the Japanese infantry, they suffer three in return and the remaining step breaks. The Dutch position is starting to show cracks but there are only three turns left. SITREP Turn 10 1215 hours: The Dutch outer defense of the airfield collapses under heavy fire and assaults. The Dutch lose two more steps and the remnants of the north and north west positions flee past the airfield to the south. The Japanese now have almost two companies adjacent to the airfield ready to assault. The airfield defenders open fire and inflict a step loss on the Japanese paratroopers. SITREP Turn 11 1230 hours: The Japanese lay down heavy suppressing fire on the airfield breaking the defenders. A Paratrooper company assaults the airfield and sends one defending platoon fleeing. But the Dutch Major rallies one platoon and the armored cars reinforce. The airfield issue is not yet decided. SITREP Turn 12 1245 hours, final turn: The Japanese press the assault, eliminate a step of Dutch infantry and the armored car platoon. The remainder of the Dutch forces on the airfield and become demoralized. Before they can fell though, the rest of the Japanese force sends the Dutch HMG platoon running to the south and the paratroopers surround the airfield. Most of the Dutch on the airfield surrender. Those who try to flee are cut down. Final score: Japanese: 17, Dutch 2. A Major Victory for the Japanese. This was a quick play scenario that went pretty much like the historical account. The Dutch put up resistance for a period of time but once they start to break, they pretty much collapse. It was fun to finally get into the Pacific with Panzer Grenadier. |
||||||||||||
| 0 Comments |
| Death Descending on the Dutch | ||||||||||||||
|---|---|---|---|---|---|---|---|---|---|---|---|---|---|---|
Tried this scenario out over 3-sessions as the defending Dutch. Bad choice of sides, and an even worse selection of combat leaders! The Treadasaurus led the attacking SNLF paratroopers, and as he was without his precious tanks, I thought that this would be an easy scenario for the Dutch - wrong again. Both sides drew bad leaders, particularly on my side. We played without the awful FOW rule, but did use the excess initiative optional rule. Others have reported this battle in detail, so here are a few highlights in what ended as a triumph for the Japanese invaders. The Emperor's airborne dropped in a few places and consolidated quickly (5 turns) using the terrain effectively to approach the airfield. Their assault stacks proved to be unbeatable in close assaults and only 3 steps of Japanese paratroopers were eliminated by game end. There were many adjacent-hex firefights, prior to the close assaults that the Dutch lost every time in this unbalanced scenario that I doubt was even slightly play-tested. The Japanese did suffer from disorientations in the jungle as they closed in, but their lengthy, tidal wave-like assault was, a little slow developing, but unstoppable. The final VP score was : Japanese: 18, Dutch 3. A Major Japanese victory, just like in real life 83 years ago. I give this unbalanced (but probably accurate historically) scenario a generous rating of 3, and suggest that it is best suited for solitaire play only. Shared play is almost guaranteed to result in a Japanese walkover. |
||||||||||||||
| 1 Comment |
Mix this with my Lost Battalion of the Pacific. It adds a couple more scenarios to the campaign. My mother-in-law was there.