
|
Nofilia Village New Zealand Division #1 |
||
|---|---|---|
| (Defender) Germany | vs |
Britain
(Attacker)
New Zealand (Attacker) |
| Formations Involved | ||
|---|---|---|
| Britain |  |
4th Light Armoured Brigade |
| Germany |  |
15th Panzer Division |
| New Zealand |  |
2nd Divisional Cavalry |
| New Zealand |  |
2nd New Zealand Division |

| Total | |
|---|---|
| Side 1 | 1 |
| Draw | 0 |
| Side 2 | 1 |


| Overall Rating, 2 votes |
|---|
|
4
|
| Scenario Rank: --- of 913 |
| Parent Game | New Zealand Division |
|---|---|
| Historicity | Historical |
| Date | 1942-12-18 |
| Start Time | 07:00 |
| Turn Count | 18 |
| Visibility | Day |
| Counters | 50 |
| Net Morale | 0 |
| Net Initiative | 1 |
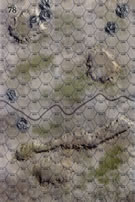
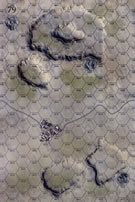
| Maps | 2: 78, 79 |
| Layout Dimensions | 56 x 43 cm 22 x 17 in |
| Play Bounty | 175 |
| AAR Bounty | 165 |
| Total Plays | 2 |
| Total AARs | 2 |
| Battle Types |
|---|
| Inflict Enemy Casualties |
| Road Control |
| Urban Assault |
| Scenario Requirements & Playability | |
|---|---|
| An Army at Dawn | Maps + Counters |
| Liberation 1944 | Counters |
| New Zealand Division | Base Game |
| Introduction |
|---|
|
The New Zealand Divisional Cavalry Regiment had been intended to give the division a capacity for scouting and screening. Instead, it often supplemented British armored units, as it did during the attack on Nofilia. The New Zealand tanks and Bren carriers stormed into the village alongside the handful of British tanks that the 4th Light Armoured Brigade still had in service. |
| Conclusion |
|---|
|
The British and New Zealand tanks overran the village and captured about 250 German prisoners, but then engaged in a firefight with German tanks. That blunted the advance, and under that covering fire the Germans withdrew and resumed their retreat along the coastal highway. |

|
|
|---|
| AFV Rules Pertaining to this Scenario's Order of Battle |
|---|
|
| Army |
|---|
|

| Heer |
|---|
|


| New Zealand Army |
|---|
|


| 3 Errata Items | |
|---|---|

|
The reduced direct fire value of the Heer HMG became 5-5 starting with Fall of France. (plloyd1010
on 2015 Jul 31)
|

|
All SS PzIVH tanks should have a movement of 8. (Shad
on 2010 Dec 15)
|

|
The morale and combat modifiers of German Sergeant #1614 should be "0", not "8". (Shad
on 2010 Dec 15)
|
| The fleetest off foot shall surely win the race! | ||||||||||||
|---|---|---|---|---|---|---|---|---|---|---|---|---|
Of late, I have been playing scenarios featuring minor allies of both the Axis and UN/Allied Forces. So I decided to play the scenarios in "New Zealand Division" when the new book arrived. Scenario 1 sees the Germans holding the town and needing to stay on the East-West coastal (or so we are told...) highway. The two sides are pretty well matched, with the exception being mobility. Where the Germans have 2 AT guns, the Kiwis have 3 Stuart VI's, oh, and did I mention dragging is the only way to move the anti-tank guns for the Germans. Long story short, Kiwis read the defense at the line, split the Stuart wide outs, well... wide out, and proceeded to methodically destroy all German Armor, and both AT guns before taking the town, only losing a Suart platoon, and a platoon of infantry and their Brens. However, a major victory just was not possible as there was not time to clear the road. |
||||||||||||
| 0 Comments |
| You GOTTA be kiddin' me! | ||||||||||||
|---|---|---|---|---|---|---|---|---|---|---|---|---|
The Germans set up on the ridge West of town to include the town itself, the mortars behind the hill North of town, and it looked pretty solid. The NZ forces attacked the ridge itself with the idea that they would mop up toward the village last. The German effort wasn't helped by the fact that they got their armor shot up early in the game. With six turns to go and only the town to take with ample firepower to do so, the NZ forces closed in on the town. It was at that time that my lead assault group got the bejesus shot out of it on the hex preparatory to the assault. (By virtue ((SIC)) of throwing FIVE ((count em!)) elevens in a row!) (I couldn't do that on a bet!) THAT little happenstance threw my entire stack into a regrouping run and cost the NZ (probably) forces the victory. It came down to the last turn and it was to do or die situation.... and they didn't. German win. (..and they wonder why my hair is grey.) |
||||||||||||
| 0 Comments |