Panzer Grenadier Battles on April 27th:
Arctic Front Deluxe #40 - Children's Crusade Broken Axis #14 - Târgu Frumos: The Second Battle Scenario 3: Sledge Hammer of the Proletariat
Army Group South Ukraine #6 - Consternation Road to Berlin #73 - She-Wolves of the SS
Errors? Omissions? Report them!
Yigo and the Approach to Mt. Santa Rosa
Marianas 1944 #26
(Defender) Japan vs United States (Attacker)
Formations Involved
Japan 10th Independent Mixed Regiment
Japan 24th Tank Company
Japan 29th "Thunder" Division
Japan 9th Tank Regiment
United States 307th Infantry Regiment
United States 706th Tank Battalion
Display
Balance:


Overall balance chart for MARI026
Total
Side 1 0
Draw 0
Side 2 3
Overall Rating, 3 votes
5
4
3
2
1
4.33
Scenario Rank: --- of 913
Parent Game Marianas 1944
Historicity Historical
Date 1944-08-07
Start Time 07:30
Turn Count 24
Visibility Day
Counters 80
Net Morale 0
Net Initiative 2
Maps 3: 100, 82, 83
Layout Dimensions 129 x 28 cm
51 x 11 in
Play Bounty 165
AAR Bounty 165
Total Plays 3
Total AARs 2
Battle Types
Inflict Enemy Casualties
Rural Assault
Cave Control
Entrenchment Control
Conditions
Caves
Entrenchments
Minefields
Randomly-drawn Aircraft
Scenario Requirements & Playability
Marianas 1944 Base Game
Saipan 1944 Maps + Counters
Introduction

In the early morning hours of August 6th two Japanese medium tanks drove through the 305th Infantry Regiment's lines. The tanks caused considerable damage that night, both entering the lines and coming back the other way a few hours later. Before falling victim to antitank fire the two rogues killed 31 men and wounded another 63. The 305th paid a high price for not being dug in and prepared that night. Perhaps they would learn their lesson prior to the major offensive planned against the village of Yigo on the 7th of August. This attack would prepare the way for the 77th Division's follow-on thrust against Mt. Santa Rosa. The Japanese had fortified Yigo village and surrounding area into a formidable defense.

Conclusion

The Army fought most of the day around the Yigo area. Initially the tanks rapidly outdistanced the infantry until they ran into strong resistance in the form of anti-tank guns and machine guns that knocked out two light tanks and set a medium tank afire. But together, the 307th Infantry and their assigned armor, along with timely air and artillery support, cleared the area and controlled the high ground so the 77th Division could attack Mt. Santa Rosa on time.

The other notable event that day was the death of Colonel Douglas McNair, killed by a sniper. His father, Lt General Leslie McNair, had been killed 12 days earlier by inaccurate U.S. bombing at St. Lo, France. Although the war seemed to be going in favor of the Americans by this point, many homes on both sides continued to lose their loved ones.

Additional Notes

American morale and initiative are transposed.


Display Relevant AFV Rules

AFV Rules Pertaining to this Scenario's Order of Battle
  • Vulnerable to results on the Assault Combat Chart (7.25, 7.63, ACC), and may be attacked by Anti-Tank fire (11.2, DFT). Anti-Tank fire only affects the individual unit fired upon (7.62, 11.0).
  • AFV's are activated by tank leaders (3.2, 3.3, 5.42, 6.8). They may also be activated as part of an initial activating stack, but if activated in this way would need a tank leader in order to carry out combat movement.
  • AFV's do not block Direct Fire (10.1).
  • Full-strength AFV's with "armor efficiency" may make two anti-tank (AT) fire attacks per turn (either in their action segment or during opportunity fire) if they have AT fire values of 0 or more (11.2).
  • Each unit with an AT fire value of 2 or more may fire at targets at a distance of between 100% and 150% of its printed AT range. It does so at half its AT fire value. (11.3)
  • Efficient and non-efficient AFV's may conduct two opportunity fires per turn if using direct fire (7.44, 7.64). Units with both Direct and AT Fire values may use either type of fire in the same turn as their opportunity fire, but not both (7.22, 13.0). Units which can take opportunity fire twice per turn do not have to target the same unit both times (13.0).
  • Demoralized AFV's are not required to flee from units that do not have AT fire values (14.3).
  • Place a Wreck marker when an AFV is eliminated in a bridge or town hex (16.3).
  • AFV's do not benefit from Entrenchments (16.42).
  • AFV's may Dig In (16.2).
  • Closed-top AFV's: Immune to M, M1 and M2 results on Direct and Bombardment Fire Tables. Do not take step losses from Direct or Bombardment Fire. If X or #X result on Fire Table, make M morale check instead (7.25, 7.41, 7.61, BT, DFT).
  • Closed-top AFV's: Provide the +1 modifier on the Assault Table when combined with infantry. (Modifier only applies to Germans in all scenarios; Soviet Guards in scenarios taking place after 1942; Polish, US and Commonwealth in scenarios taking place after 1943.) (ACC)
  • Tank: all are closed-top and provide the +1 Assault bonus, when applicable

Display Order of Battle

Japan Order of Battle
Imperial Japanese Army
  • Mechanized
  • Misc
United States Order of Battle
Army
  • Mechanized

Display AARs (2)

Lightning Strikes
Author thomaso827
Method Solo
Victor United States
Play Date 2015-05-22
Language English
Scenario MARI026

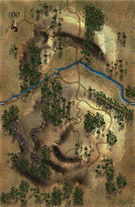
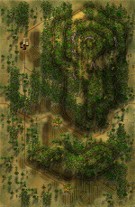
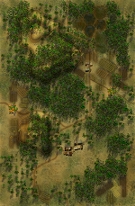
The Japanese are spread pretty thin on 2 boards as the US Army tries to move north through them from a jump-off line on a 3rd board. The US Army had a fairly easy time of it at first, and even managed to get air cover and good arty support for the first half of the game. Japanese were set up evenly split on infantry between the central and northern boards, but the 3 single steps were added to make killer stacks in the jungled hills of the northern board. I set up the central board troops with 1 stack at the middle of the board in jungle to slow down the advance, and placed an AT gun and infantry in the central board village hoping to get a shot at approaching tanks before losing it. With more stacks than leaders, I placed adjacent stacks of infantry next to weapons and HMG stacks, keeping pure infantry stacks with leaders in order to do the most damage should they get the chance to assault and letting the infantry officer influence the adjacent weapons/HMG stacks as necessary until being occupied themselves. The 2 single step Japanese tank units I stacked in light jungle where they were masked by heavy jungle but had lanes of fire that covered the central road and bridge. The US were set up in elements of 3 stacks centered on Captains with the HMG and Engineer or Flame unit and 2 LTs each with 2 Infantry platoons, something of a heavy company force, with reserves just behind lead by the Colonel, LTC, Major, another Captain and LT, and followed up by the SGT bringing up all 3 mortar units. The US armor was stacked in the middle and moved out to mid-board, where they stopped in light jungle, still on the road, to await the infantry before getting closer to a 3-hex jungle area on the hilltop, a great looking place for an ambush. Infantry soon caught up and flanked the jungle to fight an infantry stack in the south-eastern hex and an AA gun and HMG combination in the southwestern hex, where the AA gun had hoped to get the tanks as they went by. The Japanese troops melted away to direct fire and off table arty, while a spectacular show of airpower arrived in the form of a P-38 element that headed for the village hex on that central board. A roll of 2 with a result of 2X eliminated an AT gun and an Infantry step and demoralized the Japanese SGT, and a followup attack by arty finished off the defenders the next turn. The US troops continued to move north but things stagnated quickly when they found the Japanese stack in the town and another in jungle to the east. The Japanese in the town kept rolling X results that took step losses and demoralized leaders. In the east, the Japanese Major had decided to initiate his own assault instead of waiting for the US troops, and his luck wasn't quite so good. In the town, the US Captain died, along with the Flame unit he had entered with, and one after another of the infantry platoons that had moved adjacent was called in to reinforce the assault, while the Japanese lost nothing. Again, the Japanese Major on the other side of the board lost step after step until he lost his own life in the leader loss result along with 3 of 4 steps of troops he had started with. The US luck in town finally changed just as I remembered the plus because of having a tank unit in combined arms, and the roll finally went the right way for the US, eliminating 2 steps of Japanese troops, demoralizing one of the survivors and the LT they were stacked with. The two events finally allowed the US line to move forward again and the COL and his entourage moved between the two assaults and onto the northern board. In the midst of all this, the US Shermans had exchanged shots with the Japanese tanks, and Managed to eliminate both single step tank units to no losses to their own. The elimination of the last pockets of resistance on the middle board had taken too long, and the US troops that had succeeded in regrouping and moving forward would have had a tough time indeed trying to take out the Japanese killer stacks of 5 steps on each of the jungle hilltops, especially with one less flame unit available to do the job. At the end of turn 22, and with points at 38 for the US to 25 for the Japanese, and with US troops on the northern board, but the cave still in Japanese hands, I called the game. With just 2 turns available, there seemed no way to storm those last 2 hills without turning the points against the US. Great game.

0 Comments
You must be a registered member and logged-in to post a comment.
Marianas 1944, scenario #26: Yigo and the Approach to Mt. Santa Rosa
Author JayTownsend
Method Solo
Victor United States
Play Date 2018-08-23
Language English
Scenario MARI026

Marianas 1944, scenario #26: Yigo and the Approach to Mt. Santa Rosa

The U.S. Army gets back into the Battle on Guam. Three maps to conquer as much victory objectives as possible. I setup up the Japanese in five areas hoping to stall the Americans but they have such a large force and air & artillery support too boot! I maybe should have setup up all the Japanese back on map 82 or bunched them into larger groups, so they couldn’t be taken out peace-meal but I didn’t.

The American lost only 5 steps and one leader and achieved all the victory objectives but the far off cave, which they failed to take on the last turn. Of course the American steps count double but still the Americans won 48 points to 13 points for a Major Victory but it was fun task of trying to maneuver and fight over three lengthwise maps.

0 Comments
You must be a registered member and logged-in to post a comment.
Errors? Omissions? Report them!
Page generated in 0.474 seconds.