
|
Patrol North: Barrigada Marianas 1944 #22 |
||
|---|---|---|
| (Defender) Japan | vs | United States (Attacker) |
| Formations Involved | ||
|---|---|---|
| Japan |  |
10th Independent Mixed Regiment |
| United States |  |
706th Tank Battalion |

| Total | |
|---|---|
| Side 1 | 3 |
| Draw | 0 |
| Side 2 | 0 |


| Overall Rating, 3 votes |
|---|
|
3.67
|
| Scenario Rank: --- of 913 |
| Parent Game | Marianas 1944 |
|---|---|
| Historicity | Historical |
| Date | 1944-08-01 |
| Start Time | 07:00 |
| Turn Count | 14 |
| Visibility | Day |
| Counters | 14 |
| Net Morale | 0 |
| Net Initiative | 2 |
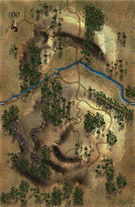
| Maps | 1: 100 |
| Layout Dimensions | 43 x 28 cm 17 x 11 in |
| Play Bounty | 134 |
| AAR Bounty | 165 |
| Total Plays | 3 |
| Total AARs | 2 |
| Battle Types |
|---|
| Exit the Battle Area |
| Inflict Enemy Casualties |
| Patrol |
| Conditions |
|---|
| Hidden Units |
| Scenario Requirements & Playability | |
|---|---|
| Marianas 1944 | Base Game |
| Saipan 1944 | Counters |
| Introduction |
|---|
|
On July 31st the indigenous Chamorros reported to the Marines that the Japanese had abandoned the south half of the island and moved north. This confirmed reports from U.S. patrols. To wrest the north from the Japanese, the Army’s 77th Division planned to drive north on the east side near Mt. Santa Rosa and Mt. Barrigada where they expected the enemy to be digging in their defensive lines. The 3rd Marine Division planned to advance parallel to the 77th Division's left flank until meeting the 1st Provisional Marine Brigade in the far north. There they would combine to hit Mt. Machanao where more Japanese strong points clung. The 77th Division sent out armor patrols to scout the planned Mt. Barrigada offensive. |
| Conclusion |
|---|
|
The light tanks of the 706th scouted ahead finding an abandoned casemate before running into a small convoy of Japanese trucks stalled on the road. The Japanese soldiers open fire, and in response the lead M5 took out about 35 defenders before the tanks turned their guns on the trucks. Further up the road, when one of the tanks became hung up on a stump, the jungle came alive with 20mm cannon and heavy machinegun fire. The tank crews quickly recovered from their surprise and drove the attackers back into the protective heavy foliage. The 14 light tanks made it back shortly before the general advance to capture Barrigada got under way. The assault upon the mountain met little resistance. In additional good news, the 77th Division liberated a large concentration camp filled with Chamorros. The move north continued with less-than-expected resistance, though the Marine casualties continued to slowly climb. |
| Additional Notes |
|---|
|
American morale and initiative are transposed. |

|
|
|---|
| AFV Rules Pertaining to this Scenario's Order of Battle |
|---|
|
| Imperial Japanese Army |
|---|
|


| Army |
|---|
|

| 1 Errata Item | |
|---|---|
| Scen 22 |
This scenario calls for 2 Army M-5 tank platoons. Unless I misplaced one, my Saipan game only has 1 Army and 1 Marine M-5 unit, so I recommend using the Marine as the second one. (thomaso827
on 2014 Aug 11)
|
| Chasing Tanks | ||||||||||||
|---|---|---|---|---|---|---|---|---|---|---|---|---|
This small scenario seemed to be the perfect thing to run before starting dinner. It certainly went fast, but not exactly like I had expected. Playing solo, I set up two Japanese infantry stacks that somewhat had to be passed nearby, giving them a chance for assault against the US M-5s. The Japanese trucks were set up along the road near the north side of the table, which should tempt the US armor to engage and risk assault. But I really didn't think the tanks would be stopped. The assault encounter at mid board went pretty much as I thought, Marines passing their morale checks and rolling on. They stopped briefly to engage and destroy the casemate, which I had placed near the central crossroads. While stopped and during the next few turns, they took ineffective fire from the 20mm AA gun but ignored that. It was as they managed to kill the first truck unit that the Japanese got a good assault, with a step loss to the tanks. Even though this made for an immediate Japanese win, I still had about half of the game time left to go, so played on. The tanks became demoralized, then passed to disrupted, and the Japanese stack, lead by an 11-1-1 LT, chased them down each turn. In the end, the US managed to flee off the board, having lost a second step to the pursuing Japanese troops after 3 turns of the Japanese rolling a 7 on the 13 column, the only result doing nothing. Fun little scenario, and yes, it begs for hidden setup for the Japanese force in a 2-player game. |
||||||||||||
| 0 Comments |
| Marianas 1944: scenario #22, Patrol North: Barrigada | ||||||||||||
|---|---|---|---|---|---|---|---|---|---|---|---|---|
Marianas 1944: scenario #22, Patrol North: Barrigada I was needing a scenario returning to the jungle terrain and only had time for a quick one and an unconventional one just for fun, almost a chest like strategy. This was it! The Americans need two exit all four steps of M5 Stuart tanks off the north edge of the map but first must eliminate one Japanese truck step to win, in 14 turns, anything else is a Japanese victory. The Japanese also have a small force of mixed unit besides the three truck units, which include: 2 x INF, 1 x SER, 1 x HMG Reduced, 1 x 20mm AA Gun, 1 x Casemate and 3 Leaders. In my game I setup the Japanese in the north section of the map in a kind of blocking force, using the terrain to their advantage. The Americans moved both M5 tank units to the nearest Japanese truck unit, destroying it and receiving some harmless 20mm AA Gun fire. Next they split up trying to exit the north edge of the map and trying to spreads the Japanese lines out. The problem was, the Japanese trapped one M5 unit and ignored the other. Letting it slip off the north edge of map but the other M5 was trapped in an endless assault and would slip out only to be assault by another Japanese unit until the scenario ended, giving the Japanese a victory. If I had it to do over with, I would have kept the two American M5 together giving them more fire power to maybe blast their way out of the assault. |
||||||||||||
| 0 Comments |