
|
The Guam Banzai Maneuver Marianas 1944 #19 |
||
|---|---|---|
| (Attacker) Japan | vs | United States (Defender) |
| Formations Involved | ||
|---|---|---|
| Japan |  |
10th Independent Mixed Regiment |
| Japan |  |
18th Infantry Regiment |
| Japan |  |
48th Independent Mixed Brigade |
| United States |  |
12th Marine Artillery Regiment |
| United States |  |
21st Marine Regiment |
| United States |  |
9th Marine Regiment |

| Total | |
|---|---|
| Side 1 | 1 |
| Draw | 0 |
| Side 2 | 1 |


| Overall Rating, 2 votes |
|---|
|
4
|
| Scenario Rank: --- of 913 |
| Parent Game | Marianas 1944 |
|---|---|
| Historicity | Historical |
| Date | 1944-07-26 |
| Start Time | 04:00 |
| Turn Count | 30 |
| Visibility | Day |
| Counters | 115 |
| Net Morale | 0 |
| Net Initiative | 1 |
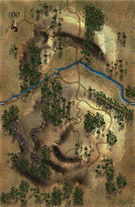
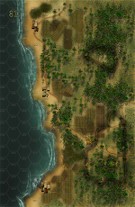
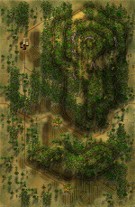
| Maps | 4: 100, 101, 81, 82 |
| Layout Dimensions | 86 x 56 cm 34 x 22 in |
| Play Bounty | 183 |
| AAR Bounty | 165 |
| Total Plays | 2 |
| Total AARs | 2 |
| Battle Types |
|---|
| Inflict Enemy Casualties |
| Conditions |
|---|
| Off-board Artillery |
| Reinforcements |
| Illumination |
| Scenario Requirements & Playability | |
|---|---|
| Marianas 1944 | Base Game |
| Saipan 1944 | Maps + Counters |
| Introduction |
|---|
|
In the northern landing area Lt. General Takeshi Takashina, the island garrison’s commander, planned a coordinated counterattack on the Americans. In contrast to the disjointed, unorganized banzai charges encountered throughout the Pacific in previous campaigns, his plan provided detailed instructions to units, and coordination with reserves to exploit successful breakthroughs or gaps in the American lines. One of his main goals included penetrating into and disrupting the American rear areas. |
| Conclusion |
|---|
|
Japanese flares lit up the sky both to help their soldiers to get to their assembly areas, and to light up the Marine positions so follow-on mortar and artillery concentrations could harass and suppress the Marine howitzer crews. The Japanese then exploited an 800-yard gap they discovered between the 9th and 21st Marines, driving deep into their sectors. Throughout the early morning hours, units of every sort fought to contain the Japanese, a significant portion of whom had penetrated into the rear areas. Marine command post personnel, cooks, clerks, and radio operators all picked up weapons to fight the Japanese assault. In the end, the momentum gained by the Japanese fizzled out and the attack became disorganized as the losses rapidly accumulated among the officers leading the assaults. After that, the total casualties began to mount as well as the Marines organized their own counterattacks. The butcher's bill tallied over one thousand Japanese by the time the last soldier hightailed it back into the trees. The Marines also suffered heavy casualties, but Marine training prevailed. The confused fighting ended by noon, and unknown to the American commanders, they had broken the back of Japanese resistance on Guam. |
| Additional Notes |
|---|
|
American morale and initiative are transposed. |

|

|
|---|
| AFV Rules Pertaining to this Scenario's Order of Battle |
|---|
|
| Imperial Japanese Army |
|---|
|


| Marine Corps |
|---|
|


| 1 Errata Item | |
|---|---|

|
The 8-3 Marine Infantry counter appears in most of the Saipan 1944 and Marianas 1944 scenarios, replacing the 10-3 DF valued Marine counters for those scenarios and is currently published in the most recent Saipan printing. (JayTownsend
on 2015 Dec 26)
|
| Marianas 1944, scenario: The Guam Banzai Maneuver | ||||||||||||
|---|---|---|---|---|---|---|---|---|---|---|---|---|
Marianas 1944, scenario: The Guam Banzai Maneuver I have been wanting to play this one for a while but have been so busy designing PG games that I haven’t gotten a lot of playing time in but I am taking a small break from designing and finally had time to play it. I am also using the 8-3 valued Marine counters, very cool! This one was hard for me to setup as I wasn’t sure how to defend as the Marine player and I spread my counters across maps 101 and 81 trying to defend both maps with an eye towards those extra victory points. The Japanese get the advantage of setting up second and checking out the Marine’s setup as some Japanese scout must have spied them out before the early morning/night attack. The Japanese see the setup terrain on map 100 as being a better asset for attacking the Marines on map 101 than map 82 and also their reinforcement will enter on map 82 within five turns. The Japanese use the cover of darkness to penetrate the thinly spread American lines and try to void contact as much as possible as they can gain points for getting and staying alive in the American’s rear messing with supply/command/artillery troops. The Japanese have great success getting behind the Americans lines and the Marines start shooting flares and heavy artillery and off board Naval bombardments as well but also have to shift dig-in units from the thin line to go after the Japanese renegades. Before long the Japanese second force enters the combat zone which is about the same size as the first group of attacking Japanese. Once again the Marines have to shift units around, including the Monster E4-5 Sherman Flame tanks but lose their dug-in advantage. Combats are taking place all over the battlefield and to my surprise by the end of the scenario the Japanese tricks of Spreading the American lines has worked in the their favor for a Major Japanese Victory, 41 points to 26 points. The Americans eliminated 23 Japanese steps and 3 Leaders for 26 points, while the Japanese eliminated 9 Marine steps and 2 Leaders but more importantly they had 30 steps still on American territory on maps 101 and 81 for a total of 41 points. Observations and comments: the Americans should have only defended on one map gaining 10 points, than adjusted to attack the other map in strength in the second half of the scenario and this would have been a much close match. The E4-5 Sherman flame tank is a beast but keep Infantry with it in assaults and use your 2 x 30 off board artillery well and I think the Marines will do better next time. The 8-3 valued Marine Infantry counters makes a much better balance scenario and I recommend using them for all the Marianas 1944 and Saipan 1944 scenarios. I believe they are sold in the latest released Saipan games or you can join the Gold-Club and purchase them as well. The Japanese should avoid combat except when good assault opportunities arise and slipping through and behind the lines and finding a jungle or town hex to campout in will increase your odds of winning this scenario for them. Great fun! |
||||||||||||
| 0 Comments |
| Beguiling Trap | ||||||||||||
|---|---|---|---|---|---|---|---|---|---|---|---|---|
This interesting scenario has a Japanese attack starting in the wee hours and ending in broad daylight. The Japanese has to get as far as possible into the western two boards, attack the US artillery park, and generally do as much damage as possible. His own casualties are not too much of an issue, except that both sides get points for leader casualties as well as normal step losses. The Japanese historically took advantage of a gap in the Marine line, and sticking to placing Marines in good jungle positions or dug in to light jungle hexes, I had 2 gaps, one of 3 and one of 5 hexes. The Japanese get another force of nearly the same size as the initial force, less the mortars and 20mm AA gun, which come in on turn 5, just before the sky lightens. It's important for that initial force to do as much damage as possible, since the reinforcements will be in full view by the time they are in any position to engage the Marines. I infiltrated the Japanese well for 2 turns, choosing not to use illumination but rather having 6 stacks ready to assault 6 defending stacks on turn 3. In the northern flank, this worked pretty well, and the Marine defenders melted away, with the only leader loss of the game taking place there. The central force on the northern board didn't fare so well. The Marines got a first fire at an adjacent hex with the first outpost of a Marine INF and HMG, and it destroyed the assaulting force targeting that hex. The next assault force survived first fire only to discover they found the Engineer Flame unit and they died, leaders and all. The third assault stack of the central force ran into the dug-in force containing the Sherman Flame tank. They also died to the last man. The flame tank and an infantry platoon moved north and rescued the sole survivor on the northwestern-most Marine defense and finished off a Japanese assault force in that hex, and ran out of lighter fluid for the big Zippo right then and there. The northern Japanese attack forces stalled and started losing a battle of attrition as the sun rose and the sounds of firing came from the south. In the south, the Marine line was far more secure, and with leadership like I drew for the Marines, the Japanese started losing troops at 2 hex range, before they could even get assault forces in place. More and more Japanese troops and leaders died or fled, while Marines here and there became demoralized for a turn but returned quickly. I used the 10-3 Marines for the last time on this scenario, and it is just possible they were what hurt the Japanese so badly, but it was only by one column at most over what it would have been with the 8-3 Marines. Die rolling seemed to have a lot more to do with it today. The luck of the dice ebbed and flowed for both sides, abandoning me when anything but a 7 would have made a difference, and then destroying a stack to the last man on lower odds attacks. At the end of turn 16, and running low on the time I could allot to the game, I looked at the field. In the north, both sides feared taking more casualties and nearly every Infantry and HMG counter left for the Japanese were single step units. The northern side had lost nearly half of it's leaders. In the south, the Japanese were stalled just out of reach of Marine DF, but had also suffered heavily. The Marines in the north were too weak to push out the Japanese, and the Marines in the south had plenty of strength but risked leaving gaps where Japanese troops might push through to attack the artillery, which had put out a tremendous volume of fire without having seen a single Japanese soldier. In counting up the points, the Japanese last 43 steps of troops and 8 leaders, but still had 9 steps on the western boards. The Marines had lost 5 steps and 1 leader. It was obvious who won from that. Further turns would only be spent in exchanging artillery fire for the most part. So game called, USMC victorious. Great game. This makes my 30th Marianas scenario, and I plan to play them all again with the lower value Marines in the future, but have way too many other scenarios available to try first to do so now. |
||||||||||||
| 0 Comments |