
|
Along the Agat-Sumay Road and the Drive to Orote Marianas 1944 #18 |
||
|---|---|---|
| (Defender) Japan | vs | United States (Attacker) |
| Formations Involved | ||
|---|---|---|
| Japan |  |
38th Infantry Regiment |
| Japan |  |
54th Naval Guard Force |
| Japan |  |
60th Anti-aircraft Defense Unit |
| Japan |  |
9th Tank Regiment |
| United States |  |
22nd Marine Regiment |

| Total | |
|---|---|
| Side 1 | 0 |
| Draw | 0 |
| Side 2 | 3 |


| Overall Rating, 3 votes |
|---|
|
4.33
|
| Scenario Rank: --- of 913 |
| Parent Game | Marianas 1944 |
|---|---|
| Historicity | Historical |
| Date | 1944-07-25 |
| Start Time | 08:30 |
| Turn Count | 30 |
| Visibility | Day |
| Counters | 124 |
| Net Morale | 0 |
| Net Initiative | 0 |
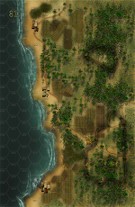
| Maps | 2: 101, 81 |
| Layout Dimensions | 56 x 43 cm 22 x 17 in |
| Play Bounty | 174 |
| AAR Bounty | 159 |
| Total Plays | 3 |
| Total AARs | 3 |
| Battle Types |
|---|
| Airfield Control |
| Inflict Enemy Casualties |
| Cave Control |
| Conditions |
|---|
| Caves |
| Entrenchments |
| Minefields |
| Off-board Artillery |
| Randomly-drawn Aircraft |
| Terrain Mods |
| Scenario Requirements & Playability | |
|---|---|
| Marianas 1944 | Base Game |
| Saipan 1944 | Maps + Counters |
| Introduction |
|---|
|
With the Bundschu Ridge now under the Marines' control in the north, and Mt. Alifan in their control in the south, the turned their attention to the Orote Peninsula that jutted out of the island of Guam like a thumb. The pre-war Marine Barracks hunkered there, along with the famous Rifle Range and Orote Airfield. The Japanese did not plan to give up this symbolic piece of ground easily. The Army's 77th Division took over most of the beachhead in the south, freeing up the Marines for this pincer movement. The Marines referred to the 77th as the "77th Marines" because, unlike the 27th Army Division on Saipan, the 77th Division maintained an excellent relationship and open communications with the Marines throughout the campaign. |
| Conclusion |
|---|
|
The Marines doggedly advanced in the face of a withering fire. Numerous machine gun nests in cleverly camouflaged emplacements, supported by concrete casemates, blocked their advance while destructive artillery fire rained down. Tank-led Japanese counterattacks drew Marine bazooka teams and Sherman tanks rushing forward in response. By the end of the day eight Type 95’s sat burning or in pieces. By late afternoon the Marines finished securing the area between Agat Bay and Apra Harbor. The main body of the Japanese found themselves confined to eight square miles of the Orote Peninsula. Later in the afternoon, some Japanese units tried to escape to the mainland by barge. That night the remaining Japanese launched a rather large banzai attack led by the 54th Keibitai, remnants of the 38th Infantry, and other service and labor personnel, but the Marines easily repulsed them, inflicting heavy casualties. |

|

|
|---|
| AFV Rules Pertaining to this Scenario's Order of Battle |
|---|
|
| Imperial Japanese Army |
|---|
|


| Imperial Japanese Navy |
|---|
|


| Marine Corps |
|---|
|


| Navy |
|---|
|
")
| 1 Errata Item | |
|---|---|

|
The 8-3 Marine Infantry counter appears in most of the Saipan 1944 and Marianas 1944 scenarios, replacing the 10-3 DF valued Marine counters for those scenarios and is currently published in the most recent Saipan printing. (JayTownsend
on 2015 Dec 26)
|
| Slogging To Victory | ||||||||||||
|---|---|---|---|---|---|---|---|---|---|---|---|---|
This 30-turn scenario uses 2 coastal boards with landward side in, 101 and 81, so you are presented with a peninsula sort of thing. The north on board 101 is covered with crops, separated by rows of jungle, giving the defender visibility at 3 hexes and making it difficult to get in to a good place for an assault without the defender having several turns to hammer away at the attacker. The southern board, 81, has hills, towns and quite a bit more jungle, and the defender has to set up at least 3 hexes away from the east edge, which gives the Marines a chance to come on in several places unobserved. I used the 10-3 Marines again, and will do so with the final scenario I need to finish this book, then plan to replay the whole lot with the new counters. The Japanese get 4 mines, which I set up blocking open space, 3 extending from the eastern jungle line within the Japanese setup area so that it forces the Marines to either risk going through or makes them go around through a light jungle hex between the mines and the sea. I set up the SNLF in the forward jungle on the north board and towards the rear on the south board, holding the smaller hill and the central town hex. Caves were set up, one in the light jungle of the second, more central jungle line on the north board and at the base of the western hill on the southern board, with one entrenchment on the hill, the other in light jungle a few hexes from the northern shore but just far enough from the water's edge to avoid a close shot from the US Navy gunboat. Marines get 3x30 OBA and another 2x10, but the big 30s are only available for any consecutive 6 turns. Marines get an aircraft draw on the first 8 turns. The Japanese get 3x10 and 2x8 OBA with no air support. Both sides have a lot of leaders so nothing has to be set up adjacent to a leader to get some leadership support. I had to end the game at a given time, regardless of where it was at, but I believe the stopping point gave a good accounting of where the game was going to go. The Marines have a Col and an LTC and use the full order of battle for infantry, so I broke them down into a northern force with the Col, and a southern force under the LTC. The Mortars came in as one stack, and moved just south of the center line where they could assist with either side as needed. The M-7 rocket truck came in along the trail and set up just east of the first town hex where he could put rounds on most of the Japanese defending the eastern half of the southern board. The Japanese regulars that start as single steps I placed forward defending the hill to hopefully trade their lives for the Marines and save the full units as a central defense line, along with the Japanese AT gun, 70mm gun and one of the two AA guns, while the other AA gun was set up in jungle along the northern coast and the Japanese 75/88 was set up in the northern entrenchment. The northern force moved west, with half in 3 stacks moving along the beach and the other in 3 more stacks moving towards the first line of jungle where the SNLF was hidden away. The Marines along the shore made their way around the mines, and swept the Japanese troops and the AA gun along the shore, but the Marines heading for the jungle started taking the casualties, maneuvering to make an assault. On the southern board, the single step Japanese troops died or fell back with no damage to the Marines, and the Marines along the southern shore bypassed much of the Japanese force with no loss, one force making it to the central town hex and starting an assault there before taking any casualties. Others in the southern force moved forward to the jungle line where the Japanese AT gun and infantry gun were hidden. These guns had better luck, as well as their leaders calling more accurate OBA fire. Few step losses occurred, but nearly everything still on the large hill mass was disrupted or demoralized for a bit. The Marine Colonel stepped forward and took over an assault against the Japanese AT gun that had stalled, and his leadership saved the day, destroying the guns and chasing away the Japanese leader. The Japanese 70mm gun in the next hex didn't last that long as it was swept away in the first assault. To the north board, the SNLF saw themselves starting to be flanked to both sides and, leaving one stack engaged in an assault, pulled back to the second defense line around the next jungle line, extending that line to the north. The morale of the SNLF leadership was all 10s and 11s and with their 8/8 regular morale, they were hard to hurt, but they finally started failing morale checks and several units fled after failed rally attempts. The scenario gives points to the Japanese player for eliminating Marine leaders, but the Japanese leadership was having a rough time of it. The central town fell to a combined armor/engineer/flame assault and the shore was nearly opened up to the west, but the Japanese tanks moved into the westernmost town to hold it. Marine OBA results were mixed at best, and really only started hurting targets towards the end of the 6 turns available. Marine air support was present and hard hitting 7 of the 8 turns available. At the halfway point in turns, my time running out, I reviewed the situation. The Japanese were just beginning to collapse in the north but the entrenched 75/88 was keeping the Marines away, having also inflicted a step loss to the Sherman that supported the northern force. There was an avenue forming between the entrenchment and the remaining Japanese just to the south side of the northern board, and with Japanese leader loss approaching half of their starting numbers, the trend was only going to continue. In the south, the Marines were ready to encircle the western hill, with a force centered on the southern Sherman platoon, heading towards the southwestern town to tangle with those Japanese tanks. A tally of casualties and objectives gave the Marines a minor win. They had not taken either entrenchment or cave yet, and I had forgotten to place an airfield at the setup, so rolled randomly to place it just to see if it would fall inside their territory, but it was still inside of the Japanese area. But the Japanese losses, including 9 leaders, one of which was the Japanese Colonel, was so great that the casualty points alone gave the Marines their victory at this point. While the Marines were sure to take some more losses, it seems just a matter of time before they would take the southern entrenchment and cave, finish off the Japanese tanks and trap the remaining Japanese in the northern board by a right turn from the southwestern hill area. Even though I only made it half way through, I enjoyed it greatly and look forward to running it with the new set of Marine counters. |
||||||||||||
| 3 Comments |
| Marianas 1944, Scenario Eighteen: Along the Agat-Sumay Road and the Drive to Orote | ||||||||||||
|---|---|---|---|---|---|---|---|---|---|---|---|---|
After playing a small scenario I needed a meatier scenario and picked this one, playing it off and on over three days. This scenario is loaded with many types of units and the victory points are very interesting. Both sides get one point for every enemy unit eliminated but with American tanks counting triple, Japanese tanks double and the Japanese getting two points for eliminated American Leaders. Also the Americans get two points for every cave or entrenchment controlled and either side get five points for whoever controls the airfield counter and added up to different levels for victory, so a lot of interesting things to keep track of. In my game I setup the first Japanese line of defense with a row or casemates and dug-in Japanese Infantry. The Second line of Japanese defense more Infantry and heavy weapons, SNLF units, caves and entrenchments. The third and last line of Japanese defense was the airfield some heavy Japanese Guns/Anti-tank and reserved armor light tanks. This puzzle of a scenario is not for the faint of heart, as both sides have to figure it out in some interesting terrain with some very heavy off board artillery on both sides of the match. The Marines moved on to the Peninsula from the east with ocean to the north and south! Hitting the first line of Japanese defense proved very difficult, even for the high powered Marine Infantry with support of tanks, Mk-7 Rocket trucks, LCI Gunboats, air & artillery as well. Casualties mounted at the first defense lines with the Americans finally breaking through but with no clear advantage in points. After battling for many turns the breakthrough finally hit the Japanese second line of defense. The Japanese held out their weak Type 95’s tanks not wanting to give the Americans easy points but the Caves & Entrenchments were again causing American and Japanese casualties to climb. But the Americans decided not the go after the last cave and entrenchment complex but instead followed a breakthrough in the second Japanese line of defense over to the third line and the airfield. After 30 turns the Marines controlled the airfield but at a heavy price. The Japanese committed their light armor in the end and lost it very fast giving the Americans enough points to give them a major victory instead of a minor victory 52 points to 39 points. A very tense battle that could have gone either way, depending on the strategies used and step up of units. I highly recommend this one! |
||||||||||||
| 0 Comments |
| Logistics chaos | ||||||||||||||
|---|---|---|---|---|---|---|---|---|---|---|---|---|---|---|
First, be aware that my regular opponent and myself, we are playing PG with all optional rules, whenever possible. In this case, I have to admit that I would prefer to use the "Logistics shortfall" rule only by special rule reference (short ammo or whatever). The scenario is a US assault across the full width of an island (the sea on both sides) towards an airfield protected by minefields, casemates, caves and some Japs too. As the Marine player, I command a tremendously powerful infantry force + some shermans, rockets, offboard artillery, aircrafts and so on. On the second turn (2nd !!), I suffered from Logistic shortfall without having fired much ! On the 4th turn, the Jap player also hits the Logistics shortfall button ! Well, that's good and certainly more historical... On 5th turn, the Jap player comitted sepuku by hitting the same button again : Critical shortfall ! The rest was rather easy for me. The Jap player surrendered on turn 12 (30 of them). Nice scenario. Terrible rule. |
||||||||||||||
| 0 Comments |
Thomas, you might want to check your victory conditions. Only the Japanese receive victory points for eliminated enemy leaders in this scenario.
Right, I saw that, just didn't spell it out well in the report. Sorry about that. I was more interested in spelling out that without their leaders, they were going to be at a much greater disadvantage very soon in a battle of maneuver. Even the SNLF troops were starting to flee as several of their leaders were among the missing.
I understand, great AAR btw!