| Author |
JayTownsend
|
| Method |
Solo |
| Victor |
Japan |
| Play Date |
2020-12-21 |
| Language |
English |
| Scenario |
Leyt018
|
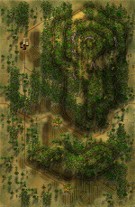
Leyte 1944, Scenario Eighteen: Swamp Things
The Americans have good armor support, good Infantry numbers but little off board artillery support and a low morale of 7/6 and three victory objectives to try an achieve or not. The Japanese have a lot of entrenchments, casemates and even a cave, a minefield and some good AT Guns to slow the road north for the Americans.
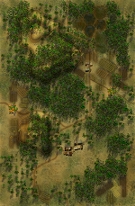
The Japanese setup basically in four areas along the north-south road with the biggest obstacles in the tighter, narrow corridors, especially on map 82. The Japanese are still kind of spread thin and only put one units in the far northern town. The Americans really get clogged up on the first Japanese defensive position on map 83 and take 5 or 6 turns before they decide to flank some units out of the traffic jam and many of the forward units get demoralized and need room to pull out and recover and regroups. With help of armor and the Flame Engineers the Americans finally clear the first road block but one Flame Engineer loses a step as well as an armor steps. Once in the middle of the map the American creep past the second Japanese road block and loses three more armor steps which count double and an Infantry step and again the road gets clogged up.
Finally with 7 turns left the Americans need to flank again, the third Japanese road block as it starts to fall toward the end of the game but the forth is still waiting. The American achieved none of their victory objectives, giving the Japanese a Major Victory even if the battlefield didn’t look like it. The Americans lose 14 steps as the Armor counts double and the Japanese lose 16 steps but no victory objectives to the Americans. In hindsight, the Americans should have blown off the north-south road object and flanked on both sides going after the town & village hexes on map 82 and getting a maybe 2 to 1 advantage in step loses and the north-south road was too costly with all those Japanese fortifications.
|