
|
Labiranan Head Leyte '44 #17 |
||
|---|---|---|
| (Defender) Japan | vs | United States (Attacker) |
| Formations Involved |
|---|

| Total | |
|---|---|
| Side 1 | 1 |
| Draw | 0 |
| Side 2 | 0 |


| Overall Rating, 0 votes |
|---|
|
0
|
| Scenario Rank: of |
| Parent Game | Leyte '44 |
|---|---|
| Historicity | Historical |
| Date | 1944-10-22 |
| Start Time | 07:00 |
| Turn Count | 22 |
| Visibility | Day |
| Counters | 47 |
| Net Morale | 1 |
| Net Initiative | 1 |
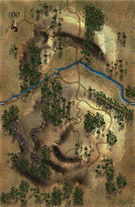
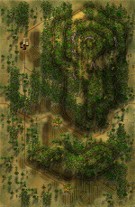
| Maps | 2: 100, 82 |
| Layout Dimensions | 56 x 43 cm 22 x 17 in |
| Play Bounty | 164 |
| AAR Bounty | 171 |
| Total Plays | 1 |
| Total AARs | 1 |
| Battle Types |
|---|
| Hill Control |
| Inflict Enemy Casualties |
| Entrenchment Control |
| Conditions |
|---|
| Entrenchments |
| Off-board Artillery |
| Smoke |
| Scenario Requirements & Playability | |
|---|---|
| Leyte '44 | Base Game |
| Marianas 1944 | Maps |
| Saipan 1944 | Maps + Counters |
| Introduction |
|---|
|
By landing just north of Dulag in the midst of swamps, the 96th Infantry Division avoided Japanese defenses and came ashore virtually without opposition. The Japanese had dug in just to the north, in and around the ridges known as Labiranan Head, and the Americans had to turn and deal with them. The first attempt failed, and after a hefty bombardment by airplanes and naval guns, they came on again a day later. |
| Conclusion |
|---|
|
Supported by massive artillery barrages, the Americans made slow progress through the Japanese positions. They finally reached the crest of the hill but could not eject all of the Japanese from their entrenchments. But operations on the landward flank assured that the Japanese could not remain on Labiranan Head, and they withdrew before they could be isolated there. |

|
|
|---|
| AFV Rules Pertaining to this Scenario's Order of Battle |
|---|
|
| Imperial Japanese Army |
|---|
|


| Army |
|---|
|


| Leyte 1944, Scenario Seventeen: Labiranan Head | ||||||||||||
|---|---|---|---|---|---|---|---|---|---|---|---|---|
Leyte 1944, Scenario Seventeen: Labiranan Head The Japanese don’t have a huge force here but they are going up against Green American Division with only a 7/6 morale rating. The Japanese have some good assets and decide to setup two entrenchments on the deep jungle hills on map 82 and one on the open hills of map 100 forcing the Americans to split their forces if they wanted to achieve all their victory objectives. So the key for the Japanese is their setup. The Americans got too excited and hurried their armor ahead of their Infantry to the more open hills on map 100 which was their opening mistake and their biggest mistake of the scenario. In three turns the Japanese entrenched 75/88 gun destroyed three armor steps and demoralized another leaving the Americans with no armor the rest of the scenario accept a halftrack unit. The 75/88 gun is deadly for American armor, as even the Sherman tanks only have a 3 value armor defense factor. On the other hand the Japanese 75mm guns are pretty useless with only a 4 bombardment factor but better with a 2 AT factor. The Americans have a good off-board artillery factor but once my American Infantry became demoralized on the maps, for both of their forces, they hardly ever recovered and I found my forces too weak to obtain any of the victory objective, they lost over three times as many steps as the Japanese when you throw in the lost armor steps counting double. The Japanese win a clear Major Victory on this one. Losing my armor early sealed my fate on this scenario but I still really enjoyed. The American need to take out that Japanese 75/88 gun early to at least have a chance but it will still be difficult, worth another attempt for sure. Next time! |
||||||||||||
| 0 Comments |