
|
Progress at Buri Airfield Leyte '44 #14 |
||
|---|---|---|
| (Defender) Japan | vs | United States (Attacker) |
| Formations Involved |
|---|

| Total | |
|---|---|
| Side 1 | 1 |
| Draw | 0 |
| Side 2 | 0 |


| Overall Rating, 0 votes |
|---|
|
0
|
| Scenario Rank: of |
| Parent Game | Leyte '44 |
|---|---|
| Historicity | Historical |
| Date | 1944-10-25 |
| Start Time | 07:00 |
| Turn Count | 22 |
| Visibility | Day |
| Counters | 77 |
| Net Morale | 0 |
| Net Initiative | 0 |
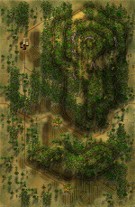
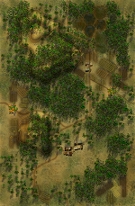
| Maps | 2: 82, 83 |
| Layout Dimensions | 56 x 43 cm 22 x 17 in |
| Play Bounty | 173 |
| AAR Bounty | 171 |
| Total Plays | 1 |
| Total AARs | 1 |
| Battle Types |
|---|
| Airfield Control |
| Inflict Enemy Casualties |
| Urban Assault |
| Conditions |
|---|
| Entrenchments |
| Minefields |
| Off-board Artillery |
| Terrain Mods |
| Scenario Requirements & Playability | |
|---|---|
| Leyte '44 | Base Game |
| Saipan 1944 | Counters |
| Introduction |
|---|
|
After sorting out his new command, Lt. Col. John Finn renewed the attack against Buri Airfield on the next morning, this time with two battalions in line. A 30-minute artillery bombardment made little impression on the Japanese, whose fortifications suffered only minimal damage. Finn pleaded for armor support, but the tanks remained committed to the flying wedge. |
| Conclusion |
|---|
|
With added troops and artillery but no tanks, the second American attempt had some limited success, but still could not take the airfield. Third Battalion penetrated to the edge of the airfield, and rather than pull back for the night the Americans retreated only a short distance and fought off the inevitable counter-attacks without loss to themselves. With a stronger starting position, they would make a third attempt when daylight returned. |

|
|
|---|
| AFV Rules Pertaining to this Scenario's Order of Battle |
|---|
|
| Imperial Japanese Army |
|---|
|


| Army |
|---|
|


| Leyte 1944, Scenario Fourteen: Progress at Buri Airfield | ||||||||||||
|---|---|---|---|---|---|---|---|---|---|---|---|---|
Leyte 1944, Scenario Fourteen: Progress at Buri Airfield I know this scenario is called Progress at Buri Airfield but I didn’t have any, as the Japanese basically setup all their units on map 83 in two areas defending the town hexes in the eastern and western areas including the airfield surrounded by minefields, entrenchments, casemates and dug-in Infantry and support units, using the terrain to their advantage. The Americans enter the battlefield in two groups and attacked that way, divided into two groups each attacking separate Japanese areas which probably wasn’t the best strategy, as they achieved none of their victory objectives giving the Japanese a Major Victory. I pulled the plug of the operation after turn 16, as the American units were too scattered, disorganized, with disrupted units, demoralized units and only six turns left. They had lost 14 steps, one leader, which was a Major while the Japanese had only lost 5 steps and still had a solid hold on all the American victory objectives. I’ll try and do better on the next scenario, which is another attempt at the Buri Airfield but fresh troops and armor support. |
||||||||||||
| 0 Comments |