
|
Red’s Highway Leyte '44 #8 |
||
|---|---|---|
| (Defender) Japan | vs | United States (Attacker) |
| Formations Involved |
|---|

| Total | |
|---|---|
| Side 1 | 0 |
| Draw | 0 |
| Side 2 | 1 |


| Overall Rating, 0 votes |
|---|
|
0
|
| Scenario Rank: of |
| Parent Game | Leyte '44 |
|---|---|
| Historicity | Historical |
| Date | 1944-10-30 |
| Start Time | 08:00 |
| Turn Count | 28 |
| Visibility | Day |
| Counters | 63 |
| Net Morale | 0 |
| Net Initiative | 1 |
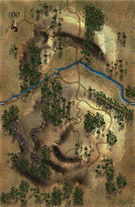
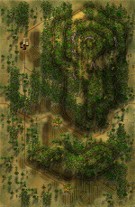
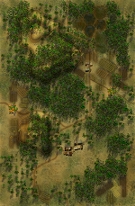
| Maps | 3: 100, 82, 83 |
| Layout Dimensions | 84 x 43 cm 33 x 17 in |
| Play Bounty | 176 |
| AAR Bounty | 171 |
| Total Plays | 1 |
| Total AARs | 1 |
| Battle Types |
|---|
| Bridge Control |
| Inflict Enemy Casualties |
| Urban Assault |
| Conditions |
|---|
| Entrenchments |
| Off-board Artillery |
| Scenario Requirements & Playability | |
|---|---|
| Leyte '44 | Base Game |
| Marianas 1944 | Maps |
| Saipan 1944 | Maps + Counters |
| Introduction |
|---|
|
The Japanese 35th Army command designated the port of Carigara on the north coast as the assembly point for reinforcements. One brigade would arrive by sea, while a division marched there by land. The American Sixth Army command, aware of these intentions, sent Col. Aubrey “Red” Newman’s 34th Infantry Regiment to seize Carigara before the Japanese could arrive. |
| Conclusion |
|---|
|
When his leading company faltered, Col. Aubrey “Red” Newman took the point himself. The freshly-arrived Japanese troops put up fanatical resistance, with suicide squads destroying several tanks that moved forward without protective infantry. When shell fragments felled Newman he continued to direct the advance as a medic sewed his abdomen closed. The colonel tried to continue commanding his regiment until his orderly dragged him away from the front. Having lost their colonel, the regiment’s attack fell apart and the Japanese held their ground. |

|
|
|---|
| AFV Rules Pertaining to this Scenario's Order of Battle |
|---|
|
| Imperial Japanese Army |
|---|
|


| Army |
|---|
|


| Leyte 1944, scenario Eight: Red’s Highway | ||||||||||||
|---|---|---|---|---|---|---|---|---|---|---|---|---|
Leyte 1944, scenario Eight: Red’s Highway A fun three map scenario with many victory conditions to try and achieve for both sides. The Americans have to put together some good offensive plans and decide what to go for first and when to break off different forces to go after other objectives. The Japanese have to figure out how to setup their defenses and how to best use the terrain to their advantage. There is also a mini game of a sort going on with the Japanese trying to destroy bridges, which I used the engineer unit, a strong Lieutenant and one of the rare truck units for faster mobility. It was 28 turns so I won’t so into too much detail as there are so many variables in this scenario but the American Scott tank is vulnerable to even the Japanese weaker guns, sure it good for Direct Fire but mine got burned. After all was said and done, the Japanese destroyed all three bridges, the last on barely, eliminated 13 American steps but only controlled one town hex for a total of 33 points. The American eliminated 21 Japanese steps, 3 leaders, controlled four town hexes and two villages for 47 points and a Major American Victory. One Village was forgotten, so I didn’t award those points to anyone. Fun stuff! |
||||||||||||
| 0 Comments |