
|
Operation Goodwood: Pushing South Liberation 1944 #18 |
||
|---|---|---|
| (Defender) Germany | vs | Britain (Attacker) |
| Formations Involved | ||
|---|---|---|
| Britain |  |
159th Infantry Brigade |
| Britain |  |
2nd Northamptonshire Yeomanry |
| Germany |  |
125th Panzergrenadier Regiment |

| Total | |
|---|---|
| Side 1 | 2 |
| Draw | 0 |
| Side 2 | 7 |


| Overall Rating, 8 votes |
|---|
|
3.25
|
| Scenario Rank: 582 of 913 |
| Parent Game | Liberation 1944 |
|---|---|
| Historicity | Historical |
| Date | 1944-07-18 |
| Start Time | 07:45 |
| Turn Count | 24 |
| Visibility | Day |
| Counters | 85 |
| Net Morale | 0 |
| Net Initiative | 2 |
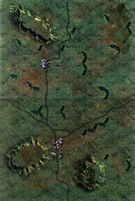
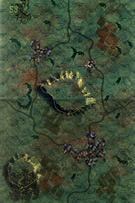
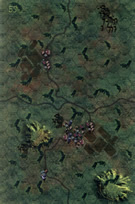
| Maps | 3: 57, 58, 59 |
| Layout Dimensions | 84 x 43 cm 33 x 17 in |
| Play Bounty | 158 |
| AAR Bounty | 153 |
| Total Plays | 9 |
| Total AARs | 4 |
| Battle Types |
|---|
| Inflict Enemy Casualties |
| Road Control |
| Urban Assault |
| Conditions |
|---|
| Hidden Units |
| Off-board Artillery |
| Randomly-drawn Aircraft |
| Smoke |
| Terrain Mods |
| Scenario Requirements & Playability | |
|---|---|
| Liberation 1944 | Base Game |
| Introduction |
|---|
|
The success of the Operation Goodwood plan depended on the speed with which the advancing armor could roll back the German defenses. To open the way, British heavy bombers hit German positions early in the morning followed by a rolling barrage. The armor was to race southward behind the barrage leaving any pockets of opposition to the following infantry brigade for mop up. |
| Conclusion |
|---|
|
Things started out well as the Germans offered little resistance and retreated with some encouragement from the advancing Brits. British heavy bombers had levelled Cuverville earlier in the morning, destroying the panzerjägers stationed there and scattering the other defenders. It too soon fell. However, the panzer grenadiers soon rallied and stopped the advance short of Demouville. |

|
|
|---|
| AFV Rules Pertaining to this Scenario's Order of Battle |
|---|
|
| Army |
|---|
|


| Heer |
|---|
|


| 4 Errata Items | |
|---|---|

|
All Bren carriers should have a movement value of 7. (Shad
on 2010 Dec 15)
|

|
The reduced direct fire value of the Heer HMG became 5-5 starting with Fall of France. (plloyd1010
on 2015 Jul 31)
|

|
All SS PzIVH tanks should have a movement of 8. (Shad
on 2010 Dec 15)
|

|
The morale and combat modifiers of German Sergeant #1614 should be "0", not "8". (Shad
on 2010 Dec 15)
|
| A Smashing Start to Goodwood. | ||||||||||||
|---|---|---|---|---|---|---|---|---|---|---|---|---|
Although this is somewhat of a lop-sided scenario, I had a blast playing it. It was fun to maneuver a British Brigade and smash the German defense. For once the 8 morale uber-mensch got what was coming to them as the overwhelming Brit firepower did the Germans in. I do think though that a clever german defense might be able to slow the Brits but I have yet to see what it could be. i could have played the Germans better too, their tanks got caught early on and destroyed. Here is the hourly reports that were posted on my Consimworld blog (with pictures) 0745 hrs 18 July 1944: Elements of the 159th Infantry Brigade and the Northampton Yeomanry Battalion cross the Line of Departure to start the attack for Operation Goodwood. In their path are elements of the 1st Battalion, 125th Panzergrenadier Regiment, 21st Panzer Division delaying/defending in depth. Both sides begin the fight with artillery fires but have little effect. Playing Scenario 18, Operation Goodwood: Pushing South from PG's Liberation 1944 0845 hrs, 18 July 1944: The German front line was not as robust as British Intelligence thought it was (using the optional solo hidden unit rules) and the British attack on the German front goes quicker than expected. The Germans have a tough time withdrawing from their forward positions, especially the panzers. An early Typhoon strike disrupts a Mk IV platoon which causes the Germans to have to fight to withdraw their tanks; overwhelmed by numerous Cromwell tanks the Germans lose all but a few of their tanks and half-track mounted AT guns. This may be hurt them in the long run. The forward German infantry almost makes its escape but is plastered by British artillery when assuming a secondary position on the eastern hill. The Brits take some casualties to German artillery but otherwise move forward in good order. Now the UK brigade commander orders his forces to prepare for the assault on Cuverville which may be tougher than expected and a whole company of German infantry remains undetected. In the last turn the Brits were unable to move all their units due to a Fog-of-War SNAFU. 0945 hrs, 18 July 1944: the British press the attack and hit the German MLR at Cuverville and running west. The Brits manage to envelope the town and gain a foothold behind the German defense. The Brits assault (the hex with the #1 counter)and bring up Crocodile flame tanks. The Germans, apparently knowing they are doomed, fight tenaciously to hold the town as long as they can. Casualties mount on both sides as overwhelming British firepower takes its toll on the Germans as well as German artillery fires on the Brits. A few Fog of War turns disrupt some movement off follow on British units. There are no easy days... 1045 hrs, 18 July 1944: The British have secured all but the town center of Cuverville, where die-hard remnants of the German defenders hold out. the towns east and west of Cuverville are also secured and British commanders orders the brigade to continue south towards Demouville. (the Brits have a Major Victory but I'll keep playing to see if they can break through completely at Demouville) 1115 hrs, 18 July 1944: The Brits secure Cuverville and send a passel of German to the POW pens. And they press the attack towards Demouville hitting it with artillery and rushing Cromwells up to pound it with direct fire. The HMG platoon covering the town's approaches get hit hard by 25 lbr artillery and the survivors flee. The Landsers of the remaining infantry and mortar platoon realize what is coming and throw down their weapons. the approaching Tommies hear shouts of "Kamerade! Kamerade!" as the Germans surrender. The British win a major decisive victory and can now push south. Although a couple of pockets of resistance remain, they will be easily taken care of. |
||||||||||||
| 0 Comments |
| British steamroller |
|---|
|
This scenario has hidden units so for my solo play I used the optional rule with likely locations. I'm not sure how much that throws balance or flow. As the British player it's nice not to worry about a nasty surprise but as the German player having only 4 hidden INF units doesn't feel all that powerful. In any case the massive British force of 30 INF/WPN and 9 AFVs gets points for taking town hexes over 3 boards, but there's enough points to win on the first two boards. So the Germans must defend at least on the middle board, and prevent the British from leaking around to the rear. This is tough to do against such huge numbers. Although, the British are surprisingly brittle in the open (they'll take alot of morale results as they advance) and they don't really have a strong assault punch...the Crocodile might be their most important unit, followed by the 9 factor WPN units. The German player should target these. I could see alot of improvement and better play on the German side, so I rated it a 4, but honestly the British won very easily in my first go. Very methodical advance and even when the Germans got hot dice and engaged their best units, the British just absorbed the blows and kept cycling in new units as needed. Definitely and interesting and fun scenario, but the German player really needs to think his setup and strategy through. |
| 0 Comments |
| Second time, same results |
|---|
|
Played this one again because the situation is inherently interesting. I tried a new German setup (more forward, tanks hidden) and it seemed to work at first, inflicting early heavy step losses on the British. But once they regained their footing, which was inevitable given their numbers, the British then had a much easier mid game and jumped out to a 15 point lead as early as turn 12 (out of 24). I do like this scenario but I'm scratching my head at how you can defend the road on three boards and about 22 different (and spread out) town hexes, with only 15 combat units. The attackers have 38 units, although the vehicles can't enter 5 of the town hexes, this doesn't seem to matter too much (you can send them towards the others). The one chance the Germans have is get alot of morale hits as the British cross the open ground, but the Brits can minimize this with 3 smoke rounds per turn to provide cover. So great historical scenario, interesting situation, but a tremendous German challenge. |
| 0 Comments |
| Goodwood advances slowly | ||||||||||||
|---|---|---|---|---|---|---|---|---|---|---|---|---|
A very overwhelming looking scenario from the German perspective with eight British companies advancing south from there start line to face barely three Heer companies. They must hold the towns of Cuverville and Demouville after a heavy bombing has turned them to rubble. Support is scares, one platoon of PzIVH's and one of PzIVF2's as well as mortar and AA support, but they must cover a 4 km front that is 10km deep and prevent the British force from opening a gap. To do this they will have to hit and run and pick where they will make a stand. The Germans setup with once force that will be mobile and attack and run and another that will hold key positions. The tanks will and a couple of platoons will hit and run, setting up on the board 57 in hidden positions. Behind them on board 59, one company will hold Cuverville while another will hold Demouville. Support units will be dispersed between the two. Cuverville receives the ENG, HMG and the S307F, while the mortars and SK/4 to Demouville. The British setup massed to the north edge of the boards. The Cromwells and Croodile advance down the road while flanked by the rifle platoons with supporting HMGs and 3in mortars. They will try to sweep the first board, 57, to establish control over this board before proceeding to the 59. They will need to content will hidden units and German OBA before they can get established. The advance starts slow with the British only being able to get a couple of scouting companies on board before FoW hits. But hidden German FO's draw first blood with a direct hit on a RIF with a 2X. The British continue to advance and find one of the first hidden German GREN's. They try to suppress it with OBA but it is able to retreat back to board 59. German tanks remain quite while the British maneuver. But this changes as they begin to close on there cloaked positions. From the low hill south of the town the PzIVH fire at advancing Cromwells but misses. It will retire to board 59 on the next turn. British RIF try to close on the tanks but can reach them on the hill. German OBA hits again and demoralized more rifle platoons, but the German SGT that was spotting is discovered and nearly captured and he to runs south. To the west the other British wing advances to discover the other German platoon. After a quick exchange of fire the Germans retreat back to to board 59. This just leaves the PzIVF2 to deal with. But this was actually hidden on board 59, but this gives the British pause and FoW comes early on several turns to reinforce the issue of timidity for the British. Several turns pass and the British have advanced on the town of Cuverville. The Cromwell's lead the advance through the northern fields. The German companies hold their fire and wait for the infantry to close as well. But the Cromwells provide a wall and heavy fire on the town, but little effect on the Germans. Although German FO's are directing killing fire on the advancing British, two more steps of RIF's are lost as well as two other are demoralized. Direct fire by the German company also disrupts an attacking Cromwell slowing the British fire. But soon the British close for assaults and get into the town. Heavy fighting in the town last for an hour before the Germans start to break and they can see that they are being flanked by other British units. But the German PzIVH comes to the rescue and flanks the British assaults and is able to claim a step of Cromwell's. This cause the British to falter and the move back into the northern fields. Other Cromwells maneuver for a shot on the Germans. The PzIVH holds the German advance up but the Cromwells are too speedy and are able to get into a crossfire position. The German still has the advantage and try to take out one of the Cromwell's when the get the initiative, but miss. The Cromwells miss too, but British RIF's are able to close and assault the PzIVH destroying it with grenades and PIAT's. With the eastern flank secure the British look to clear Cuverville, but the Germans have other ideas. By this point in the war the Germans were well apt at defensive battles and the one company had good leadership. A Captain 9-0-1 and a LT 10-1-1 control the town with their company. Heavy fire by there HMG keeps the RIF's at bay, but the Cromwell CS and another Cromwell have closed and fire point blank at the HMG, eventually breaking the HMG and is flees. The other GREN's hold had provides cover. Eventually the RIF/HMG's close and assault the defending company. The initial assault takes over an hour to produce results,but the GREN's are able to get out of the assault without a scratch. The frustrated British, bring up the Crocodile to close the deal, but again the Germans try to escape, this time it fails and they lose a step and the Captain is mortally wounded. This leaves just the LT with his GREN. Surrounded and pressed the LT and GREN are lost in a subsequent assault. To the west the mobile GREN and its LT link up with the hidden PzIVF2 to hold the small town on board 59. They are able to provide a good defense before a RIF and LT are able to close on the town. These were the advanced units from the other western wing of the British advance. They close but are hit with OP fire and disrupt and demoralize. More RIF's advance but are hit with German OBA and another full step of RIF's are lost. Eventually the German GREN is demoralized and must flee leaving the tank by itself. The British close to assault and destroy this one too. At this point the British have enough point or a win with clearing both boards 57 and 59, but have high losses. Further advances put the British onto board 58 and they take more minor towns to give them a close to a major victory and the Germans with no chance to recover. In the end losses are heavy, the Germans lose both the PzIVH, PzIVF2 and S307F as well as 3 platoons of GRENs an HMG and two leaders, while the British lose 3 platoons of RIF and 1 Cromwell, but the bigger losses is cohesion, there 12 British units that are demoralized or disrupted. |
||||||||||||
| 0 Comments |