
|
The Green Howards Liberation 1944 #12 |
||
|---|---|---|
| (Defender) Germany | vs | Britain (Attacker) |
| Formations Involved | ||
|---|---|---|
| Britain |  |
4th/7th Dragoon Guards |
| Britain |  |
69th Infantry Brigade |
| Germany |  |
26th SS Panzergrenadier Regiment |

| Total | |
|---|---|
| Side 1 | 2 |
| Draw | 0 |
| Side 2 | 0 |


| Overall Rating, 2 votes |
|---|
|
3.5
|
| Scenario Rank: --- of 913 |
| Parent Game | Liberation 1944 |
|---|---|
| Historicity | Historical |
| Date | 1944-06-11 |
| Start Time | 16:00 |
| Turn Count | 14 |
| Visibility | Day |
| Counters | 115 |
| Net Morale | 0 |
| Net Initiative | 1 |
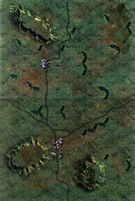
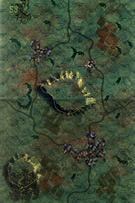
| Maps | 2: 57, 58 |
| Layout Dimensions | 56 x 43 cm 22 x 17 in |
| Play Bounty | 163 |
| AAR Bounty | 171 |
| Total Plays | 2 |
| Total AARs | 1 |
| Battle Types |
|---|
| Breakout |
| Delaying Action |
| Inflict Enemy Casualties |
| Rural Assault |
| Urban Assault |
| Conditions |
|---|
| Hidden Units |
| Off-board Artillery |
| Smoke |
| Scenario Requirements & Playability | |
|---|---|
| Liberation 1944 | Base Game |
| Introduction |
|---|
|
As the sun rose, the 69th Infantry Brigade received orders to attack the Cristot area as part of a large effort aimed at securing Tilly-sur-Seulles. Time was of the essence as the operation was planned to kick off shortly after noon. Delays occurred as commanders down the chain prepared their men and issued orders to the two battalions of Green Howards and their supporting armor. At 1600 the Green Howards tardily stepped off. |
| Conclusion |
|---|
|
The 6th Battalion of the Green Howards launched their attack through Audrieu and advanced steadily toward Cristot. On nearing the village counterattacking Panther tanks destroyed seven of the supporting Shermans in an unequal fight. This left the infantry vulnerable to heavy small arms fire from Cristot, forcing them back to Audrieu. At the same time the 7th Battalion of the Green Howards suffered a rebuff while assaulting a wooded area just outside of Cristot. The 6th Battalion’s War Diary put a brave face on a bad day saying: “Although the battalion suffered in that respect, the enemy was severely shaken by our attack and had many dead.” |

|
|
|---|
| AFV Rules Pertaining to this Scenario's Order of Battle |
|---|
|
| Army |
|---|
|


| Schutzstaffel |
|---|
|


")
")
")
")


| 6 Errata Items | |
|---|---|

|
The "Optional Values" for the Achilles---and by extension the Archer---given in an Avalanche Press Daily Content piece on the 17-Pdr Anti-Tank gun (and printed on a replacement counter sheet Download) are now the Official Ratings, published in games like Cassino '44, Grossdeutschland 1946, and Indian Unity. These are: 8-5 / 8-8 Full Strength and 4-5 / 8-8 Reduced Strength. (caryn
on 2012 May 03)
|

|
All Bren carriers should have a movement value of 7. (Shad
on 2010 Dec 15)
|

|
The "Optional Values" for the Firefly given in an Avalanche Press Daily Content piece on the 17-Pdr Anti-Tank gun (and printed on a replacement counter sheet Download) are now the Official Ratings, published in games like Cassino '44, Grossdeutschland 1946, and Indian Unity. These are: 5-5 / 8-8 Full Strength and 3-5 / 8-8 Reduced Strength. (caryn
on 2012 May 03)
|

|
Ignore the direct fire values. (Shad
on 2010 Dec 15)
|

|
All SS 105mm guns should have white, indirect fire values. (Shad
on 2010 Dec 15)
|

|
The reduced direct fire value of the SS HMG is 5-5 in Beyond Normandy and Road to Berlin. (plloyd1010
on 2015 Jul 31)
|
| Not so fast there... |
|---|
|
I chose this scenario as one of the unplayed ones. Plus, it was a nice, meaty scenario with tanks on both sides. The British come in with 30 infantry units of various types, 8 tanks (5 Shermans, 2 Fireflys and an Achilles) plus supporting mortars, AT guns and OBA. The Germans oppose them with SS GREN, various mortars and AT guns, some OBA and, oh yeah, 3 Panther units that enter on turn 1. The scenario starts in the daylight and ends after dark. Historically, the British, who set up on Board 58 and are trying to exit Board 57, plus take towns and a hill there, got their butts spanked and ran back to the large town on Board 58. This scenario really illustrates why. I set up with strong forces going down the east side of the map to contest the hill, with tanks and infantry trying to break through in the middle. The AT guns and more infantry went down the west side. I covered the advance with smoke as long as I could. For their part, the Germans defended the town and hill strongly, with a bunch of hidden units to cause trouble for the Brits. I'm using the suggested method of writing down 2x as many hexes and drawing from a cup. In this particular scenario, I wanted all of the Germans to be stacked 2/hex. I ran into some interesting issues. For instance, there were some HMG among the hidden units. So, when a unit got within 5 hexes of a potential hidden hex, I'd draw. And sometimes I'd draw GREN, who shouldn't come out that quickly. I settled on basically counting draws like that as "no draw" and keeping it as a potential hidden hex. This one turned ugly quickly. Once the British guns started to run out of smoke, the Panthers started tearing apart the Shermans, whose thin armor couldn't stand up to their guns. Before dying, the Fireflys did take out a platoon of Panthers, however the other 2 platoons were more than enough. Some of the tanks did survive, however the step losses gave a lot of points to the Germans. In addition, the German OBA and on-board artillery was causing havoc with the advance, inflicting some step losses, and disrupting and demoralizing a lot of troops. The British attempted to respond, however they werre firing at units either dug in or in a town for the most part, and just weren't as effective. The British assaults made it to the smaller hill, although with a weak force, and were making some headway in the middle, however the casualties were appalling. 25 steps for the British (about half of that was armor counting double) to about 6 for the Germans. And, by turn 12 when I called it, they were nowhere close to taking any of their objectives or exiting the map. I was going to play out all the turns, however one of my cats decided to jump on the board yesterday. Amazingly, she avoided all the counters. However, she started to walk, and I tried to lift her off, and that's when stacks went flying. Given the lopsided score in the scenario so far, I decided to move on and not try to recreate things. This is an interesting scenario, I suspect different British tactics might have provided a better result. However, the superiority of the Panthers, having to cross open ground to get to their objectives, the hidden Germans and the quality of the Germans will make this one a tough fight. This is one I think I'd really enjoy FtF. |
| 2 Comments |
Good AAR. Looks like a good, albeit tough for the Brits, scenario
They have to keep their armor away from the Panthers, at the same time they need the armor's strength to help take out the tough SS troops. I don't think there's a way to get it done without a lot of casualties, however if they are "productive" casualties, maybe that's not so bad.