
|
Defense of Porong Lost Battalion #3 |
||
|---|---|---|
|
(Defender)
Netherlands
(Defender) United States |
vs | Japan (Attacker) |
| Formations Involved | ||
|---|---|---|
| Japan |  |
47th Infantry Regiment |
| Netherlands |  |
3rd Cavalry Unit |
| Netherlands |  |
VIII Infantry Battalion |
| Netherlands |  |
XIII Battalion |
| United States |  |
131st Field Artillery Regiment |

| Total | |
|---|---|
| Side 1 | 1 |
| Draw | 0 |
| Side 2 | 0 |


| Overall Rating, 2 votes |
|---|
|
4
|
| Scenario Rank: --- of 913 |
| Parent Game | Lost Battalion |
|---|---|
| Historicity | Historical |
| Date | 1942-03-08 |
| Start Time | 22:30 |
| Turn Count | 18 |
| Visibility | Day |
| Counters | 82 |
| Net Morale | 1 |
| Net Initiative | 2 |
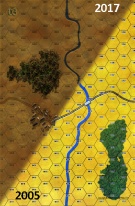
| Maps | 2: 23, 3 |
| Layout Dimensions | 56 x 43 cm 22 x 17 in |
| Play Bounty | 184 |
| AAR Bounty | 171 |
| Total Plays | 1 |
| Total AARs | 1 |
| Battle Types |
|---|
| Bridge Control |
| Urban Assault |
| River Control |
| Conditions |
|---|
| Terrain Mods |
| Scenario Requirements & Playability | |
|---|---|
| An Army at Dawn | Counters |
| Elsenborn Ridge | Maps |
| Fire in the Steppe | Maps |
| Kokoda Campaign | Counters |
| Lost Battalion | Base Game |
| Nihon Silk | Counters |
| Introduction |
|---|
|
As the 2nd Infantry Division landed in Western Java, the 48th Division went ashore at Kragan, in East Java. A detachment named the Abe Unit, formed around the 47th Infantry Regiment, was assigned to move toward the south of Surabaya. The Dutch command intended to defend Surabaya, garrisoning several towns outside the city proper. Porong is such a town, on the south side of the Kali(river) Sadar. |
| Conclusion |
|---|
|
Major-General Koichi Abe, commanding the Abe Unit, decided on a night attack. When the Japanese forces (including tanks) attacked Porong in the evening of March 6th, the KNIL troops had managed to destroy a railway bridge, yet the other bridge was captured intact by the Japanese troops, since most KNIL native troops fled, or better to say deserted. Most resistance was offered by a 47mm AT gun under the command of KNIL Sergeant H.F. Pasch and a AT rifle, which managed to destroy three Japanese tanks. Ritmeester C.W. de Iongh recalled: "The retreat of the KNIL troops from Porong and Pandakan was a complete "stampede". Panic without any organization. Officers and troops of the division yelled at us: "Flee, flee, the Japanese tanks are coming!". Battery E of the 131st Field Artillery Regiment was caught in the retreat. The Americans of the "E" Battery, with their flanks overrun, gave more than they got as they withdrew in close order. |

|
|
|---|
| AFV Rules Pertaining to this Scenario's Order of Battle |
|---|
|
| Imperial Japanese Army |
|---|
|


| East Indies Army |
|---|
|


| 131st Field Artillery Regiment |
|---|
|


| Army |
|---|
|

| 2 Errata Items | |
|---|---|

|
1 counter in the mix is printed with the INF symbol, rather than the mortar weapon symbol. It does not effect the unit's function. (plloyd1010
on 2013 Mar 11)
|

|
The HMG units in counter mix are printed with the standard INF symbol, rather than the heavy infantry symbol used for HMG and WPN units. The misprint does not effect the units' function. (plloyd1010
on 2013 Mar 11)
|
| Close Run Night Fight with MG Abe | ||||||||||||||
|---|---|---|---|---|---|---|---|---|---|---|---|---|---|---|
This was our third scenario, designed by our own Peter Lloyd, that Tubac52 and I have played in face-to-face matches. This one was the best of the three, IMHO, although I would have preferred to lead the Japanese side, since they had tanks! The result was a very close Allied Minor victory. Like the previous 2 scenarios in this set, this wild battle lasted 4-sessions. This time I led the combined Dutch and American force. My daring opponent, Tubac52, led the hard-charging elements of General Abe's 47th & 48th Infantry regiments in a nighttime assault. As before, both sides drew middling leaders, although not as many were killed or captured as in the previous 2 play-throughs.We used the consolidation, smoke/illum and excess initiative optional rules and ignored the FOW. We used the following two house rules: 1) Road Movement for Mechanized & Foot Units All FOOT & MECHANIZED units may move on roads at the rate of 1/2 a Movement Point (MP) per road hex, just like MOTORIZED units, and 2) Standardized Movement for Mechanized Units All mechanized units may move through clear hexes at a movement cost of only 1 movement point (MP) per hex, instead of 1 1/2. Add one to this cost if moving up, across, or down slopes hexes. We think that these house rules added to the fun, enhanced unit mobility and generally improved game play. As has become routine in our plays, the senior Japanese leader got eliminated in the 9th game turn, and chaos ensued for next 3 game turns, thereby ensurering that the Dutch would be able to counterattack effectively and retake the crucial bridge that they had lost in game turn 7. The two Japanese tank platoons were eliminated by either armor piercing shots or in close assaults in the town on Map 3. Once again, Japanese morale recovery efforts were virtually always successful. This one featured many, rather costly, close assaults in urban areas. Plenty of leaders were hit and killed on both sides: 3 for the Allies, and 6 for the surging Japanese. The PG Fates were fickle and favored the Allies in combat during our first, second & final session (18 game turns in this brawl - they supported the efforts of the Emperor's troops on a grand scale in the 3rd session. Step losses by the end were 21 for the Japanese side; and 10 for the bedraggled Allies that mostly occurred when the ill-trained & green Dutch troops first "saw the elephant" in the form of the menacing, but crummy, Nipponese tanks. There were a great many vicious adjacent-hex fire fights & close assaults and control of the town hexes nearest the bridge was a seesaw, give-and-take, high casualty, battle within a battle. In the end, the Japanese were not able to both hold the crucial bridge - that changed hands at least 3 times - nor be in complete control of 4 town hexes. So, a minor victory went to the battered Allied side. This result came remarkably close to a draw. I give this relatively-balanced, scenario an enthusiastic rating of 5, more as testament for a well-designed set of scenarios, capped by this fun-to-play match. We both felt that this one is suitable for both SOLO and SHARED play with the rule set that is described above. Without the artillery proving illumination, and some very Allied lucky combat throws, the Japanese would likely have won this battle, going away. |
||||||||||||||
| 0 Comments |