
|
Dueling with Death’s Head South Flank #38 |
||
|---|---|---|
| (Attacker) Germany | vs | Soviet Union (Defender) |
| Formations Involved | ||
|---|---|---|
| Germany |  |
1st SS "Leibstandarte Adolf Hitler" Division |
| Soviet Union |  |
5th Guards Mechanized Corps |
| Soviet Union |  |
95th Guards Rifle Division |

| Total | |
|---|---|
| Side 1 | 0 |
| Draw | 0 |
| Side 2 | 2 |


| Overall Rating, 3 votes |
|---|
|
4.33
|
| Scenario Rank: --- of 913 |
| Parent Game | South Flank |
|---|---|
| Historicity | Historical |
| Date | 1943-07-13 |
| Start Time | 09:00 |
| Turn Count | 18 |
| Visibility | Day |
| Counters | 181 |
| Net Morale | 0 |
| Net Initiative | 2 |
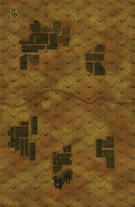
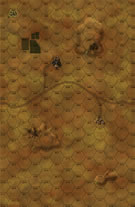
| Maps | 2: 36, 39 |
| Layout Dimensions | 56 x 43 cm 22 x 17 in |
| Play Bounty | 171 |
| AAR Bounty | 165 |
| Total Plays | 2 |
| Total AARs | 2 |
| Battle Types |
|---|
| Delaying Action |
| Exit the Battle Area |
| Inflict Enemy Casualties |
| Road Control |
| Conditions |
|---|
| Off-board Artillery |
| Randomly-drawn Aircraft |
| Scenario Requirements & Playability | |
|---|---|
| South Flank | Base Game |
| Introduction |
|---|
|
After netting Polezhaev on the 12th, Death’s Head Division was ordered to cut the Prokhorovka-Kartashevka road on the 13th. It was a tall order, as both of the division’s flanks were hanging open and the Soviets had deployed significant armor reinforcements during the night. Nevertheless, the concentration camp guards felt confident in their own superiority and moved forward undaunted by mere facts. |
| Conclusion |
|---|
|
Despite massive Soviet reinforcements, Death’s Head Division managed to reach and secure a good portion of the Prokhorovka-Kartashevka road before noon. Unfortunately for them it was all for naught, as with SS Lifeguard Division unable to advance Death’s Head was forced to recall its panzers later due to mounting pressure on both its flanks. However, Death’s Head had at least reinforced its misguided belief in its own superiority by performing extremely well. |

|
|
|---|
| AFV Rules Pertaining to this Scenario's Order of Battle |
|---|
|
| Schutzstaffel |
|---|
|


")
")
")
")


| Army (RKKA) |
|---|
|


| Guards |
|---|
|


| 4 Errata Items | |
|---|---|

|
The reduced direct fire value of the SS HMG is 5-5 in Beyond Normandy and Road to Berlin. (plloyd1010
on 2015 Jul 31)
|

|
The Units in Beyond Normandy were misprinted with a movement factor of 5. The movement factor should be 8. (rerathbun
on 2012 Mar 21)
|
|
|
Liberation 1944's counters are mislabeled 'PzIVF2.' The counter's ratings are correct (Armor 5, Move 8, DF 11-6, AT 6-8). (rerathbun
on 2014 Feb 14)
|

|
Should have direct fire value of 10-5 and an anti-tank value of 4-4. Values on the Kursk South Flank counter are for SPW-251/22. (plloyd1010
on 2015 Feb 17)
|
| A Tough Nut to Crack | ||||||||||||||
|---|---|---|---|---|---|---|---|---|---|---|---|---|---|---|
Unlike the previous scenario, this one seemed like a natural fit for a forward defense, at least in part. As the Soviet player, I committed a lot of tanks and infantry very close to the German advance. I had a few tanks on the hill, and another few tanks in the field near the center of the map to catch any clumsy advances by the German tankers. There were a few infantry and guns under cover or dug in down the depth of the left side of the board (From the Soviet perspective), but I was willing to cede most of the left side and use the hill as a natural fortress. (It turns out my tankers just couldn't shoot straight, at least in the middle of the board. I feigned a retreat from the hill using the "double blind" rules to my advantage; but when the Germans pulled right into the killing zone, I only got one half platoon for ten or twelve shots, even allowing for crossfire!) I anchored my entire right flank in the far forward field- the tough nut of the title. I had probably 8 or 9 T34 platoons there, backed up by infantry and MGs. When the Germans ran into that, they decided to go around, which cost a lot of time, a commodity that seems increasingly scarce in these final scenarios. Although the Germans were relentlessly advancing on my left and driving up the middle, their commander conceded defeat- there was not enough time to get the required steps off the board. |
||||||||||||||
| 0 Comments |
| Kursk South Flank, scenario #38: Dueling with Death’s Head | ||||||||||||
|---|---|---|---|---|---|---|---|---|---|---|---|---|
This is another larger scenario but unlike Purple Haze, Dueling with Death’s Head only has 2 maps and not as many units but a lot for two maps. There are four victory objectives and depending on how many the Germans do or don’t achieve will determine the victory levels of both sides. The Soviets start on the map, mostly dug-in with lots of Infantry, Tanks, AT-Guns and other Heavy Weapon Support units. The Germans will enter from the South with a large group of Infantry, Tanks, AFV’s and other support units but more important, they have 4 x16 off board artillery units. They do not have to enter each unit on turn one if they choose not to but there only 18 turns to do a lot of work. Both sides roll for air-support every turn. Looks like a good one! In this one, I setup the majority of the Soviet units on the east-west road dug-in with a second line of defense and support just a little behind and artillery with a little armor as a third line to support of move up and fill holes. The Germans moved on to the southern edge of the map cautiously with their stronger armor and one Lieutenant Leader to sneak up in the fields and spot for the off-board artillery. For three turns the German armor trade shots with some forward dug-in Soviet T-34 tanks and try to drop off-board artillery into Soviet dug-in Infantry positions but at this rate they will never take their objectives, so on turn 4 all the Germans unit pile on the map and the two maps become one big battle of one type or another. Time is not on the Germans side and neither are the dice. The Germans clear the east-west road only on one map, exit 20 units but lose more than 20 steps, only achieving 2 out of 4 objectives for a Minor Soviet Victory. Trying to remove a stone-wall in 18 turns is difficult. |
||||||||||||
| 0 Comments |