
|
Tiger Stomp South Flank #37 |
||
|---|---|---|
| (Defender) Germany | vs | Soviet Union (Attacker) |
| Formations Involved | ||
|---|---|---|
| Germany |  |
6th SS "Theoder Eicke" Panzergrenadier Regiment |
| Soviet Union |  |
18th Tank Corps |
| Soviet Union |  |
9th Guards Airborne Division |

| Total | |
|---|---|
| Side 1 | 0 |
| Draw | 0 |
| Side 2 | 2 |


| Overall Rating, 3 votes |
|---|
|
3.67
|
| Scenario Rank: --- of 913 |
| Parent Game | South Flank |
|---|---|
| Historicity | Historical |
| Date | 1943-07-12 |
| Start Time | 17:00 |
| Turn Count | 24 |
| Visibility | Day |
| Counters | 61 |
| Net Morale | 0 |
| Net Initiative | 0 |
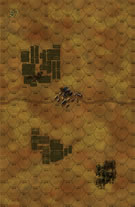
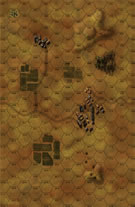
| Maps | 2: 37, 38 |
| Layout Dimensions | 86 x 28 cm 34 x 11 in |
| Play Bounty | 140 |
| AAR Bounty | 165 |
| Total Plays | 2 |
| Total AARs | 2 |
| Battle Types |
|---|
| Inflict Enemy Casualties |
| Urban Assault |
| Conditions |
|---|
| Off-board Artillery |
| Reinforcements |
| Terrain Mods |
| Scenario Requirements & Playability | |
|---|---|
| South Flank | Base Game |
| Introduction |
|---|
|
The Germans still felt confident of success on the night of the 11th, and the next day would see 1st SS Lifeguard Division trying to provide enough artillery support for Death’s Head Division to advance far enough to cover the Lifeguards’ exposed left flank. Hopefully, the Soviets could then be leveraged from Prokhorovka without any costly urban fighting. Advancing south of the Psel River around noon, Death’s Head ran into more than it bargained for. |
| Conclusion |
|---|
|
The Germans rolled over the weary 11th Motorized Rifle Brigade, and things went their way until Soviet armor entered the fray around noon. By 1800 hours, Soviet tankers including the 170th Tank Brigade that had been savaged by 1st SS Lifeguard Division earlier in the day entered Vasil’evka. With the situation rapidly deteriorating, the panzergrenadiers called for assistance. The Tiger Company responded promptly and drove the Soviets all the way back to Andreevka. |

|
|
|---|
| AFV Rules Pertaining to this Scenario's Order of Battle |
|---|
|
| Schutzstaffel |
|---|
|


")
")
")


| Army (RKKA) |
|---|
|


| Guards |
|---|
|


| 2 Errata Items | |
|---|---|

|
All SS 75mm IG guns are direct fire weapons (black), not indirect (white). (Shad
on 2010 Dec 15)
|

|
The reduced direct fire value of the SS HMG is 5-5 in Beyond Normandy and Road to Berlin. (plloyd1010
on 2015 Jul 31)
|
| Veni, vidi but not vici... | ||||||||||||||
|---|---|---|---|---|---|---|---|---|---|---|---|---|---|---|
Very interesting scenario. The victory conditions create a kind a seesaw movement which is really challenging. Basically the German player (me !) has to reach 3 objectives to win (controlling town hexes on both maps, preventing too many losses and inflicting more) while the Russian only has two to accomplish (the same). My set up was quite an agressive one, well forward with AT guns on hilltops to shoot T34s. And I did succeed : two steps of T34s destroyed on first turn and more demoralized. However the Russian artillery instantly killed the AT guns and German engineers assaulting the demoralized T34s went nowhere and got KIA also. To prevent more losses, German withdrew waiting for the Tigers to enter. The Russians advanced carefully and got trapped. The very slow moving Tigers entered the battlefield on turn 6 (first possibility on turn 5). Fun : a group of German HMGs forced one entire company of T34s to retreat by fear of being forced to devastating morale checks (when the MGs obtain a X1 on the combat table...). Now Russians got back on defensive positions. Germans advanced again to get casualty points from dead Russians : a slow process. Eventually, the Germans got the casualty points they needed while the Russian obtained the same result ! The only way for the Germans to win the scenario was to expel the Russians from the other village on the eastern map. SS were then sent through the plains to assault the village while Tigers destroyed every AFV in sight. The infantry eventually reached the village inlicting horrendous losses on the Russians but it failed to secure all the village hexes on the very last turn of the game. A very good scenario. Historically, it seems the terrain along the Psel river was an area built by many more rowhouses than shown on the maps. The slopes going down from southeastern heights towards the Psel river also offered quite a different terrain to fight on than the KKursk south flank maps. |
||||||||||||||
| 0 Comments |
| Foolish forward defense | ||||||||||||||
|---|---|---|---|---|---|---|---|---|---|---|---|---|---|---|
As the German, I got a little cocky and set up too far forward. I took the first opportunity I could to jump off that hill and engage the Soviets in assaults, but I had completely ignored the possibility of massed Soviet artillery, which destroyed a good number of my infantry with complete impunity. I should have stuck to the back side of the hill and hunkered down in the town until the Tigers showed up. The Soviets were at the gates of the town and the Tigers weren't even on the board yet when I conceded defeat. |
||||||||||||||
| 0 Comments |