|
Misfire South Flank #19 |
||
|---|---|---|
| (Defender) Germany | vs | Soviet Union (Attacker) |
| Formations Involved | ||
|---|---|---|
| Germany |  |
2nd SS "Germania" Infantry Regiment |
| Germany |  |
LSSAH Panzer Regiment |
| Soviet Union |  |
10th Tank Division |
| Soviet Union |  |
183rd Rifle Division |

| Total | |
|---|---|
| Side 1 | 4 |
| Draw | 0 |
| Side 2 | 0 |
| Overall Rating, 5 votes |
|---|
|
3.6
|
| Scenario Rank: 336 of 913 |
| Parent Game | South Flank |
|---|---|
| Historicity | Historical |
| Date | 1943-07-08 |
| Start Time | 08:30 |
| Turn Count | 20 |
| Visibility | Day |
| Counters | 229 |
| Net Morale | 1 |
| Net Initiative | 0 |
| Maps | 4: 36, 37, 38, 39 |
| Layout Dimensions | 86 x 56 cm 34 x 22 in |
| Play Bounty | 194 |
| AAR Bounty | 165 |
| Total Plays | 4 |
| Total AARs | 2 |
| Battle Types |
|---|
| Inflict Enemy Casualties |
| Urban Assault |
| Conditions |
|---|
| Off-board Artillery |
| Randomly-drawn Aircraft |
| Reinforcements |
| Terrain Mods |
| Scenario Requirements & Playability | |
|---|---|
| South Flank | Base Game |
| Introduction |
|---|
|
Stavka had decided the time was right to stop the rampaging panzers of SS Obergruppenführer Paul Hausser. They were to be hit in the nose by General V.G. Burkov’s fullstrength 10th Tank Corps, supported by 2nd Tank Corps. Once this attack had drawn the Germans’ attention, two more tank corps supported by elements of two rifle divisions would strike the Germans’ already weak right flank. It sure looked good on paper. |
| Conclusion |
|---|
|
Battles are not won on paper, and things went wrong for the Soviets from the start. The Germans pre-empted the Soviet attack, and General Burkov’s response was poor. Throughout the day his brigades launched piecemeal attacks with no coordination between themselves or with the supporting infantry. By the time 2nd Tank Corps arrived, 10th Tank Corps had already shot its bolt. With such a clumsy effort, the Soviets were slaughtered for no appreciable gain. Meanwhile Unterscharfurher Staudegger’s Tiger tank of 1st SS Lifeguard Division destroyed 17 Soviet tanks and would add five more in the afternoon. A Knight’s Cross awaited him the following day. |
| AFV Rules Pertaining to this Scenario's Order of Battle |
|---|
|
| 7 Errata Items | |
|---|---|
| Scen 19 |
RKKA leaders may active the Guards BM-13's and 76.2mm (campsawyer
on 2012 Jul 13)
|
| Scen 19 |
There is too many SS trucks in the scenario. Remove the one that is specified in the initial SS force and add it to the reinforcements. (campsawyer
on 2012 Jul 14)
|
| Scen 19 |
There is too many SS 50mm AT guns for the counter mix. Remove one from the initial SS force. (campsawyer
on 2012 Jul 14)
|

|
All SS 75mm IG guns are direct fire weapons (black), not indirect (white). (Shad
on 2010 Dec 15)
|

|
The reduced direct fire value of the SS HMG is 5-5 in Beyond Normandy and Road to Berlin. (plloyd1010
on 2015 Jul 31)
|

|
The reduced direct fire value in Kursk: Burning Tigers is 4-4. (plloyd1010
on 2015 Jul 31)
|

|
Kommissars never get morale or combat modifiers. Ignore misprints. (Shad
on 2010 Dec 15)
|
| Red Russians bleed white | ||||||||||||
|---|---|---|---|---|---|---|---|---|---|---|---|---|
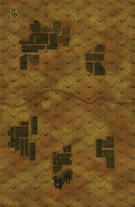
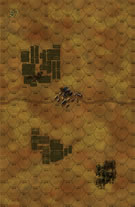
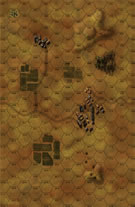
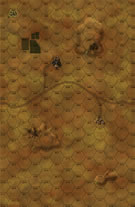
With the SS divisions a bit strung out the Soviets look to launch a massive attack on the thinned German lines, but sometimes numbers cannot overcome the fighting skill of the SS. This scenario features a massive amount of troops, a total of 14 T-34's, 27 INF's, 15 SMG's, 7 76.2mm guns, ATR's, Su-122's and 76's, BM-13's and even an Soviet FLM unit. The Germans have a good many troops as well including 88mm guns in a Tiger and AA gun. But the real key for this is the good quality German troops that are on the defensive. The Germans can easily muster direct firepower numbers of 16 and 22 in critical kill zones. The Tiger and 88 give good long range AT support as well as the mortars and NW41 providing bombardment on advancing Soviets. Morale and leadership a definitely on the German side, no matter what the leaders you plug for the Soviets. Other minor points are the availability of aircraft on both sides, although for the 3rd game in a row it played no significant part in the battle. There is modest OBA for both sides that will keep each player on their toes. For the setup the Germans need to defend the towns, so the initial force setup is centered around them. On board 38 the Germans have the bulk of there SCH, HMG and ENG's holding the large town with two SCH and OBSTFR in the smaller town to the north. For support the reduced Tiger and 75mm AT are in the major town covering the road, with the IG supporting the left flank of the town. On the low hills to the east and west the Marders and SCH are dugin to provide flank support. On board 39 the northern town has a 20mm and the southern just have SK-9's. (If the Soviets get that far it will be too late.) The OBSTBNFR places his command post on the hill to the northwest with 88mm, NW41 and mortar support. On board 37 a company of SCH, the 50mm AT and the Grille hold the town. For the Soviets they will advance onto board 38 and push for the two towns. There is no choice but get all the troops moving to get something close enough for assaults. The bulk will move on that board, with a smaller force moving down the trail on board 36. (BTW, the stagger entry SSR for scenario is very good, it will keep the German player guessing). The Soviet advance goes as one would think, German OP fire is right on target and several units fall quickly. Morale keeps the other from moving too quickly. But for the German fire there is too many and the Soviets eventually close enough troops on the northern town to assault. SS troops are trapped and destroyed, but at double the cost for the Soviets. The Soviets advance units to the left of board 38 to go after the Marder defending the hill. After a brief firefight between it and T-34's, the Marder is reduced but so is a T-34. Soviet INF's and SMG's look to swarm the remaining SCH's but heavy fire from the German mortars behind them slows the progress. Eventually that hill is reduced and the command post on board 39 is threatened. But the Germans still hold the major town. The Soviets concentrate there advance on the town, but start to take fire from the eastern hill on board 39. The Marder and 75mm gun keep the T-34's back while a lone SCH threatens the Soviet advance. But Soviet artillery finds home on the 75mm and it is out of action. T-34's advance and overpower the Marder, but again it is an even trade. Soviet INF's advance and the SCH high tails it for board 39. With board sides of the town taken the Germans await the Soviet assault from the north and the east. But the attack starts with units getting close on the west. The STBNFR in command shifts ENG's to cover the Soviet advance, but leaves the west side of town dangerously open for attack. A gallant Soviet Captain pulls units forward under heavy German fire as T-34's flank the town. The Germans searching for something to help the defense of the town shift two SCH platoons from the town on board 37, as the Soviets have not advanced on it yet. The reduced Tiger is also force to move as the T-34's threaten to push on to board 39. it move back to cover this advance. But the Soviets spot an opportunity to get the SU-122's and 76's close to the town. Both companies drive right up to the town an power heavy fire on the SS defenders. Pinned and now being blasted and assaulted, the German hope is for the reinforcements to appear and they do. With a forced march up the road on board 39, fresh SCH and HMG units are thrown into the battle. Reinforcing assaults and providing fire on the Soviet units advancing on the town. The Soviets keep pressing, but the German OP fire and BF are ripping the ranks apart. For example the Soviets advance units around the southern edge of the town on board 38, but fire from the 20mm AA gun kept disrupting the units and forcing them to stop. NW41 fire would demoralize them and force them to run. In the north of the town the Germans were not so luckly, assaults destroy there HMG units and several SCH's. The Soviets had foothold in the north and east town hexes and threatened the STBNFR's command post in the center. More reinforcing SCH's were poured into the assault hexes taking a heavy toll on the Soviets. But the Soviets looked to try to take advantage of the German need to defend the town. T-34's moved onto board 39 to try to overrun the smaller towns. The German captured T-34's Pz747r were up to the task. In a epic battle of T-34 against T-34, the Germans won the day, knocking out two platoons, without a loss to the Soviets. To the west the flanking force moved down to threaten the town on board 37. Supported by 76.mm gun fire they advanced and drove the dugin defenders back into the town. T-34's advanced and fired point blank at the SCH's, driving them back. But the German Grille made it presence felt with heavy fire on the assaulting Soviet's. Support by the 88mm helped until it was targeted by Soviet OBA and destroyed. The Soviet flanking force tried to push forward, but the reduced German Marder was able to get a flank shot on the T-34's to stop their support. It would be up to the final attack on the major town on board 38. The Soviets pushed as much as they could into the town, but trying to find good order troops was tough. Eventually push reduced INF's into the assaults helped but they were easy targets for the German defenders. Casualties mounted for the Soviets and with over 50 steps destroyed could not push the Germans out of the town. German losses were high, over 30 steps. In the end the Soviet attack stalled and the Germans held the town. Please note the errata on this scenario, there are several items that got changed in translation from design to reality. |
||||||||||||
| 0 Comments |
| An Aptly Named Scenario | ||||||||||||||
|---|---|---|---|---|---|---|---|---|---|---|---|---|---|---|
When I counted out the Russian pieces, I was sure that the Germans would get trounced. So I set up the Germans in a line that was mostly parallel to the board edge that the Russians would be entering; my only concession to German man-power shortages was anchoring my left flank way to the rear in the four hex town along the trail. The trail itself was not blocked, but Marders and AT guns were set well back to achieve crossfire on advancing tanks. During the first two turns of the Russian advance, I targeted my off-board and on-board artillery on his machine guns or on any hex that contained two of his infantry. I didn't kill anybody, but most of his infantry and SMGs were advancing without the firepower support of the HMGs. On the third turn my airplane knocked out two half-platoons of T34s. By the fifth turn, the Russians had advanced up to my positions in the fields, but their assaults were costly, and the Germans were holding their own. By turn eight, the Russians had brought most of their tanks and vehicles onto the board, and they had taken the town way back along the trail, but the German reinforcements appeared the next turn, and were set to advance on the town from the two fields on either side of it. The Russians had committed most of their armor on their right flank along the trail, and thus they were ill-positioned to fight the Germans (since the Germans weren't there!). The Russians retired from the field after the ninth turn- their units were too dispersed/disrupted/demoralized to regain coherence in time to make a difference. The morale advantage really made itself felt in this scenario. With artillery support, the average Kaempfgruppe of three German platoons was easily able to repulse 8 or 10 Russian infantry/SMG platoons. Had the Russians coordinated their tanks and infantry better, the outcome would have been very different. |
||||||||||||||
| 0 Comments |

 KurS018


