
|
Strongpoint Yakovlevo South Flank #7 |
||
|---|---|---|
| (Attacker) Germany | vs | Soviet Union (Defender) |
| Formations Involved | ||
|---|---|---|
| Germany |  |
1st SS "Leibstandarte Adolf Hitler" Division |
| Soviet Union |  |
14th Antitank Brigade |
| Soviet Union |  |
1st Guards Tank Brigade |
| Soviet Union |  |
51st Guards Rifle Division |

| Total | |
|---|---|
| Side 1 | 4 |
| Draw | 0 |
| Side 2 | 0 |


| Overall Rating, 4 votes |
|---|
|
4.5
|
| Scenario Rank: --- of 913 |
| Parent Game | South Flank |
|---|---|
| Historicity | Historical |
| Date | 1943-07-06 |
| Start Time | 10:15 |
| Turn Count | 16 |
| Visibility | Day |
| Counters | 234 |
| Net Morale | 0 |
| Net Initiative | 2 |
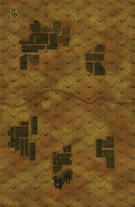
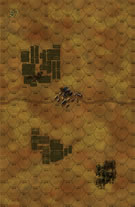
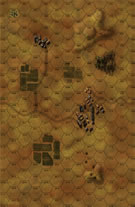
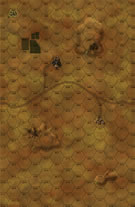
| Maps | 4: 36, 37, 38, 39 |
| Layout Dimensions | 86 x 56 cm 34 x 22 in |
| Play Bounty | 194 |
| AAR Bounty | 159 |
| Total Plays | 4 |
| Total AARs | 3 |
| Battle Types |
|---|
| Inflict Enemy Casualties |
| Road Control |
| Urban Assault |
| Conditions |
|---|
| Entrenchments |
| Minefields |
| Off-board Artillery |
| Randomly-drawn Aircraft |
| Reinforcements |
| Terrain Mods |
| Scenario Requirements & Playability | |
|---|---|
| South Flank | Base Game |
| Introduction |
|---|
|
Late in the morning, the SS Lifeguard Division received orders to take Yakovlevo. In order to expedite this, the SS Reich Division was to apply pressure against the Soviets to (hopefully) tie down any reinforcements attempting to intervene. Despite this precaution, a Soviet tank brigade managed to work its way in front of the Lifeguards. The German response to this unexpected development was swift and brutal. |
| Conclusion |
|---|
|
Stavka had hoped that sending in an armored brigade would stiffen the defenses enough to stop Hauser’s rampaging panzers. It was not to be, as the panzers sliced through the defenses and Yakovlevo quickly fell. The Guardsmen fleeing from the battle into Bol’shoe Maiachki and Pokrovka were ignored, and the Lifeguard Division continued advancing along the road to their destiny at Prokhorovka. |

|
|
|---|
| AFV Rules Pertaining to this Scenario's Order of Battle |
|---|
|
| Schutzstaffel |
|---|
|


")
")
")
")
")


| Army (RKKA) |
|---|
|


| Guards |
|---|
|


| 6 Errata Items | |
|---|---|
| Scen 7 |
In the SS Order of Battle, PzIIIf should be PzIIIg. (rerathbun
on 2014 Feb 07)
|

|
All SS 75mm IG guns are direct fire weapons (black), not indirect (white). (Shad
on 2010 Dec 15)
|

|
The reduced direct fire value of the SS HMG is 5-5 in Beyond Normandy and Road to Berlin. (plloyd1010
on 2015 Jul 31)
|

|
The Units in Beyond Normandy were misprinted with a movement factor of 5. The movement factor should be 8. (rerathbun
on 2012 Mar 21)
|
|
|
Liberation 1944's counters are mislabeled 'PzIVF2.' The counter's ratings are correct (Armor 5, Move 8, DF 11-6, AT 6-8). (rerathbun
on 2014 Feb 14)
|

|
Should have direct fire value of 10-5 and an anti-tank value of 4-4. Values on the Kursk South Flank counter are for SPW-251/22. (plloyd1010
on 2015 Feb 17)
|
| Fear of the unknown. | ||||||||||||||
|---|---|---|---|---|---|---|---|---|---|---|---|---|---|---|
I lost this scenario but it was the best of all that I played. Now we play double blind so minefields are not noticed until you stop next to them or enter them. Those in entrenchments are seen from a distance of 3 hexes or less. Airplanes can identify troops in a target hex and the 6 adjacent hexes only. The Germans had overwhelming fire power 19 tanks which included 5 tigers, The Soviets had only 11 AT guns and 8 AT rifles and a huge battle field to defend at the start of the contest. Yes they do have 14 entrenchments and 11 minefields to place but minefields can be avoided and entrechments can be taken and use against the defenders. For 4 hours the Soviets needed to defend, in order of importance, the main road, the large town, the foot trail, the other smaller towns on the board and their lives. I know that once a gun is fired,it is very difficult to move it,so initial placement is very important. Also the Soviets have one more asset that is FEAR OF THE UNKOWN. The Initial Placement: The foottrail and the 2 small towns on the western half of the map were defended by phantom troops(5 of the poorest leaders, 2 AT guns and 4 infantry units good at retreating slowly). By placing all the minefields in the southern fields E, W and S edges and entrenchments on the ends of its Northern edge. It created a pocket to hide AT guns, infantry and Machineguns as could be placed in both fields. The 4 hex town between the fields was left undefended. The major town to the North was occupied by infantry, ATRs, HMGs, FLM. The remaining AT guns occupied the neighboring hills and woods with supporting infantry and Hmgs. Tanks did not arrive until the 6th turn. The Germans divided their forces into 4 groups placing 2 tigers for the foottrail and 3 tigers for the main road with supporting units, a large force was set to clear the country side of any units in the middle of the battlefield and the last mechanized group was set to drive along the eastern edge of the battlefield. The Plan: Let the Germans advance towards the main town avoiding combat as long as possible, hoping their lead Eastern groups would be far ahead of their supporting units. This would give me at least a fighting chance with enough fire power to take on the tigers. The Resulting Action: The Germans were forced to attack my strong points(the entrenchments at the edges of the fields) not knowing how well they were supported from within the field. The Tigers took the bait and approached the main town from where smgs and infantry appeared ready to assault them and leave them helpless to a massive AT crossfire. AT fire and Infantry assaults killed 9of12 spw units, 3of5 tigers and 5of5 PZIVF2s however. The Soviet infantry lost completely 22of27 infantry units. Leaving insufficient infantry to hold the main town when the German battle group that was assigned to clear the country side turned east and attacked the main town. To avoid massive losses trying to hold the town. Soviet tanks saw the opportunity to retake the 4 hex town, allowing those on foot to retreat to the hills with supporting fire. The Germans won the field this day but armor and guns are much harder to replace than men. |
||||||||||||||
| 0 Comments |
| A Last Turn Victory | ||||||||||||||
|---|---|---|---|---|---|---|---|---|---|---|---|---|---|---|
This scenario was bloody, brutal and hard fought by both sides. 170 steps were lost between the Germans and Russians by the end of the game. German losses (75 steps) were mostly tanks- including THREE entire tiger platoons; Russian losses (95 steps) were mostly infantry and ATR, with a few guns and tanks for variety. The Russian initial set-up was especially devious- he concentrated nearly all of his men and materiel on the eastern boards, leaving only a token defense in the west. And, as the Germans, I had broken my command into four large battle groups: one to take the western trail, one to work its way past the fields in the west, one to take the small town in the south, and one to crawl along the eastern edge. Trouble was already brewing- for nearly half the game about half of my forces were going to be fighting 95% of his strength on the eastern boards. Furthermore, he set up his minefields to block my access to the fields. The mines were deployed in wedges that pointed to the south, and the open end of each wedge was anchored by entrenchments. I couldn't hide my SPWs out of sight of his guns and tanks in the eastern sector and lost nine or ten of them by game's end. To my surprise- and utter horror- the Russians had hidden most of their forces INSIDE these wedges in the fields! Each time I made a little gain against one of the entrenchments, new forces were fed into them. I made the idiotic decision to try to get around the sides of the wedges, even with my armor. Crossfire from his T-34s and other guns ripped my tanks to shreds as they tried to force their way into these well protected wedges. I eventually worked the center battle group into the big town around turn 12, and the Russians abandoned it- but not without sending three of their own tank platoons down to the four-hex town that I assumed was mine! I only managed to win because on the final turn I cleared the sparsely defended trail. I learned a lot from this one. First- I was an idiot to be so afraid of the mines- I had engineers after all. But I never used them to scout the strength of the minefields, and if I had I would have discovered where he was hiding most of his men. Second, a disrupted tank is almost as useless as a demoralized tank. It can't fire to any useful effect, and when you are stupid enough to get yourself into a crossfire situation, you can't recover them- you have to move that one hex- if you can. Third, I left the middle open! I had no AT assets to stop his tanks from leaving the big town and re-taking the small town- which I had assumed was behind my lines! |
||||||||||||||
| 0 Comments |
| Bring up the reinforcements, NO! Not that far! |
|---|
|
Despite the large number of scenarios I have played I have noticed that I do have a tendency to be, on occassion, careless in my play, especially when I play solo. In this one a somewhat worn Soviet force is tasked with the need to block a German spearhead and keep them from gaining a travel path north. The Soviets start out with little to fight against a large German armored component which includes 5 full Tiger platoons except the omnipresent 76.2s (and one 85 battery). The Germans bring a full regiment of infantry plus a good deal of engineer support and the aforementioned slew of tanks. The Soviets do get reinforcements in the form of a tank brigade. The Germans begin eating their way up the road and track in parallel fashion with forces sufficient to complete the task on either end. The road brings a larger VP bonus to both sides so they both concentrate there while the track is held by a series of supporting AT emplacements and infantry outposts by the Soviets. The Germans bring their large force to bear on the town to the immediate front and use massed tank fire to soften the towns defenders while the 76s take pot shots. Since all of the Tigers are on this front the shots primarily bounce although a Pz IV does get a hit from time to time. The problem for the Soviets is that the Germans are gaining in VPs at a tremendous rate and it will be necessary to get the reinforcing armor in place quickly to avoid being overrun. Unfortunately the Soviets fail the die roll for the first full hour after they are available. The only thing keeping the Soviets in the game at this point were four turns with very quick FOW rolls (1,3 5, and 6 rolls into the turn). Finally on turn 8 the reinforcements arrive and rapidly move in front of the large town along the road, unload their SMGs and prepare for battle. What they apparently couldn't do, however is count to 8, the range of the AT weapon on a Tiger. After I finished the turn and breathed a sigh of relief for the Soviets I looked from a German perspective and noted that the T-34s were in range and sight of four of the five Tigers. Quickly at the beginning of the next turn 6 armor steps were blown away followed by 4 the next turn as the disrupted tanks became the next victims. The 20 points thus gained by the Germans were instrumental in blunting the hopes of the Soviets for a counterattack to turn the tide. By turn 14 (of 16) the Germans had secured a major victory total and appeared likely to retain it. Only a late assault by the remaining Soviet tanks on a town held by a company of infantry brought the total back to a minor victory. Assuming you don't make a blunder like I did, this one is very well balanced. The Soviets have plenty of fortifications and minefields which can force the Germans to lose turns. With only 16 turns there is little time to lose if they are to capture either the track or the road. I give it a "4" and it might rate a "5" without the mindless rush to death made by the 1st Guards Tank. This one is good in any play format. |
| 0 Comments |