
|
Manhandled South Flank #5 |
||
|---|---|---|
| (Attacker) Germany | vs | Soviet Union (Defender) |
| Formations Involved | ||
|---|---|---|
| Germany |  |
3rd SS "Death's Head" Division |
| Soviet Union |  |
16th Guards Mortar Regiment |
| Soviet Union |  |
263rd Mortar Regiment |
| Soviet Union |  |
694th Antitank Regiment |
| Soviet Union |  |
79th Guards Mortar Regiment |

| Total | |
|---|---|
| Side 1 | 1 |
| Draw | 1 |
| Side 2 | 7 |


| Overall Rating, 12 votes |
|---|
|
4.17
|
| Scenario Rank: 52 of 913 |
| Parent Game | South Flank |
|---|---|
| Historicity | Historical |
| Date | 1943-07-06 |
| Start Time | 05:30 |
| Turn Count | 22 |
| Visibility | Day |
| Counters | 242 |
| Net Morale | 1 |
| Net Initiative | 1 |
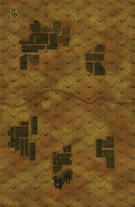
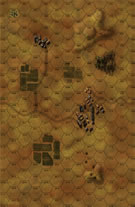
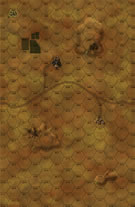
| Maps | 3: 36, 38, 39 |
| Layout Dimensions | 84 x 43 cm 33 x 17 in |
| Play Bounty | 188 |
| AAR Bounty | 147 |
| Total Plays | 9 |
| Total AARs | 5 |
| Battle Types |
|---|
| Delaying Action |
| Exit the Battle Area |
| Inflict Enemy Casualties |
| Road Control |
| Urban Assault |
| Conditions |
|---|
| Entrenchments |
| Minefields |
| Off-board Artillery |
| Randomly-drawn Aircraft |
| Reinforcements |
| Scenario Requirements & Playability | |
|---|---|
| South Flank | Base Game |
| Introduction |
|---|
|
The second day of Operation Citadel found Death’s Head Division attacking eastwards towards the Lipouyi Donets River while Army Detachment Kempf was advancing northward to meet them. It was imperative that the two formations link up so that their armor could be free to spearhead the advance, rather than being stuck protecting the two formations’ own flanks. Located between the Germans and their objectives was Colonel P.D. Govorunenko and his 375th Rifle Division. |
| Conclusion |
|---|
|
Colonel Govorunenko and his men clung tenaciously to every meter of ground and refused to yield an inch. Even though Army Detachment Kempf managed to advance all the way to Iastrebovo, the hoped-for linkup was not accomplished. That forced II SS Panzer Corps to detach almost one third of its total strength to secure its flank, thus weakening the spearhead. |

|
|
|---|
| AFV Rules Pertaining to this Scenario's Order of Battle |
|---|
|
| Schutzstaffel |
|---|
|


")
")
")
")
")
")


| Army (RKKA) |
|---|
|


")


| Guards |
|---|
|

| 7 Errata Items | |
|---|---|

|
All SS 105mm guns should have white, indirect fire values. (Shad
on 2010 Dec 15)
|

|
All SS 75mm IG guns are direct fire weapons (black), not indirect (white). (Shad
on 2010 Dec 15)
|

|
The reduced direct fire value of the SS HMG is 5-5 in Beyond Normandy and Road to Berlin. (plloyd1010
on 2015 Jul 31)
|

|
The Units in Beyond Normandy were misprinted with a movement factor of 5. The movement factor should be 8. (rerathbun
on 2012 Mar 21)
|
|
|
Liberation 1944's counters are mislabeled 'PzIVF2.' The counter's ratings are correct (Armor 5, Move 8, DF 11-6, AT 6-8). (rerathbun
on 2014 Feb 14)
|

|
The reduced direct fire value in Kursk: Burning Tigers is 4-4. (plloyd1010
on 2015 Jul 31)
|

|
Kommissars never get morale or combat modifiers. Ignore misprints. (Shad
on 2010 Dec 15)
|
| Sippin' Whiskey | ||||||||||||
|---|---|---|---|---|---|---|---|---|---|---|---|---|
Ok, I took a month to finish this one, actually a little over a month. This wasn't because I have been too busy but because the darn thing was so good it was hard to finish. There were so many choices and so much going on that it was hard to immerse myself and just drink it in. A regiment of SS plus a full panzer regiment go up against a full regiment of RKKA infantry backed by a full AT detachment and reinforced midplay by two companies of T-34s. The Germans are charged with controlling a road, controlling the towns, exiting units and avoiding losses. In the final analysis I found it too tough a task for the Germans despite their morale advantage and general air superiority. I say general air superiority because at times the Soviets will sneak some planes through to contest things. The Soviets set up in three lines. An annoying force in the first line. A much more serious force in the second line divided into a north and south section, each hidden in the fields off the road with AT guns entrenched along the road. And then a final strong line anchored in the large town controlling the road on the final mapboard. Given their low morale and high German firepower, massive losses are expected by the Soviets so unpressured areas are expected to transfer troops to the pressured areas as soon as possible. The Germans decide to ignore the obvious challenge to move in a broad front and instead opt for an overwhelming push on the southern edge of the board (nothing initially magical about the southern edge, it may have been because I sat there, turns out to have been brilliant as the Germans were able to use the large hill on the final mapboard as a marshalling area before assaulting the towns. The assault seemed to have gotten off well, causing 16 step losses in the first sex turns and destroying the annoying first line of the Soviets. I say, "seemed" to have gone well since the Germans lost 14 steps and 1 tank step during the same period. These losses would come back to haunt them. They were the result of multiple artillery strikes (the BM-13s, mortars and 76.2s) and some vicious opportunity fire. The Germans had mounted a battalion of SCH in halftracks to release at the right moment, presumably after the Soviet second line was breached. The losses through turn 6 demanded that the German have more oomph in the attack so the battalion was released from reserve and promptly hammered by the 76s and 85s while still mounted resulting in six more step losses in short order. Add to that a lucky shot by a 45mm and you can see that the German losses were going to be too high to meet the criterion for victory. Meanwhile on the north end of the second line a battalion of SS went up against two companies of Soviets in the fields. Although this attack started well it stalled and the Soviets went on a counterattack. This freed up some infantry to reoccupy some entrenchments previously held by 76mms and establish a strong presence along the road out of the main attack axis of the SS troops. At this point the Germans had a +1 on initiative. In the remaining 12 turns of the game the Germans were able to gain the turn initiative only three times. That, combined with early FOW rolls left a very disorganized mob of Germans advancing. This mob then had to divide in two to deal with Soviet tanks in the small town and in the woods to the northeast of the large town and the large town itself. By the end of turn 19 with only the small town, and one hex of the large town free of Soviets (despite the neutralization of the T-34s) and plenty more Soviet units where they came from, the Germans conceded the victory to the Soviets. They had driven a hole through the Soviets 8 hexes, to 10 hexes wide but could not even get to all the Soviets on the road nor those town hexes in the north end of the large town. While clearing either the road or the town was theoretically possible the German will was broken at that point. Losses for the Germans totalled 42 steps plus 6 tank steps and 5 leaders. The Soviets suffered worse, losing 53 steps, 11 tank steps and 10 leaders but had blunted the SS in this sector and put a huge delay in the attack. The only victory condition which would be met was exiting units, the remainder were clearly out of reach. This one was a blast to try out. In a way I am glad to be playing the Kursk scenarios now rather than earlier. Without the experience that I have had, the larger scenarios would have just seemed, well, unmanagable, rather than challenging. I will have to go back and replay at least one of my early plays (Soltsy the Prelude) which had a lot of units but I clearly played it poorly. I can't see giving this one anything less than a "5". But take your time - if you go too quickly you will miss some of the blended flavors! |
||||||||||||
| 0 Comments |
| SS Smackdown | ||||||||||||
|---|---|---|---|---|---|---|---|---|---|---|---|---|
This scenario is a brawl. Both sides have a regiment of infantry with lots of onboard AT, artillery, mortars and rockets. The SS also have about 2 battalions of tanks, while the Soviets get a few companies worth as reinforcements. The SS must achieve a number of VCs, with their level of victory determined by how many they accomplish. The tasks are to clear the road, take the town, exit 30+ steps, and suffer fewer than 30 steps casualties. The Soviets earn their victory by denying the SS their objectives. I chose a defense in depth for the Soviets, with AT guns placed in entrenchments and dug-in all over the place, hoping to maximize the chances of crossfire. I also dispersed infantry/HMG strongpoints in clusters of entrenchments throughout the depth of the position. The idea was to slow the SS by making them repeatedly deploy and attack positions while other positions would have them in their sights. The SS plan was to drive with the entire infantry regiment down the south edge of the board, two battalions in the lead to break open a hole and the third in tracks to exploit. The tanks were in reserve in the center, ready to join the tracked infantry once they got underway. To the north a small force was positioned to pin the Soviets in the north from reinforcing against the big push in the south. Both sides took steady casualties as the battle developed, with a step of Tigers taken out in a Sturmovik strike, to be finished off in a gutsy assault by Russian infantry, and the Russian AT positions and infantry strongpoints in the south steadily rolled back. However, the SS command structure in the south fell apart early, and a dearth of captains meant that lots of solitary lieutenants had to try to keep the momentum going. This was ultimately the downfall of the SS. The combination of deep Russian positions and fragmented SS command resulted in the hoped-for breakthrough coming too late in the game. As the final turns ticked by, the SS had failed to achieve any of their objectives. This was a big, messy brawl. Both sides had small victories here and there, but the SS lacked any sort of sustained energy. Major Soviet victory. |
||||||||||||
| 0 Comments |
| I Hated this scenario. | ||||||||||||||
|---|---|---|---|---|---|---|---|---|---|---|---|---|---|---|
I played a delaying tactic for the whole game. This was the first scenario were not until the very last shot was fired, was the winner decided. The Soviets lost all but 3 steps (a full smg and a reduced smg) located in an entrenchment at the east end of the road surrounded by 5 german tanks. It was a brutal way to play always retreating, firing only those units that were safely distant from the Germans. Also it took 3 to 3 1/2 hours per turn, way to long when you are just sitting there watching the Germans crawl forward destroying all within their reach each turn. With the occasional good roll the Soviets were able to destroy the required 30 steps to stop any chance of a Major Victory by the Germans. The Soviet minor victory was owed to the gods of war. The delaying tactic only worked because there was not another option. This scenario, even with the glorious final result, drags one to the pit of hell and dumps you in. By the way the minefields were placed to make the road unless to the Germans and the entrenchments were almost all on board 38 (east end) so that the Germans could not use them as shelter. |
||||||||||||||
| 1 Comment |
| Really Russian Marginal Victory | ||||||||||||||
|---|---|---|---|---|---|---|---|---|---|---|---|---|---|---|
My opponent very generously termed the outcome a draw- but the Russians inflicted 30 steps of losses on the Germans and kept them from clearing the road- specifically the LAST road hex of the last board on the last turn. It was extremely frustrating to play what was for the Germans a complete and utter walkover only to have fog of war rolls steal away those precious activations when they were most needed. Playing with fog of war rolls definitely creates problems for whoever is on the offensive- as the German I had to prioritize constantly, and although I think I've gotten slightly better at doing so, I still encountered great difficulty bringing up supporting artillery pieces. There were even leaders and units who just fell by the wayside during the course of the game. I simply didn't have the opportunity to get them back into play. The Germans barreled over the Russians, once they caught up with them. Although it doesn't seem necessary, the Germans need to basically wipe out the Russians where he can find them. One cannot just leave Russians behind the front lines- they could be used to deny victory conditions. This scenario wasn't really a fight so much as it was a set-piece exercise on coordinating leaders and mobilizing massive numbers of men and machines in the most useful fashion that fate allowed. |
||||||||||||||
| 0 Comments |
| Manhandled more like badly handled | ||||||||||||
|---|---|---|---|---|---|---|---|---|---|---|---|---|
My first foray into Kursk was a solo effort and what a good scenario this is. The Germans have to clear the east/west road over three boards, clear all town hexes and exit 30 steps off the board edge just to get a minor victory. The SS are well equipped but facing them are entrenchments, T34's and a well dug in force of Soviet INF and assorted support platoons. It looks a tough ask for the Germans and in my game so it proved. The Red Army can defend in depth and also trade space for time, falling back slowly towards the main town on board 38. Some of the German AFV are fairly vulnerable to 76.2 Art so some care must be taken with the PZIIIJ's in particular. The German attack opened with three main thrusts one in the centre and one to each flank, the left flank attack got bogged down very quickly but the other two attacks surged forwards however the Russian forces waited until the last moment and slipped away to form another line further to the east, losses were in fact light on both side considering the amount of firepower available. However losses soon began to mount as the sun rose and the SS pressed forward against the trenches and minefields in their way. The Soviet tactic of just dropping back 400m before the main German line was working well, even though it seems to go against the grain to evacuate well prepared defensive positions, the clock was ticking and in this scenario time is the Red commanders ally. With 2 hours left the German commander was forced to throw some caution to the wind and with the help of the Luftwaffe's Stuka's finally started to make some inroads onto the Soviet defense with 16 Soviet steps eliminated for only 6 SS steps there seemed to be a glimmer of hope that at least one Victory Condition would be fulfilled. Alas two quick turns later (FOW rolled after only 4 activation's for the Germans and 6 activation's respectfully) soon put paid to that and the attack was called off by by the German commander for a Soviet major victory. What a cracking scenario with excitement on every turn, as you can tell by the tone of my AAR I feel it favours the Soviets, however I am sure Herr Hughes will prove me wrong as this is one game I most certainly want to play FtF. As I am sure that the attack should have been better though out and I want to test my fallback defensive tactics against a live opponent. |
||||||||||||
| 2 Comments |
Is that a gauntlet being laid down for the next "Wayne Favourite" scenario when it's turn is to come ? :-)
It sure is, oh ugly one, but beware I think its pro Soviet and I hate to see you watering down your beer with the bitter tears of frustration.