| Author |
dricher
(Japan) |
| Method |
Face to Face |
| Victor |
Japan |
| Participants |
unknown
|
| Play Date |
2014-12-30 |
| Language |
English |
| Scenario |
KoTr009
|
On to the fifth battle of the Kokoda campaign. As I rate scenarios, the ratings will be based on the scenario as a stand alone scenario, not part of the campaign. I’m not sure if early scenarios benefit one side with the intent to gain a point lead, with later scenarios designed to close that gap, so I need to consider each as a stand alone.
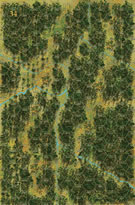
Victory for this scenario rests on a combination of village control (six for three points each) and steps inflicted against the adversary. The Australians finally get some quality troops mixed in with the low morale Maruba force, and start out controlling four villages. The Japanese have large numbers, but start out with one village (Missima) and most forces off board. The last village, Asigara, is unoccupied and between the Japanese onboard units and the Australians holding Abuari.
The Australians win initiative, and immediately seize Asigara. The first quarter of the game (six turns) sees the Japanese having trouble getting all their units on board, miserable assaults on Asigara, a slow crawl towards Isurava (hidden Aussies and firing lanes create fear), but about five Aussie steps lost to one for the Japanese. Australian lines are holding, but Asigara is under threat and the Japanese are beginning to infiltrate around the Aussie right, and the hidden units are located.
During the second quarter, the previously hidden Aussies fail to open fire and potentially pulverize the three high stack of Japanese that are adjacent. The Japanese assault, and start the long process of wearing down a strong Australian stack. Asigara is still under contention, but the Japanese are gaining the upper hand as the infiltrators slowly work back to Abuari and cut off potential reinforcements. Assaults fill the trail hexes, and Australian casualties are mounting quicker than Japanese. The Japanese are now well positioned around Isurava, and are probing the Australian center. Japanese mortars have been shaking up Australian positions, but morale recovery has kept the Australian lines together. The Australian extreme left is held by an Inf and HMG of the 2/14, and has so well shrugged off Japanese mortar effects that the Japanese have developed a superstitious fear of the HMG and will not approach for fear of opfire.
As the game reaches about the halfway mark the Australians make a move that will change the course of the New Guinea campaign. Isurava is held by an Inf and HMG from Maruba force, and the Japanese are beginning to put pressure on the area. The Aussie Lt Col decides the village is under too much threat, and moves the extreme flank HMG towards the village. What Japanese mortars have been unable to achieve is accomplished by the Australian commander. The Japanese immediately approach and assault the remaining Inf on the Australian extreme left. The unit dies quickly. As the HMG arrives in Isurava, the Japanese turn the triple mortar stack against the now triple stacked Isurava, and the reinforcing HMG immediately demoralizes. The Lt Col, adjacent to the left flank Inf, opens up on the untouched assaulters and fails to score an impact. The Japanese respond with another assault, on the Lt Col’s position, and not only score a step loss, but the leader check sees the Lt Col go down in a hail of gunfire. The Australians in the assault hex suffer from another morale check, and the entire western half of Australians units cannot move for three turns. The Japanese respond with excitement, mortars and point blank fire riddle the Isurava defenders, more Japanese rush into contact with the Australian left, assaults begin wiping out the Australians, and more Japanese push through the Australian center. The entire Australian position is now compromised, and the Japanese are running rampant.
As the third quarter of the game plays out, first Asigara falls, then Isurava, then the Rest House, and Abuari comes under assault. Japanese troops punching through the center head all the way south and take Alola. Even an 8-point mortar barrage against Abuari results in a step loss against a demoralized unit, but also causes a step loss against Japanese troops in an adjacent assault hex, and causes the leader to demoralize while disrupting all three Japanese units. Abuari finally falls, and what little is surviving of the Australians are trying to escape further Japanese punishment.
The end game sees the Japanese unwilling to spend effort hunting down the few remaining Australians units, but rather consolidates the hold on all six villages and continues to grind down what few Australian units that are still in assault hexes, slowly killing them. In the end, the Japanese suffer six step losses to the Australians 51, and hold all six villages.
End score for the scenario, Japanese 69, Australians 8.
Rated this scenario as a 4. The game was actually much closer than the score makes it seem. Halfway through the scenario the Australians held four villages to the Japanese one (with Asigara close), and while they had suffered about 12 steps to four for the Japanese, the score was almost even and the Japanese were stacked up so deep they had problems advancing against the Australian line. The lynchpin move of the HMG, which resulted in a cascade of flank collapse, commander death, and a village highly susceptible to mortars, is really what changed everything. At that point there was nowhere the Japanese could not penetrate and assault. That’s when the casualty count started, and the Aussies could not fall back in defense. Scenario length probably tilts the balance to the Japanese to a degree, but I believe the a-ha moment was what kept this game from resulting in a draw or minor Japanese victory. Prior plays on PG HQ show the Aussies can win this one.
Campaign score: Japanese 135, Australians 18.
|