
|
Milne Bay Scenario 4: Assault on No. 3 Airstrip Kokoda Campaign #28 |
||
|---|---|---|
|
(Defender)
Australia
(Defender) United States |
vs | Japan (Attacker) |
| Formations Involved | ||
|---|---|---|
| Australia |  |
7th Infantry Brigade |
| Japan |  |
5th Kure Special Naval Landing Force |
| United States |  |
43rd Engineer General Service Regiment |
| United States |  |
709th Airborne Anti-Aircraft Battery |

| Total | |
|---|---|
| Side 1 | 0 |
| Draw | 0 |
| Side 2 | 1 |


| Overall Rating, 1 vote |
|---|
|
3
|
| Scenario Rank: --- of 913 |
| Parent Game | Kokoda Campaign |
|---|---|
| Historicity | Historical |
| Date | 1942-08-28 |
| Start Time | 06:00 |
| Turn Count | 24 |
| Visibility | Day |
| Counters | 61 |
| Net Morale | 2 |
| Net Initiative | 1 |
| Maps | 1: 34 |
| Layout Dimensions | 43 x 28 cm 17 x 11 in |
| Play Bounty | 158 |
| AAR Bounty | 171 |
| Total Plays | 1 |
| Total AARs | 1 |
| Battle Types |
|---|
| Airfield Control |
| Inflict Enemy Casualties |
| Conditions |
|---|
| Off-board Artillery |
| Terrain Mods |
| Scenario Requirements & Playability | |
|---|---|
| Kokoda Campaign | Base Game |
| Introduction |
|---|
|
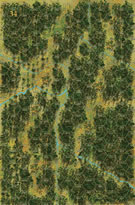
By dawn on 28 August the Japanese force was approaching No. 3 airstrip. Nearly perpendicular to the advancing Japanese force, the airstrip was a good defensive position with clear lines of fire. Brigadier Field of 7th Brigade was in charge of defending the area with a combined force of Australian and U.S. Army troops. |
| Conclusion |
|---|
|
The Japanese tanks bogged down before ever making it to the airfield and the heavy weapons of the US troops (reflected by the engineers and the additional HMGs used in this scenario) aided the Australians in holding the airfield. A subsequent night assault yielded the same result, and soon the Japanese High Command ordered a withdrawal to the landing beaches. |
| Additional Notes |
|---|
|
Australian pieces are used for the Americans. |

|
|
|---|
| AFV Rules Pertaining to this Scenario's Order of Battle |
|---|
|
| Army |
|---|
|


| Imperial Japanese Army |
|---|
|


| Imperial Japanese Navy |
|---|
|


| Assault on #3 Airstrip |
|---|
|
This scenario did not start out well for the Japanese, after the first 8 turns of battle it looked like they were going to go down in defeat, they had made contact with the main Aussie defensive line but first contact extracted a heavy toll from the SNLF, 6 steps worth including an officer. There was a ray of hope, two companies IJA units lead by 2 platoons of SNLF and a good naval officer utilized creek movement to position themselves on the flank of the Australian defensive line. After surviving unscathed from opportunity fire the next turn they assaulted the enemy positions which resulted in the Aussie left flank collapsing rather quickly. The SNLF forces along the trail rallied from their disastrous start and with the help of the tank section routed the main blocking force giving them so much trouble along the trail. They chased the demoralized remnants to the second Aussie defensive line but this time there was no devastating opportunity fire and next turn the leading units assaulted the enemy positions. The tank section and a reduced SNLF platoon with the SNLF Commander continued on to the airfield. Minor skirmishing continued as the Aussies struggled to regroup in order to eliminate the Japanese forces at the airfield. What saved the day for the Japanese was their better morale, especially in the assault, with the added column shifts from better morale, officer and being Japanese infantry against the low morale of the Aussies, gave them the edge, that is if they survived the opportunity fire to get adjacent, which in the beginning they got slaughtered but those dice rolls were in frequent during the midpoint and absent during the last 6 turns which allowed the Japanese to capture two airfield hexes and a minor victory. |
| 0 Comments |