
|
Pursuit Kokoda Campaign #2 |
||
|---|---|---|
| (Defender) Australia | vs | Japan (Attacker) |
| Formations Involved | ||
|---|---|---|
| Australia |  |
39th "Hawthorn-Kew" Infantry Battalion |
| Japan |  |
144th Infantry Regiment |
| Japan |  |
15th Independent Engineer Regiment |

| Total | |
|---|---|
| Side 1 | 9 |
| Draw | 0 |
| Side 2 | 4 |


| Overall Rating, 13 votes |
|---|
|
3.62
|
| Scenario Rank: 312 of 913 |
| Parent Game | Kokoda Campaign |
|---|---|
| Historicity | Historical |
| Date | 1942-08-12 |
| Start Time | 08:00 |
| Turn Count | 14 |
| Visibility | Day |
| Counters | 45 |
| Net Morale | 2 |
| Net Initiative | 2 |
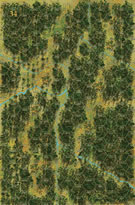
| Maps | 1: 34 |
| Layout Dimensions | 43 x 28 cm 17 x 11 in |
| Play Bounty | 140 |
| AAR Bounty | 147 |
| Total Plays | 13 |
| Total AARs | 5 |
| Battle Types |
|---|
| Urban Assault |
| Conditions |
|---|
| Terrain Mods |
| Scenario Requirements & Playability | |
|---|---|
| Kokoda Campaign | Base Game |
| Introduction |
|---|
|
The fight at Kokoda provided a morale boost for both sides. Though they were unable to hold the village after taking it, the tactical victories scored by A and D Companies proved for the first time that the Japanese were not supermen able to sweep all before them. As for the Japanese, the fact that no enemy reinforcements arrived to hold Kokoda told them just how thin the Australian forces facing them were. Previously content to just sit at Kokoda and wait for the main body of South Seas Detachment to arrive, Col. Yokoyama and Lt. Col. Tuskimoto resolved to purse the retreating Australians and perhaps destroy them. Meanwhile, Maj. Cameron brought E Company (the last of his fresh reserves) forward to join C and D Companies in an attempt to blunt the new Japanese advance. |
| Conclusion |
|---|
|
The Japanese assault came against the left flank of the line, manned by the untried troops of E Company. Under constant fire for most the morning, the Australian line bent but did not break. But as the Japanese broke off the attack early that afternoon, it was clear to Major Cameron that his men could not fight off a second attack and he made plans to withdraw back to Isurava. There the Aussies would make a new stand and wait for more reinforcements. Deciding that they could not catch and destroy the Australians in retreat, the Japanese once again went back to waiting for the main body of the South Seas Detachment. |

|
|
|---|
| Army |
|---|
|


| Imperial Japanese Army |
|---|
|


| Forward defence and a walk in the woods. |
|---|
|
As the victory condition is solely dependent on control of a village hex, I set the Aussies up in a forward defence along the trail hoping to get into the other village near the north map edge ahead of the Japanese. This strong stack with a great leader proved to be immovable. I probably assaulted it too soon thinking that time was of the essence. Instead I should have moved more Japanese adjacent to soften up the village first. Due to some great/lucky rolls the Aussies eliminated several Japanese infantry and demoralized others. Meanwhile the remaining Japanese wandered around the woods until stumbling upon the next defensive position. They had more luck here, reducing some units and pushing others back demoralized. However time ran out with the Japanese still not even adjacent to the victory village hex. I made a couple of rule mistakes; HMGs are less effective on assaults and the shift in assaults for Japanese troops but I don't think it affected the result. When I revisit this one I think the Japanese will get a lot closer to winning. |
| 1 Comment |
| Nailbiter! |
|---|
|
The Australians set up one kill stack dug in in the objective village, and the remainder of their units in the surrounding jungle, giving the Japanese quite a tough assignment. The two 81mm's set up in a clear hex on the map edge, ready to rely on friendly units to provide spotting. The mortars caused quite a bit of damage once the Japanese finally got units into spotting position, but the Aussies didn't make it easy. With the setup advantage, the Australians did a really good job pinning their opponents back and disrupting their plans. The action was back and forth, hot and heavy. For a good bit of the day, it looked as though the tough but outnumbered Australians would manage to hold onto the village. But a couple of lucky rolls (A 2 and a 3!) by two Japanese stacks eliminated the defenders in the village at the beginning of turn 14, leaving a Japanese engineer unit free to stroll in and claim the victory hex just as time expired on the game. I think this one could easily go either way, depending on which side the dice favor on a given day. |
| 0 Comments |
| Pursuit |
|---|
|
0800 - After turn 1, as the Aussie's perform a delaying action towards village 0911, the Japanese enter the AO in force. A lone INF platoon and their brave LT take up a defensive position in village 0414 blocking the trail and giving their comrades more time. His orders are to hold as long as possible then retreat down either trail or the stream bed. The rest of the battalion splits into 3 groups each heading down open terrain. The left most force will head to village 0911 and hold there. The other 2 forces will head down the stream and secondary trail to deny easy access to flank the village from the East. The race is on. Panzer Grenadier: The Final - 1115 hours. The Aussie's hold on to village 0911, barely, with a reduced HMG and reduced INF platoons. Australian victory. Losses were high on both sides. Japanese losses were 16 steps of INF (8 platoons), 2 steps of ENG (1 platoon), the LT Colonel and 2 Lieutenants. Australian losses were 13 steps INF (3.5 platoons), 2.5 steps HMG (1.5 platoons), the Major and 2 Lieutenants. Key Moments The Lieutenant and INF platoon holding village 0414 (NE corner) held on till 0845 hours when they were finally overrun, there were no survivors. A Lieutenant and 2 INF platoons were dispatched at approximately 0900 to silence the Japanese mortar platoons on the 80 meter hilltop in the NW corner, as they were reining terror down on the defenders at village 0911. They made it by 1015. At 1030 they assaulted and continued to assault until 1115. The MTR platoons took no losses but were silenced for the remainder of the battle. This was key as they were creating havoc at village 0911 and I believe this was why the Australians were able to hold on to the end. It is doubtful that the village would of been held for very much longer. |
| 0 Comments |
| One More Turn |
|---|
|
The Japanese were looking for a little payback after their disappointing defeat in Scenario 1, they divided their forces into two groups; the main force would head down the west trail to the objective with most of the infantry & best officers, while two infantry platoons & the engineers would head down the east trail with the goal of taking the objective from behind. The two 81mm mortar units were to get on the board as quickly as possible to provide indirect fire support. Australians drew some mediocre officers, with the exception of one charismatic young lieutenant, 10-1-2, who was given the task of holding the objective at all cost. His force was the two HMG’s & one infantry platoon. Two platoons were tasked with holding the village at hex 0414. The rest of the Aussies would set up blocking positions along the trail to the objective & fallback as necessary delaying the Japanese advance. The east Japanese force easily overwhelmed the Aussie blocking force at hex 0414 with the help of the 2 81mm mortars and moved down the trail to get in behind the Aussie forces but they did not get into contact with any Aussie units before the scenario ended, actually they got lost in the jungle and were never seen from again. The main Japanese force quickly moved down the west trail & come into contact with the enemy blocking forces as soon as they tried to cross the creek. They were able to get the upper hand on the Aussies forces so the delay was minimal. On the move again the scenario was looking good until the lead Japanese units come into contact with the Aussie Lieutenant in the village and then things started to unravel for the Japanese. The young lieutenant opened fire at the lead Japanese forces coming down the trail with opportunity fire; disrupting, demoralizing and eliminating a step. The rest of the Japanese units piled up behind the lead stack, the Japanese needed to get more units adjacent to the village to suppress and assault the Aussie forces if they were going to have any chance to win the scenario, their only option was the jungle. The jungle disorientation gods were on the Japanese side this time as he rolled sixes & eights when he needed them the most, positioning a number of platoons adjacent to the village objective. But the Aussie forces held against countless DF & BF attacks as the Japanese tried to soften up the enemy forces while they gathered enough full strength units for the final assault on the objective. When this came the young lieutenant was able to rally his forces despite the odds and beat off the attacking Japanese forces. Even though the Japanese routed or eliminated most of the Aussie forces they could not dislodge the young Lieutenant and his command from the objective. So the game ended with another Aussie Victory. Without this 10-1-2 Aussie Lieutenant, bending but not breaking, while holding the objective, this scenario would have been a Japanese victory. |
| 0 Comments |
| Holding on by their fingernails | ||||||||||||
|---|---|---|---|---|---|---|---|---|---|---|---|---|
An Australian militia force needs to defend one village hex against a larger Japanese force. The Australians still have militia-level morale(7/6)and a two-level initiative deficit. The basic tactics are for the Australian forces to set up a line just in front of the village with a small reserve in the village to reinforce assault hexes or act as a last ditch defense. The majority of the Japanese force comes up the trail for a frontal attack on the Australian positions, with a small flanking group of four platoons and two LT's that will attempt to go cross-country until the Japanese player gets tired of bad disorientation rolls. It takes the first six turns (of 14 total), for the Japanese player to get units into position for the initial assaults, and four Japanese infantry steps are lost to opportunity and first fire, in exchange for an awful lot of disrupted Australians. The Australians start recovers, commit their reserves, and surprisingly hold the Japanese in the four assault hexes for the next hour. By turns 12 and 13, the Japanese finally clear 3 out of four assault hexes, but it is too late to get enough troops into the village to win that assault. At the cost of 11 lost Australian steps (Japan loses 5), the village remains disputed at scenario end, giving an Australian victory. Very close to the historical result - a very badly bent but still unbroken Australian defense just manages to dispute control of the village objective. The scenario itself is a straightforward assault bash. The Japanese player might have tried harder for a flanking movement, or tried to exit units out of the assault hexes and into the village sooner. Across the four scenario Delusion set, both sides met their minimum objectives of reaching the Kokoda airstrip; three Japanese wins against 1 Australian win. If you assign 15 VP's to the Australian side for this scenario, the Japanese win this scenario set 69-31. I enjoyed the "story arc" of the scenarios and look forward to the next campaign. |
||||||||||||
| 0 Comments |
Dougie, if you have rules questions or need clarifications, post your questions in the forums and someone will generally answers within 24 hour.