|
Convoy South Pusan Perimeter #19 |
||
|---|---|---|
| (Attacker) North Korea | vs | South Korea (Defender) |
| Formations Involved |
|---|

| Total | |
|---|---|
| Side 1 | 0 |
| Draw | 1 |
| Side 2 | 1 |
| Overall Rating, 2 votes |
|---|
|
4
|
| Scenario Rank: --- of 913 |
| Parent Game | Pusan Perimeter |
|---|---|
| Historicity | Historical |
| Date | 1950-07-09 |
| Start Time | 07:00 |
| Turn Count | 22 |
| Visibility | Day |
| Counters | 0 |
| Net Morale | 1 |
| Net Initiative | 0 |
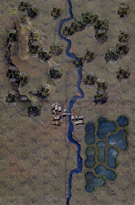
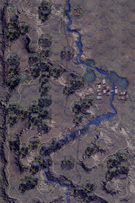
| Maps | 2: 92, 94 |
| Layout Dimensions | 86 x 28 cm 34 x 11 in |
| Play Bounty | 144 |
| AAR Bounty | 171 |
| Total Plays | 2 |
| Total AARs | 1 |
| Battle Types |
|---|
| Exit the Battle Area |
| Inflict Enemy Casualties |
| Conditions |
|---|
| Hidden Units |
| Smoke |
| Scenario Requirements & Playability | |
|---|---|
| Pusan Perimeter | Base Game |
| Introduction |
|---|
|
North Korean front-line formations showed a great deal of discipline and planning when actually in contact with the enemy. When advancing against token opposition or none at all, they could become surprisingly careless. Near Chinch’on, one of the NKPA 2nd Division’s columns ran into an ambush set by the Capital Division and some South Korean police. |
| Conclusion |
|---|
|
A successful ROK ambush netted four artillery pieces and 27 vehicles captured, temporarily blunting the North Korean advance. A three-day battle for the Chinch’on and Chonui areas began, eventually resulting in a South Korean withdrawal. The arrival of American supplies improved the ROK Army’s capacity to fight, while just the presence of American ground forces – the ROKs were as yet unaware of their poor performance – greatly boosted their will. |
| AFV Rules Pertaining to this Scenario's Order of Battle |
|---|
|
| 1 Errata Item | |
|---|---|
| Scen 19 |
The South Korean M20 counter presented in the game, and the special rules associated with it, are erroneous. Click on the unit in the Order of Battle to be taken to unit's page for further explanation and replacement counters. (plloyd1010
on 2023 Feb 01)
|
| Korean War: Pusan Perimeter, scenario #19: Convoy South | ||||||||||||
|---|---|---|---|---|---|---|---|---|---|---|---|---|
Korean War: Pusan Perimeter, scenario #19: Convoy South Interesting puzzle scenario to play and movement across two lengthwise maps. Pretty easy victory conditions, the North Koreans win if they exit four or more steps off the south edge of the map and the South Koreans win if they eliminate four or more enemy steps. My scenario ended in a Draw with the NKPA losing three steps while only exited two steps of BA-64 armored cars as a token jester at the end of the game. While the ROKs only eliminated three steps of NKPA falling short by one step and losing two of their own steps while the map was spread out with demoralized and disrupted units. The ROKs should have won this but too many units in the south as safety measure leaving the northern units unsupported much of the game. The other big mistake was trying to charge with a stack of three Cavalry units as even a BA-64 with a DF of only 4 but rolling a 3 on the dice, getting an adjacent modifier of 2, plus a 1 modifier for three enemy units in a stack can do a lot of damage. The NKPA had to unlimber their guns to fire in support of their Infantry and had no chance to exit and the Infantry got tangled in two maps of endless combat. I think this scenario favors the ROKs even though my game was a Draw. With that said, it only takes a few good dice rolls in a small scenario and the events can change. Also, the setup is critical to having different results. So play away, as you never know? |
||||||||||||
| 0 Comments |

 KWPP018


