Panzer Grenadier Battles on April 27th:
Arctic Front Deluxe #40 - Children's Crusade Broken Axis #14 - Târgu Frumos: The Second Battle Scenario 3: Sledge Hammer of the Proletariat
Army Group South Ukraine #6 - Consternation Road to Berlin #73 - She-Wolves of the SS
Errors? Omissions? Report them!
Ch’unch’on Day 3
Pusan Perimeter #9
(Attacker) North Korea vs South Korea (Defender)
Formations Involved
Display
Balance:


Overall balance chart for KWPP009
Total
Side 1 1
Draw 0
Side 2 2
Overall Rating, 3 votes
5
4
3
2
1
4
Scenario Rank: --- of 913
Parent Game Pusan Perimeter
Historicity Historical
Date 1950-06-27
Start Time 08:00
Turn Count 24
Visibility Day
Counters 108
Net Morale 1
Net Initiative 0
Maps 2: 94, 95
Layout Dimensions 56 x 43 cm
22 x 17 in
Play Bounty 173
AAR Bounty 165
Total Plays 3
Total AARs 2
Battle Types
Urban Assault
Conditions
Off-board Artillery
Smoke
Scenario Requirements & Playability
Pusan Perimeter Base Game
Introduction

The first days of the North Korean offensive revealed that when accompanied by armor, the NKPA could push the ROK troops around pretty much at will. Without their T-34’s, they could sometimes still get their way, but often the South Koreans would rally and stand their ground. On the third day of the battle for Ch’unch’on, the 7th Division entered the battle with a small spearhead of nine T-34/85 tanks the NKPA planners hoped would be enough to make a difference.

Conclusion

As their Soviet advisors could have warned, the North Korean II Corps’ commitment of nine tanks did not represent armor support. The South Koreans devastated the attacking NKPA formations, inflicting massive casualties on the 2nd Division (though far fewer on the tank-supported 7th Division). The NKPA did take the city, but only after units on the flanks of the ROK 6th Division collapsed and it was forced to withdraw.


Display Relevant AFV Rules

AFV Rules Pertaining to this Scenario's Order of Battle
  • Vulnerable to results on the Assault Combat Chart (7.25, 7.63, ACC), and may be attacked by Anti-Tank fire (11.2, DFT). Anti-Tank fire only affects the individual unit fired upon (7.62, 11.0).
  • AFV's are activated by tank leaders (3.2, 3.3, 5.42, 6.8). They may also be activated as part of an initial activating stack, but if activated in this way would need a tank leader in order to carry out combat movement.
  • AFV's do not block Direct Fire (10.1).
  • Full-strength AFV's with "armor efficiency" may make two anti-tank (AT) fire attacks per turn (either in their action segment or during opportunity fire) if they have AT fire values of 0 or more (11.2).
  • Each unit with an AT fire value of 2 or more may fire at targets at a distance of between 100% and 150% of its printed AT range. It does so at half its AT fire value. (11.3)
  • Efficient and non-efficient AFV's may conduct two opportunity fires per turn if using direct fire (7.44, 7.64). Units with both Direct and AT Fire values may use either type of fire in the same turn as their opportunity fire, but not both (7.22, 13.0). Units which can take opportunity fire twice per turn do not have to target the same unit both times (13.0).
  • Demoralized AFV's are not required to flee from units that do not have AT fire values (14.3).
  • Place a Wreck marker when an AFV is eliminated in a bridge or town hex (16.3).
  • AFV's do not benefit from Entrenchments (16.42).
  • AFV's may Dig In (16.2).
  • Open-top AFV's: Immune to M, M1 and M2 results on Direct and Bombardment Fire Tables, but DO take step losses from X and #X results (7.25, 7.41, 7.61, BT, DFT). If a "2X" or "3X" result is rolled, at least one of the step losses must be taken by an open-top AFV if present.
  • Closed-top AFV's: Immune to M, M1 and M2 results on Direct and Bombardment Fire Tables. Do not take step losses from Direct or Bombardment Fire. If X or #X result on Fire Table, make M morale check instead (7.25, 7.41, 7.61, BT, DFT).
  • Closed-top AFV's: Provide the +1 modifier on the Assault Table when combined with infantry. (Modifier only applies to Germans in all scenarios; Soviet Guards in scenarios taking place after 1942; Polish, US and Commonwealth in scenarios taking place after 1943.) (ACC)
  • Tank: all are closed-top and provide the +1 Assault bonus, when applicable
  • Self-Propelled Artillery: do not provide the +1 Assault bonus, even if closed-top (SB)
  • APC – Armored Personnel Carrier: These are Combat Units, but stack like Transports. They can transport personnel units or towed units. They are not counted as combat units for the +1 stacking modifier on the Direct Fire and Bombardment Tables (4.4). They may be activated by regular leaders and tank leaders (1.2, 3.34, 4.3, 5.43). They do not provide the +1 Assault bonus (ACC).
  • Armored Cars: These are Combat Units. They are motorized instead of mechanized. All have their own armored car leaders, who can only activate armored cars (6.85). Do not provide the +1 Assault bonus (ACC).
  • Reconnaissance Vehicle: 8.23 Special Spotting Powers Both foot and vehicle mounted recce units (1.2) possess two special spotting abilities. The first ability is that they can spot enemy in limiting terrain at one hex further than the TEC specifies for other units and leaders. For example, an enemy unit in town can normally be spotted at three hexes or less, but a recce unit can spot them at four hexes.Their second ability is that they can place a Spotted marker on any one enemy unit they can spot per turn, just as if the enemy unit had "blown its cover" by firing. Such Spotted markers are removed as described earlier.

Display Order of Battle

North Korea Order of Battle
Chosŏn inmin'gun
  • Mechanized
  • Towed
South Korea Order of Battle
Daehanminguk Yukgun
  • Misc
  • Motorized

Display AARs (2)

Dead Skunk in the Middle of the Road
Author thomaso827
Method Solo
Victor South Korea
Play Date 2015-08-29
Language English
Scenario KWPP009

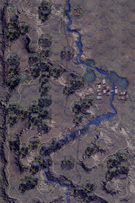
Once again, the NKPA attempt to take the town of Ch'unch'on with all that open space to the north and lots of hills and woods for the ROK to hide in. A self imposed time limit forced me to call the game at the halfway point, but the NKPA infantry was just about cut in half, and the NKPA armor sat outside the eastern gates of the city pounding away but doing no lasting damage that didn't immediately repair itself. Even with a 45+ column attack, the ROK troops just shrugged it off. The chances are that the NKPA armor, afraid of assaulting all that infantry in the streets without any infantry support of their own, have to fire adjacent hex into town, and even with a probable shift in luck to them at some point, the ROK force holding on to at least 1 hex looks innevitable. With 26 NKPA steps lost to only 2 ROK, the NKPA strength to take and hold the town was bleeding out. Great scenario to play again face-to-face when I have a chance and a little more time.

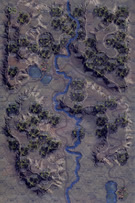
I decided that the report lacked some key things. In the last 2 attacks on this city, the NKPA lacked armor. This scenario added 2 platoons of T-34s and 3 of SU-76, as well as some armored personnell carriers. I decided to run an all armor force with the armored infantry down the eastern side to get closer to the city with armor while the infantry slogged through the rough terrain to try to hit the town from the west. This largely worked. The SMG tank riders were hit and left behind fairly early, and the BA-64 armored car got a bit too close and was demoralized in assault by a force that ventured out of the city, but the AC limped away to spend the rest of the game trying to recover. A well placed ROK AT gun succeeded in taking out 2 steps of SU-76 before a very well aimed OBA attack took out the gun. The armored infantry dismounted and were eliminated by effective direct fire from the city before they could attack. All this left a stack of 2 T-34s, a stack of 2 SU-76s and a stack of 2 BTR-40s, and I broke down the APCs to accompany the tanks and assault guns, and struck the east side of town with the two stacks. This is not without its risks, but risking assault in the open was not in my plan for the ROK troops, so the NKPA armor was in little danger. I suggest the NKPA follow this again, but massing the infantry to the west side of the road on board 94 and ignoring any defenders on board 95 to have the best chance of having enough survivors to assault the western city hexes. I managed several times to get a stack into the adjacent rice paddies and into assault with the western city hex, only to lose them entirely to the ROK first fire in assault. Concentrate what arty there is on the city to weaken the defense, and keep that AC back where it can use the recon ability to call OBA from a safe distance. The ROK has a big advantage in arty and terrain, so use the time available in the 24 turns and pound with everything you can bring to bear.

Another edit. The AC cannot call OBA but can spot the units in the city from 4 hexes instead of the usual 3. If he is accompanied by the armored infantry with a leader, that leader can take advantage of that spotting early on.

0 Comments
You must be a registered member and logged-in to post a comment.
Korean War: Pusan Perimeter, scenario #9: Ch’unch’on Day 3
Author JayTownsend
Method Solo
Victor North Korea
Play Date 2018-08-04
Language English
Scenario KWPP009

Korean War: Pusan Perimeter, scenario #9: Ch’unch’on Day 3

After playing all three Ch’unch’on scenarios you start to see what works for both sides and what doesn’t and you can try some new things out as well. On day one the ROKs won, on day two NKPA won by the skin of their teeth but on day 3 the NKPA won. Instead of using the good strategies for the ROKs I had on earlier Ch’unch’on scenarios I thought if I contracted my defenses into a smaller zone I could concentrate them better but what that did was allow the North Korean to move in close without those long delaying speed-bumps. The North Koreans also added for Day 3 some armor: T334/85s, SU-76s, BA-64s and BTR-40s which could pretty much lead the infantry into engagements, without losing so many infantry steps.

If you put together stack of 3 SU-76s you get a Death Star, as long as you avoid infantry assaults and Anti-Tank Guns, as they have a weak armor protection of zero! Also, there is nothing like the feeling of rolling a 3X on the combat charts, as it is a rarity but feels good when you do get it.

0 Comments
You must be a registered member and logged-in to post a comment.
Errors? Omissions? Report them!
Page generated in 0.272 seconds.