
|
The Korangp’o-ri Position Pusan Perimeter #5 |
||
|---|---|---|
| (Attacker) North Korea | vs | South Korea (Defender) |
| Formations Involved |
|---|

| Total | |
|---|---|
| Side 1 | 2 |
| Draw | 0 |
| Side 2 | 1 |


| Overall Rating, 3 votes |
|---|
|
4.33
|
| Scenario Rank: --- of 913 |
| Parent Game | Pusan Perimeter |
|---|---|
| Historicity | Historical |
| Date | 1950-06-26 |
| Start Time | 11:00 |
| Turn Count | 26 |
| Visibility | Day |
| Counters | 86 |
| Net Morale | 0 |
| Net Initiative | 1 |
| Maps | 2: 93, 95 |
| Layout Dimensions | 56 x 43 cm 22 x 17 in |
| Play Bounty | 168 |
| AAR Bounty | 171 |
| Total Plays | 3 |
| Total AARs | 1 |
| Battle Types |
|---|
| Bridge Control |
| Exit the Battle Area |
| Inflict Enemy Casualties |
| Urban Assault |
| Conditions |
|---|
| Off-board Artillery |
| Randomly-drawn Aircraft |
| Smoke |
| Scenario Requirements & Playability | |
|---|---|
| Pusan Perimeter | Base Game |
| Introduction |
|---|
|
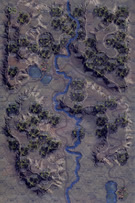
Captain Joseph R. Darrigo held the distinction of the only American officer on the 38th Parallel the morning of June 25th. He served as an advisor to the ROK 12th Regiment on the edge of Kaesong, just below Songak-san. At daybreak he awoke to the sound of artillery fire. As he jumped in his jeep, small-arms fire peppered the ground nearby. Starting the jeep he beheld a startling sight about a half mile away at the railroad station: in plain view scores of North Korean soldiers disembarked from fifteen train cars, formed up and began advancing toward the center of town. The 13th and 15th Regiments of the North Korean 6th Division had commenced their attack on Kaesong, killing or capturing most of the ROK 12th Regiment. Nothing, it seemed, could stop them. |
| Conclusion |
|---|
|
Only two 12th Regiment companies escaped to report Kaesong's capture. Local commanders decided to move the 11th Regiment to assist the 13th Regiment immediately in the Musan-ni and Korango’o-ri areas and agreed they would blow the bridge over the Imjin River after the 12th Regiment withdrew across it. The explosives failed to detonate as the North Korean 1st Division and supporting tanks of the 105th Armored Brigade approached. Failure to destroy the bridge led to bitter fighting. ROK soldiers of 13th Regiment engaged in suicide tactics, clutching high explosives and hurling themselves under the enemy tanks. Others approached the tanks with satchel or pole charges, or tried to pry open tank hatches and throw grenades inside. These volunteers destroyed a few tanks, but most were killed. The 2.36-inch bazookas and 37mm anti-tank guns proved ineffective against most of the advancing tanks, while the Soviet-made 122mm artillery out-ranged the South Korean 105mm American hand-me-downs. Nevertheless, ROK units fought hard in this area. They held up the enemy for over three days in the Korangp’ o-ri position, buying time for the South Korean Army to reassemble, and for American reinforcements to arrive. |

|

|
|---|
| AFV Rules Pertaining to this Scenario's Order of Battle |
|---|
|
| Chosŏn inmin'gun |
|---|
|


| Daehanminguk Yukgun |
|---|
|


| 1 Errata Item | |
|---|---|

|
These are single-step units. The back of the counters in Pusan Perimeter should be blank. (rerathbun
on 2014 Nov 04)
|
| Korean War: Pusan Perimeter, scenario #5: The Korangp’o-ri Position | ||||||||||||
|---|---|---|---|---|---|---|---|---|---|---|---|---|
Korean War: Pusan Perimeter, scenario #5: The Korangp’o-ri Position I was anxious to play Pusan again with the die-cut counters. The Korangp’o-ri Position scenario is still in the very beginning of the Korean War and the South Koreans are in a desperate fight to buy time. I put some ambushing ROK units forward in two positions on the northern map 95 where the North Korean juggernaut is entering the map. The rest of the South Korean forces are defending the bridges and town hexes on the southern map, map 93 as that is where most of the points are in this scenario. The victory conditions are very interesting for this scenario and should give both sides an interesting fight. The NKPA entered the map in two areas and were briefly held up by two ambushing groups of ROK units, they could have been better used in the defenses in the south. The American air-force made two appearances but with little effect and could not destroy any NKPA armor. After the North Koreans converged on main town and bridges on map 93, they came out with a major victory, as the ROKs wasted too much of their needed forces up north and the NKPA crushed the South Koreans with combine arms, of armor, infantry & artillery. It wasn’t without costs, as the NKPA lost 4 INF steps, 2 SMG steps and 1 BA-64 step but the ROKs lost many more steps and the NKPA controlled most of the victory conditions for a clear, major victory. But it was fun scenario to play throughout the turns. |
||||||||||||
| 0 Comments |