
|
Seoul by Noon Counter Attack #49 |
||
|---|---|---|
| (Defender) North Korea | vs | United States (Attacker) |
| Formations Involved |
|---|

| Total | |
|---|---|
| Side 1 | 0 |
| Draw | 0 |
| Side 2 | 2 |


| Overall Rating, 2 votes |
|---|
|
4
|
| Scenario Rank: --- of 913 |
| Parent Game | Counter Attack |
|---|---|
| Historicity | Historical |
| Date | 1950-09-25 |
| Start Time | 08:30 |
| Turn Count | 14 |
| Visibility | Day |
| Counters | 28 |
| Net Morale | 1 |
| Net Initiative | 1 |
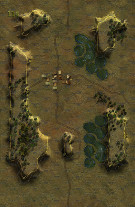
| Maps | 1: 114 |
| Layout Dimensions | 43 x 28 cm 17 x 11 in |
| Play Bounty | 150 |
| AAR Bounty | 165 |
| Total Plays | 2 |
| Total AARs | 2 |
| Battle Types |
|---|
| Delaying Action |
| Exit the Battle Area |
| Inflict Enemy Casualties |
| Conditions |
|---|
| Entrenchments |
| Smoke |
| Scenario Requirements & Playability | |
|---|---|
| Counter Attack | Base Game |
| Introduction |
|---|
|
Advancing on Seoul, the 1st Marine Regiment – led by Col. Lewis B. “Chesty” Puller, the most decorated Marine in American history and already a living legend – ran into a small North Korean roadblock backed by anti-tank guns. The Marines, of course, attacked; as Puller put it, “There are not enough (Asians) in the world to stop a fully armed Marine regiment from going where ever they want to go.” |
| Conclusion |
|---|
|
The North Koreans fought stubbornly, but the Marines drove them out with the help of a flame-throwing tank. After about half of the defenders had been killed, the remainder surrendered. The 1st Marines continued their advance, aiming right for the heart of the South Korean capital. |

|
|
|---|
| AFV Rules Pertaining to this Scenario's Order of Battle |
|---|
|
| Chosŏn inmin'gun |
|---|
|


| Marine Corps |
|---|
|


| 1 Errata Item | |
|---|---|

|
The 8-3 Marine Infantry counter appears in most of the Saipan 1944 and Marianas 1944 scenarios, replacing the 10-3 DF valued Marine counters for those scenarios and is currently published in the most recent Saipan printing. (JayTownsend
on 2015 Dec 26)
|
| Korean War: Counter-Attack, scenario #49: Seoul by Noon | ||||||||||||
|---|---|---|---|---|---|---|---|---|---|---|---|---|
Korean War: Counter-Attack, scenario #49: Seoul by Noon Kind of an interest puzzle of a scenario for both sides to play and another small fast playing scenario. Setup of the North Korean blocking forces looks to be critical in this scenario and I doubt I master this one but fun to tryout regardless of the outcome. I brought my Marine armor units of: M26 Pershing tanks, Bulldozer 105mm Sherman tanks and Flame throwing Sherman tanks on the map before risking my Infantry loaded trucks. The mighty assortment of armor pulls up adjacent to the blocking North Korean lines and fires pointblank risking the 45mm and ATR fire put are not breaking through fast enough. Worried about the short time factor, I finally risk some armor and start assaulting NKPA units and lose a step of Flame Sherman tanks in the process but open a nice whole in the lines, as many of my NKPA units are stretched too far apart. But after the American armor has destroyed a bit of NKPA Infantry and a AT gun, the Marine trucks pull forward and unload before the next line of NKPA units. But now the North Koreans are too thin and disorganized to stop the American exit. I also had to stop fighting with the NKPA forces and disengage in time to exit my units, or risk losing the scenario. It was a good thing I did pull out of the fighting in time, as if I hadn’t, I might have lost too many points but in the end the Americans won a Major Victory 18 points to 2 points, as exiting those tanks are worth double points per step. I believe this scenario favors the Marines, but my setup and defensive strategies as the NKPA player could have been better and certainly their dice rolls should have been better. |
||||||||||||
| 0 Comments |
| Surprisingly Tough Speed Bump | ||||||||||||
|---|---|---|---|---|---|---|---|---|---|---|---|---|
My second Korean contest had to involve the classic tank of the conflict: The M26 Pershing. I chose Scenario 49 for this reason; it also has a couple side benefits: A. Marines (only the second time I’ve fought using the USMC) and 2. The US commander, granted he’s not depicted in game terms, is the legendary Chesty Puller. On the surface, this looks like a rollover – besides two M-26 platoons the Marines get a Sherman Dozer and a Sherman Flame, though they only have two infantry units. The NKPA has more infantry but only two 57mm ATG platoons for AT fire. The North Koreans set up mostly in the town, with the roadblock just south of it and the entrenchment north of it. On the southern road at the edge of the ridge, the ATR and an infantry unit are dug in. Theoretically, the USMC could win by completely bypassing the town, though there would be a small risk of a loaded truck being taken out by an ATG. But that seems against the spirit of things; besides, in reality I can’t imagine such a force completely bypassing a reasonably powerful position without at least trying it. So the Marines enter the M26’s in their center, the M3’s on the south flank (as far from the southern NKPA 57mm as possible – it is still a threat to them) and the infantry near the northwestern hill, where it is unloaded in safety and then moved up to firing range of the northern entrenchment (57mm and an HMG.) Sure enough, the southern ATG drops a step from the advancing dozer Sherman, which takes several turns to recover from the subsequent disruption (partially because, at the risk of a couple more shots, it limps to the shelter of light woods to recover.) More surprising, the other ATG manages to take a bite out of one of the M26 units right off the bat. For a few turns the M26’s continue to trade shots with the entrenched position from a 2-hex range, taking fire from the ATG (and occasionally the southern one as well) with no further damage. The Marine infantry also snipes away at the entrenchment, to no avail. On the southern flank, the flame Sherman assaults the dug-in ATR and INF, taking out the ATR and reducing the INF. Over the next 45 minutes or so more of the NKPA infantry, including one SMG unit, join the assault and manage to demoralize the flame tank. Eventually it escapes the assault, but runs out of the flame fuel. Just about at that time, the recovered dozer unit joins it. Realizing that their DF attacks are going nowhere, and with time a-wasting, the M26’s charge through a town hex emptied by Koreans who went to join the flame tank assault. On the following turn, adjacent Koreans (HMG and INF) jump the tanks before they can keep moving, but they do no damage in the assault and in return are both demoralized, allowing the M26’s to exit with a small chance of damage (and none taken.) The ATG in town is quickly transported to the east edge, where a shot at the eastward-bound M26’s misses. On the northern flank, the Marine infantry advances to the next hill to the east without damage, and the trucks move ahead of them to where they might be able to reload in safety if/when needed. The south flank combat does not end well for the USMC. After the demoralized/reduced flame tank is joined by the newly recovered/reduced dozer tank, the NKPA SMG and INF – at first minus the leader – jumps them again before they can move, and over two turns the remaining steps of both armored platoons are gone, though the leader and the INF wind up demoralized. In the city, the Kommisar makes his usual contribution, rallying the demoralized SMG but failing with the SMG, resulting in a step loss. He then heads south to deal with the next demoralized unit. Having moved within one turn’s move of exiting east, the remaining Marines do so on Turn 12, two turns before the end of the scenario. Although there are now no combatants left, I feel that the Kommisar should still try and rally the demoralized unit to the south before the scenario officially ends. Over the last 2 turns the KOM reduces the demoralized INF, then succeeds in rallying it. So the Marines are still in good shape to reach Seoul, but have left behind a potentially troublesome (albeit a bit reduced) defensive position for follow-up troops to take care of – maybe air and artillery will be available. (Both sides could have used some OBA here.) The final tally of step losses: USMC: Sherman Dozer 2, Sherman flame 2, M-26 1. NKPA: ATR 1, INF 2, HMG 1. 3 M26 steps, two INF steps, and two PIO steps exited the east map edge. VP tally: NKPA 10, USMC 14. A USMC minor victory, barely – perhaps they would have done better had they gone full-bore into combat instead of attempting longer-range action and then skirting the position. And, really, you could almost call it a draw – if the scenario had not been allowed to go on two more turns to allow the KOM to work his magic on the demoralized INF, it would have ended with just a +3 nod for the Marines. In any case, this was not the rollover it first appeared. |
||||||||||||
| 0 Comments |