
|
Drive on Ponyri IV: Standing Their Ground Burning Tigers #23 |
||
|---|---|---|
| (Attacker) Germany | vs | Soviet Union (Defender) |
| Formations Involved | ||
|---|---|---|
| Germany |  |
216th Sturm Panzer Battalion |
| Germany |  |
656th Panzerjäger Brigade |
| Germany |  |
86th Infantry Division |
| Soviet Union |  |
1023rd Rifle Regiment |
| Soviet Union |  |
129th Tank Brigade |
| Soviet Union |  |
1442nd Self Propelled Artillery Regiment |

| Total | |
|---|---|
| Side 1 | 3 |
| Draw | 0 |
| Side 2 | 0 |


| Overall Rating, 3 votes |
|---|
|
5
|
| Scenario Rank: --- of 913 |
| Parent Game | Burning Tigers |
|---|---|
| Historicity | Historical |
| Date | 1943-07-06 |
| Start Time | 10:00 |
| Turn Count | 16 |
| Visibility | Day |
| Counters | 128 |
| Net Morale | 1 |
| Net Initiative | 1 |
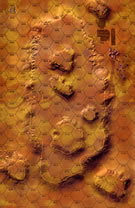
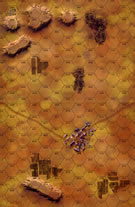
| Maps | 2: 41, 42 |
| Layout Dimensions | 56 x 43 cm 22 x 17 in |
| Play Bounty | 163 |
| AAR Bounty | 165 |
| Total Plays | 3 |
| Total AARs | 2 |
| Battle Types |
|---|
| Breakout |
| Delaying Action |
| Hill Control |
| Urban Assault |
| Conditions |
|---|
| Entrenchments |
| Minefields |
| Off-board Artillery |
| Randomly-drawn Aircraft |
| Reinforcements |
| Smoke |
| Terrain Mods |
| Scenario Requirements & Playability | |
|---|---|
| Burning Tigers | Base Game |
| Introduction |
|---|
|
As the sun rose the Germans around Ponyri still faced a determined enemy who had thwarted their ambitions on the previous day. While headquarters paid close heed to the timeline, they knew the Wehrmacht operated at the end of a long supply line making losses hard to replace. Therefore, maneuver would be employed as well as frontal assault to prevent unnecessary casualties. The attack on Ponyri began using the men already in position around the village, while strong elements of the 86th Infantry Division circled to the left attempting to cut off the village from the south. |
| Conclusion |
|---|
|
The plan looked good on paper and probably had a fair chance of success. However, the Soviets stood their ground stubbornly, exacting as well as paying a horrible price from the Germans for the three miles of ground surrendered. The Elefants again proved hard to stop, but the foot soldiers' sacrifices carried the day. |

|
|
|---|
| AFV Rules Pertaining to this Scenario's Order of Battle |
|---|
|
| Heer |
|---|
|


| Army (RKKA) |
|---|
|


| 4 Errata Items | |
|---|---|

|
The reduced direct fire value of the Heer HMG became 5-5 starting with Fall of France. (plloyd1010
on 2015 Jul 31)
|

|
The morale and combat modifiers of German Sergeant #1614 should be "0", not "8". (Shad
on 2010 Dec 15)
|

|
The movement allowance on the counters in Airborne is misprinted. It should be "3." (rerathbun
on 2012 Jan 30)
|

|
The reduced direct fire value in Kursk: Burning Tigers is 4-4. (plloyd1010
on 2015 Jul 31)
|
| Irresistible Force Met a Movable Object | ||||||||||||
|---|---|---|---|---|---|---|---|---|---|---|---|---|
The Soviets circled the wagons around the town hexes. The Germans did not hold back a flanking force, instead electing to hit the Soviets with everything they had in one blow. The Brummbars and Elefants did very well in culling Soviet strength down consistently throughout. The Germans also got air on 5 turns. The Soviets just couldn’t hold under the relentless beating. They did manage to have a few units on the 40 meter hexes at the end. The Germans did cut a corridor through the map and take the town hexes for a German victory. |
||||||||||||
| 0 Comments |
| Kursk: Burning Tigers, scenario #23, Drive on Ponyri IV: Standing Their Ground | ||||||||||||
|---|---|---|---|---|---|---|---|---|---|---|---|---|
Kursk: Burning Tigers, scenario #23, Drive on Ponyri IV: Standing Their Ground Needing an Eastern Front fix, I decided to play a scenario from Kursk: Burning Tigers and finally getting to use my new die-cut counters for it as well. Not sure what to do with my old laser counters? But this scenario was perfect for what I was in the mood for, a Kursk scenario, two maps and a nice mix of counters, including: Brummbars, Elefants and Goliaths. All of which I have never played with on a PG battlefield. The Germans have three victory objectives to try and accomplish to achieve different victory levels or defeats. They are; all town hexes, all 40 meter hill hexes and a five hex wide corridor from north to south. The Russians have entrenchments and minefields but kind of a thin line to defend all those German victory objectives. Both sides roll for air-support on even turns but the Germans have a modifier in their favor. The Germans also have two forces, one enters from the north and the other from the east on turn five or later depending on the dice roll. The first five turns are very tense, as the Germans can’t wait for their reinforcements to come, to achieve getting a victory in 16 turns. The German StuGIIIG are weak for dug-in Soviet T34s and paid the price for it but the Elefant tanks are monsters for 1943 and blow away most the Soviet armor. I just kept them away from Russian Infantry. The Soviets did manage to takeout a German Brummbar unit with a nice roll on the dice of a 12 with a 85mm AT Gun which in turn was taken out by the other German Brummbar. Steps eliminated didn’t matter in this scenario, which I kind of liked, after all it’s a bloody Kursk scenario! But the German Infantry was taking a beating in the 40 meter hills until their reinforcement arrived from the east and directly into the 40 meter hills from the other side and with the help of the Goliath units the Hills and entrenchments were conquered. The Germans also easily opened a five hex wide corridor. But after getting these two victory objectives, it was far too late to attempt taking the city hexes on map 42, where the Soviets had rung in the city with minefields and a good amount of AT Guns and Infantry, which I didn’t even attempt as it was too short of time to organize my units and I was too short on German Infantry at this point. Maybe I put too much Russian resources into defending the city. I always thought the Soviet SU-122 deserved a 12 Direct Fire rating, not a lowly 10, as it is a 122mm gun after all. So the Germans win a minor victory by getting two out of three victory conditions. On an enjoyment level, I would give this a 5 out of 5 rating and it was fun to finally get to use the Goliath units in game play. |
||||||||||||
| 0 Comments |