
|
Mt. Austin III Jungle Fighting #12 |
||
|---|---|---|
| (Defender) Japan | vs | United States (Attacker) |
| Formations Involved | ||
|---|---|---|
| Japan |  |
10th Mountain Gun Battalion |
| Japan |  |
124th Infantry Regiment |
| Japan |  |
228th Infantry Regiment |
| United States |  |
132nd "Queen of Battle" Infantry Regiment |

| Total | |
|---|---|
| Side 1 | 2 |
| Draw | 0 |
| Side 2 | 0 |


| Overall Rating, 2 votes |
|---|
|
3
|
| Scenario Rank: --- of 913 |
| Parent Game | Jungle Fighting |
|---|---|
| Historicity | Historical |
| Date | 1942-12-27 |
| Start Time | 10:30 |
| Turn Count | 16 |
| Visibility | Day |
| Counters | 66 |
| Net Morale | 2 |
| Net Initiative | 1 |
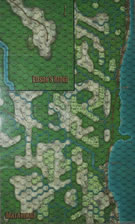
| Maps | 1: Guad-ME |
| Layout Dimensions | 84 x 55 cm 33 x 22 in |
| Play Bounty | 146 |
| AAR Bounty | 165 |
| Total Plays | 2 |
| Total AARs | 2 |
| Battle Types |
|---|
| Rural Assault |
| Conditions |
|---|
| Entrenchments |
| Hidden Units |
| Randomly-drawn Aircraft |
| Terrain Mods |
| Scenario Requirements & Playability | |
|---|---|
| Battle of the Bulge | Counters |
| Guadalcanal | Maps + Counters |
| Jungle Fighting | Base Game |
| Introduction |
|---|
|
The failure of the first two attacks on the GIFU position left the Americans no choice but to try things on a larger scale. The 1st Battalion of the 132nd Regiment had moved up on the evening of the 26th and would attack along with the 3rd Battalion. |
| Conclusion |
|---|
|
Yet again, the Japanese held their ground and the Americans made no progress. This time, however, the Americans did manage to come back with a better idea of where the Japanese stood, especially the eastern edge of the GIFU position. The Americans postponed further attacks as their two battalions had been decimated and could no longer attack the Japanese. |
| Additional Notes |
|---|
|
Cassino '44 or Elsenborn Ridge may be used instead of Battle of the Bulge for the U.S. units. |

|
|
|---|
| Imperial Japanese Army |
|---|
|


| Army |
|---|
|


| Ain't that pretty at all | ||||||||||||
|---|---|---|---|---|---|---|---|---|---|---|---|---|
More American GI's into the jungle, another stiff defense by the Japanese. With added troops the Americans renewed their attack. The added forces helped, but the jungle still proved to be a harsh mistress. The Americans scored a great OBA hit early on, but their support was limited to the first few turns. The Japanese took advantage of opportunity fire to make the advancing GIs pay. The fog of war made it hard for the Americans to coordinate their attacks. Once several hexes were involved in assault combat the Japanese morale kept thwarting the GI's attempts to control the victory hexes. The GIs killed some steps of Japanese, but often became disrupted due to the powerful defensive positions and assault modifiers that the Japanese could bring to bear. In the end the GI's "threw themselves against the wall" but could no break through. |
||||||||||||
| 0 Comments |
| Jungle Fighting #12 | ||||||||||||
|---|---|---|---|---|---|---|---|---|---|---|---|---|
Similar set up to the prior 2 scenarios. Japanese have a set line of entrenchments to defend, this time down a tiny bit from the last two fights. Americans get 2 battalions this time, and although still flimsy morale wise, the numbers make this a fairer fight, though still probably favoring the Japanese. American setup is more or less as constrained as the Japanese, so they will have the 2 battalions attacking both sides of the line. The weakest entrenchment is on the right, which is the only one oustside of the Jungle. Being the wing entrenchment, this is the most likely breakthrough point. The Americans in the east will dash across the open ground to the Jungle in the South and approach from the east while their HMGs suppress that corner. The western approach will be handled more or less identical to the last scenario. The massed OBA never rolls a natural X, so no real effect against morale 9. One step is knocked off a Japanese MG via the Eastern American HMG suppression, but not much effect is noted. The Americans reach the jungle line and begin to approach from the east. In the West, after the last of the OBA is used up, the approach through the Jungle sliver reaches adjacent to the 2 X3 INF stacks. OP fire from one dem/dis the approaching stack while the other stack assaults out of their entrenchments, wiping the group over the next 2 turns including a decap/cat loss of a LT COL. With the west frozen in place, and the nearest in the East as well, the Japanese pick apart the frozen on approach Americans with ease. Another Japanese win, but much closer this time. |
||||||||||||
| 2 Comments |
Drew and I had slog over Mt. Austin a few years back. My first thought was that the 132nd Inf Reg as inadequate to its task. I did barely pull it out in the end with massed U.S. firepower and a couple of timely assaults. The basic philosophy being the chip a small notch and jam in a crowbar.
Yeah, I saw that when I was scoping out the next few scenarios. I guess the good thing about all these Mt Austin scenarios which are very very similar is that you can always try new tactics the next time around. 13 is basically the same as 12 aside from a couple missing platoons.
I still feel that no matter what you do, its going to depend on rolling well as the US in these, as well as most of the scenarios in this module. Morale 9 is very strong in the system even without entrenchments. Add in the morale 7 Americans and the Japanese really don't even need the entrenchments, they just jump out and slice through your formation like butter in assault.
But I will have plenty of time and plenty of scenarios to try to figure it out.