
|
Heavy Metal Iron Curtain #16 |
||
|---|---|---|
| (Attacker) United States | vs | Soviet Union (Attacker) |
| Formations Involved | ||
|---|---|---|
| Soviet Union |  |
7th Guards "Kievsko-Berlinskaya" Tank Division |
| United States |  |
3rd "Spearhead" Armored Division |

| Total | |
|---|---|
| Side 1 | 2 |
| Draw | 0 |
| Side 2 | 0 |


| Overall Rating, 2 votes |
|---|
|
4.5
|
| Scenario Rank: --- of 913 |
| Parent Game | Iron Curtain |
|---|---|
| Historicity | Alt-History |
| Date | 1950-07-01 |
| Start Time | 08:00 |
| Turn Count | 30 |
| Visibility | Day |
| Counters | 225 |
| Net Morale | 0 |
| Net Initiative | 0 |
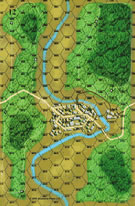
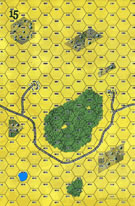
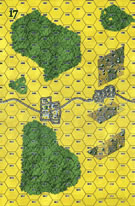
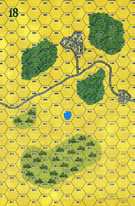
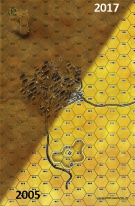
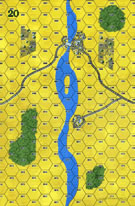
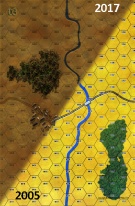
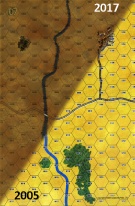
| Maps | 8: 12, 15, 17, 18, 2, 20, 3, 7 |
| Layout Dimensions | 112 x 86 cm 44 x 34 in |
| Play Bounty | 227 |
| AAR Bounty | 165 |
| Total Plays | 2 |
| Total AARs | 2 |
| Battle Types |
|---|
| Bridge Control |
| Meeting Engagement |
| Urban Assault |
| Conditions |
|---|
| Off-board Artillery |
| Terrain Mods |
| Scenario Requirements & Playability | |
|---|---|
| Airborne - IE | Counters |
| Battle of the Bulge | Maps + Counters |
| Eastern Front | Maps + Counters |
| Iron Curtain | Base Game |
| Road to Berlin | Maps + Counters |
| Introduction |
|---|
|
American tankers suffered terrible losses during World War II thanks to inferior equipment, according to veterans like Belton Cooper of 3rd Armored Division. The M4 Sherman, armed with a 75mm artillery piece, was not intended to fight other tanks and could not match the late-model German PzKw IV, much less the Panther and Tiger. American post-war tank designs were intended to make sure this situation would not repeat itself. |
| Conclusion |
|---|
|
The big tanks of the post-war era did see some limited action before becoming so much high-grade scrap steel, but not against each other. A handful of Soviet heavy tanks fought in Arab armies in the wars against Israel, while American M26 Pershings took part in the Korean War. T-34/85 tanks saw widespread use in both conflicts, but those were veterans of the Second World War. |

|
|
|---|
| AFV Rules Pertaining to this Scenario's Order of Battle |
|---|
|
| Guards |
|---|
|


| Army |
|---|
|


| 2 Errata Items | |
|---|---|

|
All Guards JS-IIs should have AT fire values of 8-8. (Shad
on 2010 Dec 15)
|

|
All Guards T-34/85 tanks should have AT fire values of 7-7. (Shad
on 2010 Dec 15)
|
| Iron Curtain, scenario #16: Heavy Metal | ||||||||||||
|---|---|---|---|---|---|---|---|---|---|---|---|---|
Posting #1 Iron Curtain, scenario #16: Heavy Metal You really haven’t lived life at least in the PG world until you have pushed around some JS3’s, JS4’s, M29’s, M30’s, & M32’s to name a few of the big boy heavy metal beasts from this scenario. The sides look pretty even in the line up except the Americans have a ton of transportation units and they get to start on the side with a few more town hexes. This will force the Soviets to attack to get more victory hexes. But at least they have a little bit better Armor defense factors and I nice attack value on their AK-INF units. Their infantry will have to ride to the front on their tanks however. This is could turn into one of the greatest PG battle scenarios of all times! We will see? Posting #2 This was a very fun scenario to play, a tankers dream but with a large amount of Infantry and off-board Artillery as well. The Victory conditions were for control of the town hexes between the North & South rivers and for the bridge hexes crossing these river, 3 points for each town hex and bridge hex. Also one point for every enemy step eliminated with tank steps counting double. I found the Soviet JS4 a tough piece of armor to kill but the American M30 & M29 both had a higher AT factor and range to adjust the Soviet armor defensive factor. The large amount of Artillery on both sides made the open ground an infantry killing ground but with map board #2 having more town hexes, the Soviet would have to make a move to control some more victory points or loss the battle without engaging, as the long distant tank shootout wasn’t producing any positive results. The Soviet flanked a Northern town but the Americans flanked a Southern town, so at one point, the only thing left to do was charge the Giant city in the middle with one large armored thrust, thus making the American expose their armor in a modern day Kursk type tank battle. The Soviet Infantry at this point were too spread out in other conflicts and the center group of Soviet Infantry were too pinned down and shell-shocked to help. The Americans controlled 87 points of victory objective hexes vs. the Soviets controlling 72 hexes of victory points. The Americans lost 140 steps of units vs. the Soviet losing 158 steps of units. Total points: American 245 and Soviets 212. A major American Victory! With so many steps lost on both sides, it didn’t feel like a major victory. Actually a few turn of events in a couple places in this game and either side could have won in a replay of this scenario. So in my opinion, this is a great heavy metal scenario and changing strategies a bit on either side could make this play out differently. I lost my first step of M30’s in this scenario, I am glade I had more where they came from, as this is the best counter to counter the Soviet JS4s. Great stuff for Cold War action! |
||||||||||||
| 0 Comments |
| Take the Bridges! | ||||||||||||
|---|---|---|---|---|---|---|---|---|---|---|---|---|
Setup: Both sides start off map, therefore there are no setup details. Play: The Americans and Soviets quickly enter the map from opposite side of the map, and quickly capture the towns and bridges on their respective sides of the 8-board map. The Soviets Soviets decide to send their main forces due west, while defending the western bridges. The Americans believe they can hold the large city on Board 2, and send two contingents to the north and south to take the bridges. In the north, the American force approaches the Soviet defenders rushing across the north-eastern bridge and begin a duel between the American and Soviet armor while the infantry rush the Soviets positions in the town. All of this happened about three and a half hours into the battle. The Americans spend an hour exchanging fire with the Soviets, gaining the upper hand over the Soviets, before they assault the town. The Americans take heavy losses, but after an hour and a half of assaults, they capture the six hex town, but are too weakened to continue the attack in the north. In the south, the Americans' force moves through the dense woods, but then splits to attack from both of the bridges in the large city on Board 12. The American armor and infantry rush the Soviets on turn 13, and begin a close range direct fire and AT fire duel. The Americans weaken the Soviets, but they recover by the time the Americans decide to assault the massive town. The Soviets struggle for the town fiercely, and after two rounds of six turn assaults, the Americans fail to take the town, and retreat into the woods. In the canter the JS-4's lead the way and engage the Americans as soon as they are spotted, and engage in a two kilometer duel over the plain in the middle of the map. The Americans and Soviets take almost equal losses, with the M32's gaining an upper hand towards the end of the duel, as the Soviet force of infantry and JS-3's rush the massive town from the north and the south. After five hours of total combat, the Soviets attack the town on Board 2, but the Americans quickly deal with the Soviet forces, and while taking heavy losses, manage to hold the center of the map. Result: American Major Victory. The Victory Point Count stands at 285-207, with the Americans having a 78 point lead. |
||||||||||||
| 0 Comments |