
|
Futility Heroes of the Soviet Union #2 |
||
|---|---|---|
| (Attacker) Germany | vs | Soviet Union (Attacker) |
| Formations Involved | ||
|---|---|---|
| Germany |  |
9th Panzer Division |
| Soviet Union |  |
30th Guards Rifle Division |

| Total | |
|---|---|
| Side 1 | 1 |
| Draw | 2 |
| Side 2 | 2 |


| Overall Rating, 5 votes |
|---|
|
3.2
|
| Scenario Rank: 613 of 913 |
| Parent Game | Heroes of the Soviet Union |
|---|---|
| Historicity | Historical |
| Date | 1942-12-11 |
| Start Time | 08:30 |
| Turn Count | 18 |
| Visibility | Day |
| Counters | 50 |
| Net Morale | 1 |
| Net Initiative | 2 |
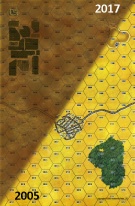
| Maps | 1: 4 |
| Layout Dimensions | 43 x 28 cm 17 x 11 in |
| Play Bounty | 137 |
| AAR Bounty | 159 |
| Total Plays | 5 |
| Total AARs | 3 |
| Battle Types |
|---|
| Meeting Engagement |
| Urban Assault |
| Conditions |
|---|
| Off-board Artillery |
| Terrain Mods |
| Scenario Requirements & Playability | |
|---|---|
| Heroes of the Soviet Union | Base Game |
| Introduction |
|---|
|
WESTERN FRONT: After weeks of failed attacks, Marshal Zhukov ordered the 20th Army to renew its assault on the eastern flank of the Rzhev bulge as the last gasp of Operation Mars. As part of a broad-front attack, the 30th Guards Rifle Division targeted the village of Bolshoi Kropolovo. Following a massive artillery barrage, the Soviets went forward with cries of "For the Fatherland!" |
| Conclusion |
|---|
|
The Soviet advance nowhere exceeded 1000 meters. "A fierce, bloody battle began that lasted all day," wrote one Soviet officer. "The attack misfired along the entire extent of the penetration front." Not a single German fortified position fell, while the riflemen of the 30th Guards Division paid a heavy price. Already bloodied in previous frontal assaults, by the end of the day the division was a shadow of the formation that attacked less than a week before, To add insult to injury, the Germans so easily repelled the attack that they did not report anything more than a minor skirmish. |
| Additional Notes |
|---|
|
This scenario could also be played using East Front maps and Red Warriors Counters. Soviet Guards transport counters may be downloaded from Avalanche Press. Otherwise, use RKKA trucks and wagons in place of the Guards counters as needed. |

|
|
|---|
| AFV Rules Pertaining to this Scenario's Order of Battle |
|---|
|
| Heer |
|---|
|


| Army (RKKA) |
|---|
|

| Guards |
|---|
|


| 4 Errata Items | |
|---|---|

|
The reduced direct fire value of the Heer HMG became 5-5 starting with Fall of France. (plloyd1010
on 2015 Jul 31)
|

|
The Pz IVe appearing in the original Panzer Grenadier game had an Anti tank value of 4-7. As of Afrika Korps (2002), continuing onward through the 3rd and 4th edition games, the anti tank value has been 4-4. (plloyd1010
on 2016 Jul 25)
|

|
All SPW 251s have an armor value of 0. (Shad
on 2010 Dec 15)
|

|
These units should have a Direct Fire rating of 2-3, just like the RKKA and NKVD counterparts. (danradz
on 2011 May 04)
|
| URRRRAAH Stalina!! |
|---|
|
First AAR for PGHQ so here it goes. I have just started to cut my teeth with PG, but being a fair ASL player (2.5 years) I grasped the rules basics quick. I decided to fight HotSU (Heroes of the Soviet Union) scenario#2 'Futility'. My German set up was a Hammer and anvil tactic, in the town I had 4 Rifle pltns 2 HMG pltns a 81mm Mortar pltn & the 37mm ATG Pltn. This lot was lead by 3 Lt's (1,0/1,1/2,0) they set up on the Eastern 3 outskirt hexes of the town. Behind these I had the 2 trucks and a reserve Lt (1,0) forward and on my right flank I had a rifle pltn mounted in the Sdkfz 251/1 Pltn lead by a Capt (0,1) the Motorcycle Pltn lead by a Capt (1,1) and the Pz IVE pltn. Plan: Allow Ivan to advance and hit him in his left flank with my small but (or so I thought) punchy mobile company sized attack force. Hold the center line and just hammer away at Ivan as he advanced through the deep snow and did his best to capture a single town hex. Turns 1-5: Ivan came on in a broad front, his leaders spread to keep his line moving forward, I hit him woth my Artillery every chance I had, the Gunners were either blind, or thier gun tubes were worn becuase in 5 turns of fire I did nothing! absoloutley nothing with my arty to him, he just kept on coming and getting closer. My mobile counter attack group hit him on his left flank as planned, what I had not planned for was how tough Ivan is when the chips are down. In one activation of fire he managed to wipe out the Motorcycle Pltn, disrupt the Pz IVE with point Blank ATG fire and force me to try and extract my small and now battered mobile element. Turns 5-10: Ivan poured on massize amounts of pressure all along my frontage, we both traded artillery, I suffered a few disrupted results but Ivan lost a whole 3 pltns of Guardsmen to some very lucky turn 9 artillery fire (rolled snake eyes!)added to this the steps already lost from small arms fire and I managed to wipe out the afore mentioned 3 pltns. Turn 10-14: My luck ran out there, Ivan had moved his right flank, slowly but with determination towards the north eastern town hex, he hit it with all he had up there which was alot of fire, demorolized the 2 Pltns and LT that had that sector and then assualted it, they managed to take the hex and beat off all my attempts to retake it. I folded on Turn 14 A great little scenario which i feel teaches the following Points: 1. PG is not as bloody as some games, casualities mount up, but over time unless you get unlucky. 2. When the line breaks it is hard to recover unless you have aimed off for it breaking. 3. Keep a reserve, simple but damn stupid not to, This I feel cost Fritz the win. |
| 2 Comments |
| Charging into history | ||||||||||||
|---|---|---|---|---|---|---|---|---|---|---|---|---|
This scenario introduced us to the penal troops of the Soviet army. These troops are truly expendable and we found there use quite quickly. Similar to scenario 1 the Soviets are trying to take a German held town in the Russian winter. Movement will be impeded by the snow so the Germans will setup in the town and the Soviets will need to charge the town. The Soviets advanced down the east-west road and as they got close OBA and OP fire started on them. Remarkably, the German fire had little effect and the Soviets were able to close on the town. This is where the penal troops served their purpose. Charging the town they were destroyed but this allowed other Guard troops to advance for assaults. German fire continued to be bad and the Soviet assault teams made it into the town. German counter attacks with reserves and the PzIVE were able to throw the Soviets out of the town temporarily. A second group move to reinforce the contested hexes while the Soviet 45mm tried to destroy the PzIVE. The Germans were able to hold after some close dice rolls in the assault hexes. The Soviets again had to pull back from the town as they were not able to get control of a single town hex. This scenario was very similar to the first, the only difference was the use of the penal troops. Although interesting, not a big differing point to make the scenario outstanding. |
||||||||||||
| 0 Comments |
| Slightly less, but still, Futile |
|---|
|
I'm currently re-reading Chris Bellamy's Absolute War, about the Soviet Union in WW II. It is a fascinating study of the Soviet decision making process. Zhukov comes in for heavy scrutiny (and suffers in comparison to Rokossovsky) and his handling of the Mars offensive is particularly hammered. By playing this scenario one can see why. In this scenario, a dispirited Guards unit (morale 7/6) must assault a well defended town and gain a foothold in the town. The actual action was fought towards the end of the Mars operation and resulted in a decisive repulse of the Soviets; so decisive that the Germans only mention a "skirmish" in their reports. Determined to outdo history as the Soviet commander I reviewed the field and the German deployment. The Germans set up a trip wire of five dug in locations, some containing only an infantry platoon, some containing strong fire teams and one containing a platoon of tanks. The field is without any significant features with the exception of a small hill in front of the town and some woods behind the town, therefore caution was useless. The Soviets advanced in a block on the northern end of the field away from the panzers. They were able to overwhelm one rifle pit and gain an adjancency to the town before being shooed away. Their entire force was either eliminated or demoralized. There were, however, moments of "victory" for the Soviets as they were actually able to come to grips with the German forces (something they were unable to do historically), cause some actual losses (3 steps) and chase a second force into the town itself before being destroyed within 400 meters of the town. They even had the opportunity to try to cause German losses and thereby deny the Germans a victory but fell short. All in all a much "better" result for the Soviets and yet still a debilitating failure. the force wasn't decimated, that indicates one out of ten eliminated. This was far more complete. OBA, opportunity fire, direct fire and the occassional stray assault led to massive losses for the Soviets at the hand of the highly competent mixed German force. Despite outperforming history, I could not feel but appalled at the losses caused by a reckless assault over featureless terrain. Very instructive as a primer on why the Mars offensive failed. The chance for a draw is real and a Soviet player who is not supremely lucky will find themselves looking for that draw as a "win" (control of a town hex) is probably beyond their capability given their relatively small force and short timeframe. Still a 3 for a clean explanation of the objectives and the study of the situation. |
| 0 Comments |
Hi Perry, welcome aboard!
Which ruleset did you use? How much real-world time did this scenario take you?
Hope you play many more!
Hi,
And thanks for the welcome, yep sorry, i should know this from doing ASL AAR's.
I used 4th Edition rules with all the whistles and bells It took me roughly an hour due to me still getting used to how PG does things.
and yes, I will be playing alot more, I am still a devoted ASL'er but PG is a great way to unwind and it harkens back to my foramtive years as a wargamer and titles such as PanzerBlitz etc.
Perry