Panzer Grenadier Battles on April 27th:
Arctic Front Deluxe #40 - Children's Crusade Broken Axis #14 - Târgu Frumos: The Second Battle Scenario 3: Sledge Hammer of the Proletariat
Army Group South Ukraine #6 - Consternation Road to Berlin #73 - She-Wolves of the SS
Errors? Omissions? Report them!
Koli Landing
Guadalcanal #24
(Attacker) Japan vs United States (Attacker)
Formations Involved
Japan 230th Infantry Regiment
United States 1st "The Old Breed" Marine Division
Display
Balance:


Overall balance chart for Guad024
Total
Side 1 2
Draw 1
Side 2 4
Overall Rating, 7 votes
5
4
3
2
1
3.57
Scenario Rank: 361 of 913
Parent Game Guadalcanal
Historicity Historical
Date 1942-11-03
Start Time 01:30
Turn Count 68
Visibility Day & Night
Counters 48
Net Morale 1
Net Initiative 1
Maps 1: Guad-ME
Layout Dimensions 84 x 55 cm
33 x 22 in
Play Bounty 134
AAR Bounty 159
Total Plays 7
Total AARs 3
Battle Types
Meeting Engagement
Conditions
Hidden Units
Scenario Requirements & Playability
Guadalcanal Base Game
Introduction

American intelligence indicated that the next Japanese reinforcement landing would be near Koli Point, to the east of the Marine perimeter. The battles to clear the west bank of the Matanikau continued to rage and only a single battalion could be spared to deal with the threat. At dawn on the 2nd the 2nd Battalion, 7th Marine Regiment marched east. That night the Marines waited in the jungle. Early the next morning supplies and troops from the 230th Infantry Regiment landed a kilometer east of the Marine position.

Conclusion

The Japanese advanced along the 2/7th positions after a patrol discovered the American on the 3rd. Unsure of the strength he faced and without air, artillery or naval support, the Marine battalion commander at first attacked and then withdrew to await reinforcements when the Japanese counter-attacked in strength. It was not long before elements of the US Army's 164th Infantry Regiment, just arrived on the island reached the scene.


Display Order of Battle

Japan Order of Battle
Imperial Japanese Army
United States Order of Battle
Marine Corps

Display AARs (3)

Time to send in the G.I.s
Author Brett Nicholson
Method Solo
Victor Japan
Play Date 2014-07-18
Language English
Scenario Guad024

I imagine that this one would be much more interesting played FTF, not just with the hidden Japanese units but also without being able to examine Japanese stacks in jungle hexes in order to determine their intial strength. Before setting up the Japanese player rolls one die to determine the amount of units they recieve; on a 1-3 the deployment is unchanged but on a result of 4 or higher the Japanese forces increase progressively depending on the result. In this case I rolled a "5" and received an additional five leaders along with three platoons of INF, one HMG and an extra 81mm mortar for the Imperial landing force which outnumbered the marine battalion sent out to intercept it and probably tipped the scales heavily in Japan's favor.

The marines pretty much need to wipe out the entire landing force or at least drive them back away from a 5-hex radius of 2212 and take no more than 7 step losses. The Japanese just need to advance, form a strong line, hang on and prevent the Americans from breaking through; kind of like a reversal of roles compared to many of the previous 'Guadalcanal' scenarios.

The battle begins early in the morning (01:30) with sides benefiting from the cover of darkness. Both sides slowly advance to meet each other and movement becomes piecemeal from the start from with night-time/jungle fog of war ending many tunrs very quickly. Contact is finally made at 02:45/turn 6. Two separate platoons of marine HMGs are quickly demoralized by Japanese DF and the American advance is halted momentarily. The Americans spend a few turns regrouping and trading fire, and by 04:00/turn 11 manage to inflict the first Japanese INF step loss. Then much of nothing occurs for a stretch time; a morale check here and there from both sides until the sun begins to rise and visibilty increases. At 05:45/turn 18, with visibilty increasing a few platoons of MAR managed to infiltrate the Japanese lines and other elements of the battalion advance and begin to pick on some SER units which were revealed from being hidden. A lucky shot from the lone American 81mm is able to take out one of the now demoralized SER units and things start looking up for the battalion. Then, at 06:00/turn 19 the Japanese bounce back and manage the first American step loss with opportunity fire and also eliminate a marine SGT (8-0-1) in the process. Also, two platoons of hidden HMGs reveal themselves and hunt down the American infiltrators before they can get into the cover of a jungle hex are able to extract another MAR step loss by 06:15/turn 20. Soon the tables begin to turn in favor of the Japanese after sunrise and though the marine DF ratings are more powerful, losses begin to mount, trading step loss for step loss which ultimately works against the outnumbered marines. The infiltrators behind the Japanese lines are cut-off, pinned down and systematically slaughtered by HMG fire. By 07:30/turn 25 Japan has managed to eliminate 8 American steps to meet one of their VCs; now what's left of the marine battalion is desperately fighting for a draw with no chance of a winning this engagement.

The battle begins to simmer down after each side trades losses step for step and there is a lull in the fighting lasting from 09:00 to 12:45, almost 4 hours with only a brief thunderstorm occuring in regards to action. Both sides trade fire from lines facing each other two hexes away but soon the marines have to get in closer as they are supposed to be driving the enemy back. There is not much of a marine battalion left any longer, just over a company while the Japanese line is quite snug and solid; the marines have to make an assault in hopes gaining ground. The order is given to assault at 14:00/turn 51 and it does not go well with the Japanese first fire eliminating a step of HMGs but the assault does go on for quite a while nonetheless. It is very clear at this point that the Americans have lost this one but was determined to ride this one out until the end to see how far the very few, yet still proud marines could get; The Japanese on the other hand would do what they could to entirely wipe out the now company-sized remnants of 2nd Battalion. With nothing to lose, just before time runs out the Japanese counter-assault and get eliminated there with the remains flushed out of the hex; if there was anything resembling a moral victory for the Americans they could be satisfied of at least winning the only assault of the battle.

By the time all the smoke cleared and the last of the marines called off the attack the Americans had lost 4 leaders (1x CAP; 2 x LT and 1 x SGT), 15 MAR and 4 HMG steps with less than a company remaining. Japanese losses were: 4 leaders (1x CAP and 3 x LT), 11 INF, 2 SER and 1 HMG step.

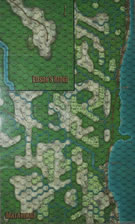
This was quite a long scenario at 68 turns but enjoyed the duration of it. Even though outnumbered from the onset the marines kept up the fight and held on without getting completely wiped out. For once the superior American DF did not save the day as it had done countless times before. The Japanese were able to match the Americans with better DF rolls all around, rolling many "snake eyes" and "boxcars" for 2X results, sometimes back to back. Once losses began to occur at a 50/50 ratio for just a few turns the Japanese had this one in the bag. The biggest mistake I made with the Americans was sending those 4 platoons behind enemy lines early on and not being able to get any more marines there to reinforce them; once the Japanese line was broken it was easily repaired and held. Then the Japanese began to slowly hook around the north flank of the Americans and also in time pushed them back from where their line was originally formed. It was interesting to watch this play out from an aerial view of the map. It's hard to say if this one would of turned out differently if the intial Japanese landing force was smaller; if I had rolled lower for the deployment before the set-up. I think it really could go either way as usually American DF outmatches the Japanese. I never thought that the Americans were ever really in a good position to make any assaults and only attempted just one the whole battle while the Japanese did not need to assault at all this time around. I thought this was a nice finish for 'Guadalcanal' and would definitely play this one again, hence the "4" rating. As far as my personal records go for the whole campaign aspect of 'Guadalcanal' the Japanese clearly won, through and through. I recorded 14 Japanese wins; 6 draws and just 4 losses. However, there were many scenarios I thought the Americans could of won on a good day or at least managed another draw. I think many people judge a game by the first scenario in the book and in this case I didn't find the first 4 scenarios all too rewarding so I can understand why 'Guadalcanal' doesn't get too many plays or higher overall ratings but once I got past the first 4 scenarios and away from the Tulagi and dreaded Gavutu-Tanambogo maps the scenarios got a lot better and glad I completed the whole boxed set (tour of duty ribbon please!). I really love the Matanikau map with all it's nooks and crannies and for that reason plan on continuing the Guadalcanal experiance with 'Jungle Fighting' in the near future as almost all of it's scenarios use the Matanikau map.

0 Comments
You must be a registered member and logged-in to post a comment.
Clearing the Island
Author Schoenwulf
Method Solo
Victor United States
Play Date 2019-11-23
Language English
Scenario Guad024

Battle Report: Well before dawn on November 3, 1942, troops from the 230th Infantry Regiment of the Imperial Japanese Army landed near Koli Point on Guadalcanal, a position east of the Marine encampments along the Matanikau River. As they moved west, they encountered elements from the 2nd Battalion, 7th Regiment, 1st Marine Division that were moving east in response to reports from Naval Intelligence of Japanese incursion. Fire was exchanged along the coastal trail around 0215 hours with the first casualties reported by the Americans at 0245. As dawn was breaking, so was the Japanese left flank. American troops had moved southeast from the trail and were raking the Japanese left with heavy machine gun fire in a symphony of 50-cals and BAR’s with M1 support. Two US squads broke through and went well east of the main position to reconnoiter the extent of the incursion. Meanwhile, back near the front lines, Major Kagisawa was felled and Captain Takamura took command. By 1000 hours, a three-hour close assault exchange finally was resolved as the Americans compressed the Japanese front line by almost a half kilometer. Two Japanese groups were holding out at noon, but one fell at 1400 and the other at 1445. With the Japanese units cleared from the area and a perimeter established, the Marines took a well-earned break after over twelve hours in intense combat.

Analysis: This is a 68-turn scenario that was played using 4th Edition rules and the hidden unit rules from Kokoda Campaign. The victory objectives involve hex control and the two control hexes (one for American and one for Japanese) have overlapping territory, so this scenario involves a lot of forced contact and attrition for victory. Note that there is an American step loss victory option for the Japanese, but an American victory requires control of a given area. The scenario starts with a variable number of Japanese units based on a die roll, and the Japanese rolled a “3”, so they had the minimum number of units for the battle. It also begins at night, so the first sixteen turns are played with night rules. Based on starting positions, the Japanese player has a slight edge since Japanese troops already have presence in their “victory zone”, while the Americans will have to move east to gain a victory. This was countered by the Americans once again being able to put three joint INF/HMG units with a 1 CM leader to make 16-point stacks. These proved formidable since the best that the Japanese could counter with was a single 11-point stack unless they put three units in a single hex that would be exposed to a one-column DF shift. As in some other quests in this monograph in which the Japanese have a step goal for victory, a strategy to be considered would be for the Japanese to just go all-out while it is still night and get as many American steps as possible via assaults using their infantry advantage. Otherwise, with the American firepower and a large number of turns, the Americans will eventually wear down the Japanese units. Another alternative would be for the Japanese to try and get a few units well west of the Americans and hang on for the draw, but the US had enough units in this playthrough to create a strong front line. If the Japanese had a better die roll at the beginning of the scenario, which would have given them more units, this strategy would have made more sense here. Ultimately, the Americans did eliminate all Japanese combat units, but it took 54 turns to do so. Had the Japanese survived another 14 turns, the scenario would have been a draw. In terms of step losses, the Americans lost 4 steps to 22 for the Japanese, which resulted in an American victory.

0 Comments
You must be a registered member and logged-in to post a comment.
Koli Landing
Author driddle01
Method Solo
Victor United States
Play Date 2011-04-27
Language English
Scenario Guad024

The Japanese set up along the coast and forward. The Marines set up forward and advance along the coast with three HMG's and MAR platoons as a firebase. The Marines send a flanking force of four MAR platoons inland to circle the main Japanese force and approach the objective. The first several hours go slowly as the Marines advance one hex at a time towards the Japanese defensive line. The main Marine force stops and waits for the Marien flanking force to get in position, and daylight to break. As dawn breaks, the two Marine forces move into position to strike the Japanese defenders. The Japanese fire on the approaching Marines, but with no damage. The two forces trade fire for several turns with the Marines getting some very good rolls (1X and 2X). This starts to break the Japanese defensive line. Several more turns continue with fire between the two forces, and Japanese losses continue to mount. The Japanese also lose some leaders on unlucky rolls, and become an ineffective fighting force. The Mariens win.

0 Comments
You must be a registered member and logged-in to post a comment.
Errors? Omissions? Report them!
Page generated in 0.337 seconds.