
|
Diversion II Guadalcanal #21 |
||
|---|---|---|
| (Attacker) Japan | vs | United States (Defender) |
| Formations Involved | ||
|---|---|---|
| Japan |  |
124th Infantry Regiment |
| Japan |  |
4th Infantry Regiment |
| United States |  |
1st "The Old Breed" Marine Division |

| Total | |
|---|---|
| Side 1 | 2 |
| Draw | 6 |
| Side 2 | 1 |


| Overall Rating, 10 votes |
|---|
|
3.8
|
| Scenario Rank: 203 of 913 |
| Parent Game | Guadalcanal |
|---|---|
| Historicity | Historical |
| Date | 1942-10-25 |
| Start Time | 02:30 |
| Turn Count | 22 |
| Visibility | Day & Night |
| Counters | 74 |
| Net Morale | 1 |
| Net Initiative | 1 |
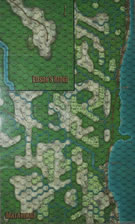
| Maps | 1: Guad-ME |
| Layout Dimensions | 84 x 55 cm 33 x 22 in |
| Play Bounty | 126 |
| AAR Bounty | 153 |
| Total Plays | 9 |
| Total AARs | 4 |
| Battle Types |
|---|
| Rural Assault |
| Conditions |
|---|
| Off-board Artillery |
| Scenario Requirements & Playability | |
|---|---|
| Guadalcanal | Base Game |
| Introduction |
|---|
|
Unable to mount the inland attack on the Marine positions along the Matanikau the day before, the Japanese finally began in the early morning hours of the 25th. As disjointed as the advance had been, the three Japanese battalions faced a single Marine battalion strung out along two ridges a 1000 yards inland. |
| Conclusion |
|---|
|
The Japanese managed to capture a portion of the ridge before being driven out. Again American firepower and Marine training carried the day. Heavy casualties (over 300 dead alone) spelled yet another disaster for the weary and starving soldier of the Imperial Japanese Army. Even the Japanese had to admit that the initiative had passed to the Americans. |

|
|
|---|
| Imperial Japanese Army |
|---|
|


| Marine Corps |
|---|
|


| Fast and Furious | ||||||||||||
|---|---|---|---|---|---|---|---|---|---|---|---|---|
Battle Report: On October 25th, 1942, Japanese troops from 1st, 2nd and 3rd Battalions of the 124th Japanese Infantry Regiment moved north in the middle of the night towards a pair of ridges being held by the 2nd Battalion, 7th Regiment, 1st Marine Division. An initial attack by a combined arms force from the 1st and 2nd Japanese Battalions on the east ridge was repulsed quickly with significant casualties, so the Japanese shifted their attention to the west ridge while maintaining bombardment to hold the east ridge in check. At 0300 hours, two Japanese platoons from the 1st Battalion had slipped by the west ridge in the swamp, but they were subsequently hammered by OBA. An hour later, three more had broken through to the north ridge and engaged the 1st Battalion, 5th Marine Regiment (1D) in close combat. The fighting continued on both the north and west ridges until dawn broke, but units from both the 1st and 2nd Japanese Battalions had broken through all the way to the coastal track. A thunderstorm followed, drenching the battlefield, which slowed troop movement and diminished their fighting spirit. The battle broke off at 0745 hours with the rain still pouring down. The Japanese had taken control of both the east and west ridges, but their hold on the coastal track and north ridge was tenuous at best, and their supply and communication lines were stressed. Analysis: This is a 22-turn scenario that uses hex control and step loss as objectives for both sides. The scenario was played using 4th Edition rules and the village rules from Kokoda Campaign for the village hex at the river mouth. Like the previous scenario, this one uses a fairly small section of the main map and has a number of units, resulting in frequent contact. Also like the previous scenario, the Japanese have a numbers advantage in terms of both amount and morale of units. But the Marines, with those 9FP HMG’s can build 2-platoon groups that use the 16 column on the DF table when they are led by one of their 1CF officers; three such groups were placed on the east and west ridges at key points. However, the Marines can’t spread themselves thin enough to create a complete block of the Japanese northward push unless they use weaker firepower. In this playthrough the strategy was to let a few groups slip through, while creating as much damage as possible to any enemy units that moved forward during the night turns. Daybreak is the Marine’s friend as they have better OBA and can create stronger two-unit fire groups. However, a thunderstorm event occurred at dawn, which limited both movement and visibility, which was stuck at two hexes for the remainder of the game. The concurrent movement decrease was also a problem for the Marines to get north and engage the Japanese units that had slipped through during the night. By game end, the Americans had caused 16 Japanese step losses, the minimum for a US victory. The Japanese, on the other hand, only had taken seven American steps, two short of the amount needed for a victory. However, they held five hexes within their objective perimeter, with three more contested; this was well beyond the necessary two hexes needed for a Japanese victory so match ended in a draw. |
||||||||||||
| 0 Comments |
| Outnumbered three to one. Smoke if you got 'em. | ||||||||||||
|---|---|---|---|---|---|---|---|---|---|---|---|---|
Strategy Comment: American need to decide whether to set up on or behind the ridge. There are advantages/disadvantages to each. Either they will be firing uphill or into the jungle. If they setup behind the ridge, the Japanese would have no protection versus artillery, but on the ridge they force the Japanese to assault uphill (defensive bonus). The American battalion decides to form a solid line without holes, but they are spread out quite thinly. Can they hold? Japanese GoalGet two units to the American airfield (marked with a spotted marker) Inflict sufficient casualties (at least 9 steps) The BattleOnly a few brief notes remain of this scenario. Within a handful of turns the Japanese have already hit their win condition, now they must deny the Americans inflicting 16 steps Japanese are folding up the American line like an accordion! Japanese penetrate the American line. Line is as good as gone. Americans retreat to intercept. Note: Americans need to inflict 4 more casualties. Go for the isolated Japanese in the northwest Note: Americans assault the Japanese in northwest. Japanese are in trouble and try to reinforce! Americans 2 steps away from win condition. Japanese Losses: 3!!! (American artillery ordered by the fleeing Captain in the southeast eliminates a Japanese platoon). Note: – That lone Captain escaped capture time and time again and manages to radio in a very successful artillery barrage. American Major killed and Lieutenant deserts DRAW!!! AftermathA very fun scenario with a somewhat imbalanced win condition. The Americans really struggled to inflict their casualties, and only with the aid of their off-board artillery and some lucky strikes did they manage to succeed. Rating 4/5 |
||||||||||||
| 0 Comments |
| A hard attack to call off when you are ahead | ||||||||||||
|---|---|---|---|---|---|---|---|---|---|---|---|---|
The marines begin dug-in and do their best to form a solid line to cover two ridges in order repell an imminent Japanese night attack. They are outnumbered three battalions to one and have just two platoons of infantry in reserve to reinforce their lines with. Most of the Japanese begin deployed just one hex away in the cover of night and jungle so their attack will be sudden and most brutal. The Americans do start off on the higher ground which will give them a slight defensive advantage against DF and in the first assault round but after that the advantage will go to Japanese with their higher moral of 9/8 in close quarter combat. Knowing that night-time/jungle fog of war will be a factor the Japanese only focus on attacking the eastern ridge at first leaving a whole battalion hidden in the jungle on the west flank as a reserve. Immediately on the first turn the Japanese take a few step losses from opportunity fire but that doesn't do much to slow them down and assaults begin immediately at 02:45/turn 2. A HMG occupied hex on the ridge is targeted first. Marine first fire is ineffective and the assault takes out a step of the sole HMG unit there and then on the following turn the American line is already broken after the remaining HMG step is eliminated. American reserves are sent to try to plug in the gap. American OBA is called down on the now Japanese occupied hex but to no effect. Other assaults on the eastern ridge begin and the Japanese take a few more losses and soon their intiative drops by one point by 04:00/turn 7. However the sacrifice seems to be paying off with the banzai attacks as another marine postion falls forming a two-hex wide corridor through the American lines. Now the Japanese press on through with a few platoons and are able to maintain a presence in the 17xx and 18xx zone to fluster the American geographical objectives and will soon make for the two hex radius of their own objective of hex 2031. The marines are "up the creek" as if they break off units from the western lines then the remaining Japanese battalion will easily take the other ridge. At 04:45/turn 10, with dawn approaching, Japan only needs to eliminate 2 more marine steps for a win while the Americans need to eliminate 6 more Japanese steps and/or clear out the infiltrators from behind their lines. Now one platoon of Japanese INF have made it to their objective behind the lines with others in tow and are adjacent to the dug-in 81mm mortar unit and the American Major. OBA and mortar fire is called down but has no effect. At 05:15/turn 12 the 81mm is easily assaulted and eliminated along with the Major resulting in decapitation! This prevents American units from moving at crucial areas and the Japanese capitalize on this making more assaults closer to the western ridge. Just like clockwork, as the sun begins to rise the "sleeping" Japanese battalion begins to emerge from their jungle positions to threaten the western ridge. It is also at this time that the Japanese have met their enemy step loss requirements. With daybreak the Americans no longer have a line to hold on to but are just barely hanging on to single, isolated positions on each ridge. Am aerial view of the map is a horrfic sight at first glance but now the Japanese have their own problems as they cannot take many more losses without forfeiting their victory. They are left stuck and engaged in two separate ridge assaults and damned Japanese doctrine forbids them to exit assaults that they have initiated. Now with full visibilty American OBA will be even more deadlier and the marines are willing to call down artillery on their own postions if need be before time runs out. What the Japanese do attempt to do is withdraw all other units that are not assaulting back into the jungle to get them out of harm's way but the Americans catch one platoon before it can move away with HMG fire and get a very lucky roll on the 16 column with "snake eyes" and eliminates the entire unit! Eventually it comes down to the Americans just having to eliminate one more Japanese step to force a draw and it is certain that one way or the other they will do so; whether through calling down artillery on their own or counter-assaulting and there is nothing that the Japanese units assaulting the ridges can do about it. There are also two platoons of Japanese INF that are isolated way behind enemy lines, dug-in a jungle hex with a nice view of the sea; a few lone LTs are sent in that direction to call down OBA on them as there are no good ordered American combat units to spare in order to hunt them down. Time starts to run out and the Japanese refrain from continuing their assaults in vain hope of not taking further losses. Then at 07:00/turn 19 an American counter-assault is made with nothing much to lose and the Japanese lose their 16th step ending the battle in a draw. A very intense scenario from start to finish. I believe it is a very tough one for the Americans to all out win but just as tough for the Japanese to hang on as well after meeting their VCs; whether through geograpical or enemy step loss VCs. It was really hard to get the Japanese to stop attacking after so much damage had been done to the American lines; not just because of the banzai rule but as the player also! The Japanese player will have to restrain himself from overdoing it and know when to call off the attack; to basically "hit it and quit it". This takes some discipline and seems somewhat uncharacteristic of the Japanese in this given situation as the airfield was within in their grasp. However this scenario does take place towards the end of the Guadalcanal campaign and by this time the Japanese are in poor shape from exhaustion, disease and starvation along with many of their attacks limited in objectives or motivation. I think 22 turns is a perfect length for this one; had it lasted any longer then without a doubt the entire marine force could easily of been wiped out. Rated a "4" for either solo or competitive play and one of the best in the box. |
||||||||||||
| 0 Comments |
| A Costly & Frustrating Jungle Draw | ||||||||||||||
|---|---|---|---|---|---|---|---|---|---|---|---|---|---|---|
This was an extended, 8-session jungle shoot-em up with the gracious, well-read & clever, Tambu, leading the fearsome and heavily-armed US Marines on Guadalcanal. I played the slightly weaker, but highly-motivated, Japanese side in this intense scenario. We started our play-through on 7 June and finished this morning. I will outline the highlights of this DRAWN battle, as other, more articulate writers, have provided greater detail. We used the FOW (beginning on turn 8), consolidation, excess initiative and smoke/illum optional rules. The US side drew an excellent set of leaders, the Japanese set were middling, and they suffered a leader decapitation in the fierce fighting. We ended up in a draw, although this relatively-balanced encounter could have gone either way. The dug-in, but very-thinly spread Marines, have to hold a relatively exposed line of positions covering the better part of two ridges. The Japanese are attacking at night and were in immediate contact in what became a brutal set of adjacent-hex firefights and close assaults. Having many leaders is always a distinct advantage in PG scenarios, and many were killed on both sides. The sky-high Japanese morale, and close combat advantage was pushed to the absolute limit. This ultimately proved to be a mistake, as all the Japanese reserves were too quickly committed to the fight in the hope of eliminating as many of the Marine's HMG and supporting-hex units as possible. Lines were broken repeatedly and the combination of fast Marine counter attacks, imaginative use of available reserves, and many lousy Japanese combat 7-die rolls meant that the Americans mostly held their own for the first 10, or so turns. OBA effectiveness was highly variable throughout this play-through, but Japanese morale recoveries were notable in the bulk of cases. Gaps on the eastern ridge were exploited by the Emperor's soldiers, and lots of infiltrations occurred as the fight became more widespread. The US Commander was wounded and forced to flee during game turn 14 as the bulk of the fight switch to the approaches of the western ridge, as casualties on both sides mounted rapidly, and the US positions become more isolated in the great wash of advancing Japanes platoons. However, Japanese momentum rapidly dwindled as leader & step losses mounted, and their advantage in numbers diminished quickly. Not being able to stop the Banzai attacks in close assaults cost the Japanese dearly as the game went on. With the coming of daylight, US OBA became lethal in "danger close" artillery fire missions. Whole, pinned platoons are repeated eliminated in the Emperor's service by accurate artillery & mortar fire. The Japanese force is seriously flagging by the end of game turn 19 as they lose their 16th & 17th step that turn. This play-through was exciting, but there was little scope for maneuver and it played like Verdun in 1916, but with jungle growth. All in all, a most intense and hard-fought scenario. This one was very hard for either side to claim as a clear victory and it favors the Japanese side. This is balanced by the urge for the Sons of Nippon to push their luck too far. In truth, the Japanese player must try to display restraint, to allow for proper exploitation of the yawning gaps that he or she will create in the US lines in the early going. I fell into this trap, as I see others have. Multiple probes is the way to go, with sufficient reserves close-by to take advantage of combat-related opportunities that will arise. I give this one a generous rating of 4, mostly due to the fun of playing with a resolute, resourceful and respectful opponent. This scenario is recommended for SHARED and SOLO play. |
||||||||||||||
| 0 Comments |