
|
Restore the Line Guadalcanal #13 |
||
|---|---|---|
| (Attacker) United States | vs | Japan (Defender) |
| Formations Involved | ||
|---|---|---|
| Japan |  |
124th Infantry Regiment |
| United States |  |
1st Marine "Edson's" Raider Battalion |

| Total | |
|---|---|
| Side 1 | 3 |
| Draw | 4 |
| Side 2 | 10 |


| Overall Rating, 17 votes |
|---|
|
2.24
|
| Scenario Rank: 898 of 913 |
| Parent Game | Guadalcanal |
|---|---|
| Historicity | Historical |
| Date | 1942-09-13 |
| Start Time | 09:00 |
| Turn Count | 9 |
| Visibility | Day |
| Counters | 28 |
| Net Morale | 0 |
| Net Initiative | 3 |
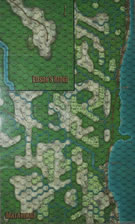
| Maps | 1: Guad-ME |
| Layout Dimensions | 84 x 55 cm 33 x 22 in |
| Play Bounty | 104 |
| AAR Bounty | 105 |
| Total Plays | 17 |
| Total AARs | 12 |
| Battle Types |
|---|
| Rural Assault |
| Conditions |
|---|
| Off-board Artillery |
| Scenario Requirements & Playability | |
|---|---|
| Guadalcanal | Base Game |
| Introduction |
|---|
|
After the Japanese attacks against the ridge, A and B Companies of the 1st Raider Battalion attacked west of the ridge in an attempt to restore their lines. |
| Conclusion |
|---|
|
The Raider attack failed as the Americans, just like the Japaneses the night before, found the jungle to be an hindrance. The Japanese still had plenty of spirit and fought hard to retain their positions near the ridge for the coming night. In the end the Marines withdrew. |

|
|
|---|
| Imperial Japanese Army |
|---|
|


| Marine Corps |
|---|
|


| An Unproductive Morning | ||||||||||||
|---|---|---|---|---|---|---|---|---|---|---|---|---|
Battle Report: After Japanese troops pushed American units from A and D companies of the 1st Raider Battalion back in the early morning hours of September 13, the Raiders counterattacked in the morning to restore their lines. As they moved south, they met resistance from the Japanese 1st battalion, 124th Infantry Regiment, 35th Brigade. By 0915, they had assaulted the Japanese right flank and, an hour later they had turned both flanks. Intense short-range exchanges continued until both sides stood down around 1100 hours, and the raider units withdrew. Analysis: This 9-turn scenario uses about half of the small Edson’s Ridge map, so it has a handful of units in a tight space, which makes it good for an introductory scenario. It was played with 4th edition rules and works fine using the newer rules. It also plays quickly since fog-of-war rolls are done after each side has taken a single turn. It ended with the Americans losing two steps to three for the Japanese. Since both Japanese objectives were still contested, and the number of steps lost necessary for Japanese victory wasn’t reached, this one ended in a draw. That result is consistent with the history of this action. |
||||||||||||
| 0 Comments |
| The Marines Needed To Send For More Marines | ||||||||||||||
|---|---|---|---|---|---|---|---|---|---|---|---|---|---|---|
Played this one against my local wargaming friend. My Americans assaulted the Japanese in the center, but had too few units to sustain the attack. The Japanese mortar did no damage, however a number of DF shots disrupted the Marines. In the end the Japanese held onto the victory hexes as the Americans simply did not seem to have enough units to be able to carry out the assigned task. |
||||||||||||||
| 0 Comments |
| Guadalcanal, scenario #13, Restore the Line | ||||||||||||
|---|---|---|---|---|---|---|---|---|---|---|---|---|
What I didn't like about this scenario was the sceanrio specail rules, Roll for Fog of War after each activation, no Japanese may move until American unit moves adjacent, but if not for that, it would be a good scenario. |
||||||||||||
| 0 Comments |
| Sir! You are joking, right? | ||||||||||||
|---|---|---|---|---|---|---|---|---|---|---|---|---|
0900 – Americans advance toward the Japanese position. Some unbelievable Japanese sharp shooting results in the Americans sustaining 20% casualties. Included among the dead is one of the American Captains. 0915 – Americans continue to advance and suffer another 10% casualties! (30%) 0930 – Japanese counter attack with a banzai charge! Raiders hold their ground and inflict the first Japanese casualties. 0945 – Americans pass the demoralized Japanese and advance into the western objective hex! (WOH) They take fire from the eastern objective hex (EOH) and suffer another 10% losses. (40%) The Americans lose their lieutenant and are heavily demoralized at receiving so many casualties. Calling in artillery the Japanese lose their second half platoon. In a failed assault, the Japanese lose a further half platoon. 1000 – Halfway through, the Japanese push to counter-attack. 1015 – Americans try to recover, but the assaulting Japanese overwhelm them at WOH. (50%) American Raiders sneak past the Japanese to take the EOH, but suffer more casualties. (60%) 1030 – American direct fire and artillery has minimal effect on the Japanese. The Japanese retaliate and the Raider HMG is eliminated. (70%) 1045 – Americans recover under fire. 1100 – Japanese hit the EOH but the Americans hold fast. JAPANESE VICTORY!!! AftermathUnable to restore the lines, the Americans fall back and wait for the inevitable night time attack of the Japanese. This was a very quick battle which felt impossible for the Americans from the beginning. Scenario Rating 2/5. It can be used as a teaching scenario. If it wasn't so quick, I'd give it a 1/5 for being practically broken. |
||||||||||||
| 0 Comments |
| A quick, solo friendly romp in the jungle | ||||||||||||
|---|---|---|---|---|---|---|---|---|---|---|---|---|
This is not a bad little scenario for learning the ropes in the jungle. It's also playable solitaire since it uses no hidden units. That said, it seems very difficult for the Americans to win. The Japanese start holding the victory hexes and the Americans have to move through the jungle and drive them out to win. The Japanese just need to hold to win. Both forces are elite (9/8) so they can shrug off most morale checks. My Americans drove on the two victory hexes and tried to hammer them with fire and artillery. They occasionally drove a Japanese unit down to distrupted, but never did enough damage to cause the Japanese to pull back or to make an assault viable. Because it can be played in under and hour and uses a small map area this should make a good training scenario. It's solo friendly setup means I'm likely to try it again. |
||||||||||||
| 0 Comments |
| The Few, The Pr..., Well actually just the few in this one |
|---|
|
A small Marine Raider force is tasked with the job of pushing back the Japanese from Edson's Ridge. To win the Marines have to take two hexes which are well garrisoned by the Japanese and avoid losing one of their starting positions. To do this the Marine player is given a force only 2/3 the size of the Japanese. The only good thing is that the Japanese player can't more their units until the Raiders are seen or fire. The fact of the matter is that there simply is not way, short of absurd dice rolling that the Marines can win this one. The Raiders have an insanely high morale of 9/8 which means that they are on a par with the Japanese... In the end, the Japanese easily held their hexes and were able to pressure the Marines for the additional hex that represented the Raiders starting point (once they could move) |
| 0 Comments |
| Raiders of the lost cause | ||||||||||||||
|---|---|---|---|---|---|---|---|---|---|---|---|---|---|---|
I was dreading this scenario days before playing it but Wayne and I decided that we would switch sides and play it twice in one session. This first play I got the Americans. Outnumbered 2-1 and on the attack to seize control of two Japanese positions deep in the jungle. Well, in short, the raiders got hammered in the first two turns losing 4 steps which met one of the Japanese victory conditions; most from opportunity fire but one raider step was lost from friendly fire after I attempted to bombard a position with OBA! It honestly couldn't have gone much worse for the marines. Then, to make matters worse the Japanese go on the offensive with assaults and the americans get driven back. The only thing I managed to do was protect hex #0506 from falling under Japanese control more by accident than intention. All nine turns were played out but the raiders never even got close to making any assaults on either Japanese position. One funny thing did occur though. I had forgotten about one reduced raider unit left behind without a leader in hex #0506 and that one reduced unit managed to eliminate a step of Japanese infantry advancing on it's position with opportunity fire, causing the only Japanese step loss of the battle. This scenario wasn't the worst I've played in 'Guadalcanal' and had it's moments, but the balance of it heavily favoring the Japanese only merits a "2" rating. Next Wayne and I flipped the leaders and changed sides to see if he could do any better with the raiders. |
||||||||||||||
| 0 Comments |
| Japanese barely hang on and hold out this time around | ||||||||||||||
|---|---|---|---|---|---|---|---|---|---|---|---|---|---|---|
This time around I got the Japanese and after Wayne and I flipped the leaders over it had mixed results; the Japanese got more with morale modifiers while the Americans got mostly cannon fodder except for one bad-assed sergeant with a 10-1-2 rating which seemed to make up for other's shortcomings. Wayne clearly managed his raider force better than I did and made sure to send lone leaders out to observe what units and leaders I had in the jungle hexes and to spot for OBA. This time the Japanese took a good number of losses and weren't able to do much damage to the raider force. Soon the battle looked as if it would end in a stalemate but then midway through the question came up about control of hexes. I thought that control belonged to the side that originally occupied the hex and that it retained control even in an assault, as long as there were still units in the hex from being the original defenders. Wayne believed that in the case of an assault that neither side exercised control until one side was forced out. So, this made it an entirely new situation. All that raiders had to do was keep a presence in either objective hex to prevent a Japanese victory and force a draw. With only a few turns left to go the Japanese situation became very desperate but quick-thinking and a degree of luck I was able to block the raiders from assaulting either hex by going on the offensive with suicidal counterattacks. It worked but just barely. I joked about aetting this one up a third time and going for round three but honestly didn't want to get humiliated playing the Americans again! So, after this second play, depending on how hex control is defined, the Americans do have a decent chance of a draw and people have recorded American victories in previous plays -my hat's off to them! This was my first shared play with 'Guadalcanal' and it is a good introductory scenario to get a feel for the jungle and there are no hidden units in it. It was a hard-hitting match and tense with playing either side. Next up we plan to continue on with another one from 'Guadalcanal' with "The Zuma Battalion" to see who really is the king of the jungle! |
||||||||||||||
| 0 Comments |
| Restoring the Line NOT | ||||||||||||||
|---|---|---|---|---|---|---|---|---|---|---|---|---|---|---|
My first FtF Pacific battle, I took one look at this scenario and realised that it heavily balanced the Japanese. However with only 9 turns, FOW on 14 or more and after only 1 mutual activation and a low counter density I offered Brett the chance to play both side. I took the Japanese in the first game. I put a killer stack in the main target hex, this was a MG, INF and 10-1-1 leader which could throw out some considerable fire power. The American raiders advanced forward and got hit by some excellent shooting from the above stack and very unluckily also hit by friendly fire. In 3 turns there were 4 step losses and the game was lost for the US. In fact the Sons of Nippon went on the offensive and drove the survivors back. In the final turns the Raiders hit back and successfully eliminated 1 whole step of Jap INF. This at least made Bret feel better. Far too unbalanced for my liking although we had fun playing this mainly due to some strange die rolls. E.G The friendly fire episode which took 1 step and the fact that the Japanese when they went on the attack kept failing morale checks. Even the reduced raider firing on the 7 chart got a X result! |
||||||||||||||
| 0 Comments |
| Restore the line NOT. Part II | ||||||||||||||
|---|---|---|---|---|---|---|---|---|---|---|---|---|---|---|
Have seen Brett try and fail to make any dent in the Japanese line I though I could see a strategy which might work better. As my leaders were plentiful if poor apart, from good old SGT 10-1-2 "Rock", they would scout ahead of my Raiders and discover where my opponent had place his HMG/INF combo and even draw some enemy fire. Brett was far too bright to fall for firing at the leaders but at least I knew where his main point of defense was. I realised that it would be only firepower that could win this one and decided to three stack with two raiders and and a MG unit with Sgt Rock in command, as the line advanced this stack drew plenty of fire and lost a step, however they also took out three steps of Japanese troops, I thought at one stage I may grab a draw, but the crafty enemy commander then led his troops into a Banzai charge although this led to more losses for the fanatical Jap INF it also meant that all my units were now tied up in assaults and could not move onto the target hexes. The game then petered out in low numbered assault which could not hurt either side. IMHO I played this as well as anyone could as the US and had some decent luck as well the result however was the same. I note there has been two US victories although reading the AAR from Joe O I think that has been marked up incorrectly. Only the most incompetent and unlucky Japanese commander should lose this, Brett was unlucky in both our games but he was not regrettably incompetent in any way. |
||||||||||||||
| 1 Comment |
A good call on the hex control issue Wayne. I checked the forum rules section and it confirms that as long as there is an enemy presence within a hex that control of it is disputed. This goes to show that after all this time invested in PG I still have a lot to learn and that there are a lot of past solo plays where the outcome may have been quite different had I realized that. Luckily I was able to remedy the situation for the Japanese just in the nick of time to prevent a draw! Also, I have to admit that I liked losing with the Americans more, in our first play of this one, than I did barely hanging on with the Japanese in our second play of it! When I lose a match I make sure that I lose well!
| Impossible task, gets even harder | ||||||||||||
|---|---|---|---|---|---|---|---|---|---|---|---|---|
Looking over this scenario and the setup on the map, it seems really hard for the US to win as the enemy can set up on the victory hexes they need to win. In order for the US to win therefore they need to oust the Japanese from these same 2 hexes, keep control of a 3rd hex the US setup on and moved away from, plus not lose 4 steps. [To clarify, the Japanese victory conditions were to control the 2 hexes mentioned OR eliminate 4 US steps. An American victory needs to keep control of their departure hex AND take the 2 victory hexes where the Japanese set up] This is a very small scenario with only a handful of units and the action will take place on a very small part of the map in 9 turns. The Japanese have a few more units than the Americans while the only US advantage is an off board arty of 18. Before the US even made first contact with the Japanese, disaster struck. The scenario utilizes the fog of war random events and the US got the off board artillery has run out of ammo event! Before it had even begun it seemed like it was over. But the Marines don't simply give up and this mission continued. There was a lot of swearing, a lot of fighting and in the end Marines had assaulted into the 2 previous mentioned victory hexes and only lost 3 steps. The marines lost 3 steps and a SGT while the Emperor's soldiers only lost one step. |
||||||||||||
| 0 Comments |
| When the best you can hope for is a draw |
|---|
|
In this scenario the Marines are moving forward from Edson’s Ridge, and must capture two hexes from the Japanese while defending a hex closer to the ridge, probably their departure point from friendly lines. The Japanese must also control the two forward hexes or inflict four steps on the Marines. Seriously, an outnumbered and outgunned force is attacking a superior enemy hiding in the jungle objective hexes, while having to defend their own departure hex, all in nine turns (with FOW after the first activations). Yes, the Japanese can’t move until the Marines are adjacent, but they are already in the objective hex with plenty of reinforcements, enough to heavily cover the objectives while advancing against the Marine departure hex. While the Marines have weak OBA, the Japanese have a mortar. The mortar can run out of ammo, and then, perish the thought, the Japanese player replaces it with another infantry unit! (Could I PLEASE start out without mortar ammo?) So the Marines maneuver to hit one end of the line, but as they approach the target hex the Opfire kills three steps! Yes, very lucky rolling, but that is the end of good rolls for the scenario. The Marines assault one Japanese hex, while the Japanese assault the departure hex, and not one assault for the game rolls higher than a 3. No steps inflicted by either side. So the scenario ends (quickly) with one hex Japanese controlled, one contested, the Marine departure hex contested, and three Marine step losses to zero Japanese losses. A draw. Yes, only about 30 min to play, but 30 min that could be better spent doing something else. This scenario is unwinnable for the Marines unless the rolls are miraculous in one direction, or the Japanese play incompetently. I looked at the three Marine “wins” listed, and one has no AAR, another (Jay’s) does not explain what happened to secure a Marine victory, and Joe’s write-up states the Marines failed to achieve their objective, so I suspect he clicked on the wrong winner button. It is not even a good training scenario since the attacker can’t win and the defender needs little competence to set up in the victory hexes and hunker down. The scenario is way past unbalanced, to the point of broken. I’d never play face to face as the Marines since a draw is the most you could hope for, and I’d never play face to face as the Japanese because it’d be embarrassing. Definitely a 1. How do you repair this scenario? By not rolling FOW until the second activation, and doing one or more of the following: 1) Allow the Japanese to only set up within two hexes of 0410, not three. 2) Reduce the Japanese force. 3) Increase the Marine force. |
| 0 Comments |