
|
The Tasimboko Raid Guadalcanal #11 |
||
|---|---|---|
| (Defender) Japan | vs | United States (Attacker) |
| Formations Involved | ||
|---|---|---|
| Japan |  |
2nd "Courageous" Infantry Division |
| United States |  |
1st Marine "Edson's" Raider Battalion |

| Total | |
|---|---|
| Side 1 | 2 |
| Draw | 2 |
| Side 2 | 2 |


| Overall Rating, 6 votes |
|---|
|
3.83
|
| Scenario Rank: 166 of 913 |
| Parent Game | Guadalcanal |
|---|---|
| Historicity | Historical |
| Date | 1942-09-08 |
| Start Time | 05:30 |
| Turn Count | 50 |
| Visibility | Day & Night |
| Counters | 79 |
| Net Morale | 1 |
| Net Initiative | 3 |
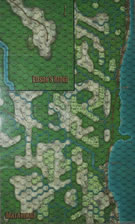
| Maps | 1: Guad-ME |
| Layout Dimensions | 84 x 55 cm 33 x 22 in |
| Play Bounty | 138 |
| AAR Bounty | 165 |
| Total Plays | 6 |
| Total AARs | 2 |
| Battle Types |
|---|
| Rural Assault |
| Conditions |
|---|
| Hidden Units |
| Naval Bombardment |
| Randomly-drawn Aircraft |
| Reinforcements |
| Scenario Requirements & Playability | |
|---|---|
| Guadalcanal | Base Game |
| Introduction |
|---|
|
Native reports placed 200-300 ill-equipped and starving Japanese at the village of Tasimboko, almost twenty miles from the Marine beachhead. Other signs pointed to a Japanese buildup. Marine headquarters decided to send the combined Raider/Parachute Battalion on a raid to disrupt the enemy and gather intelligence. With only two APD's and a couple of patrol boats available the battalion would have to be lifted in two groups. The eight Higgins boats (LCVP's) could only land two companies at a time. Should Japanese strength prove to be more than expected or their condition better, the Marines could be overwhelmed before additional forces could be brought to bear. |
| Conclusion |
|---|
|
The Marines landed without opposition. Japanese reinforcements had landed just hours earlier. Some of the few service troops left at the landing site ran when confronted with the American landing, but many fought. quickly clearing the area, the two companies secured the beachhead and once the third company was ashore, sent A and B Companies west for the village of Tasimboko, 4000 yards away. Once ashore, C and D Companies secured the landing site in anticipation of the arrival of the remainder of the raider force. Encountering scattered resistance, the two raider companies took several hours to reach the village. After stiff fighting it was taken at 1400. By 1730 the Marines had re-embarked after destroying the Japanese supply dump and all the weapons they couldn't carry off. A large haul of intelligence documents laid out the order of battle of the forces marching through the jungle to attack the airfield from the south. Most important was the luxury food and liquor found, which returned with the Marines to the perimeter. |

|
|
|---|
| Imperial Japanese Army |
|---|
|


| Marine Corps |
|---|
|


| Navy |
|---|
|

| Flyboys Save the Day! | ||||||||||||
|---|---|---|---|---|---|---|---|---|---|---|---|---|
Battle Report: As dawn broke on September 8th, 1942, Units from B & C Companies of the 1st US Raider Battalion moved west along the coastal track to reconnoiter the Japanese troop buildup near the village of Tasimboko. At 0545 hours, they were fired on by elements of the Japanese 2nd Infantry Division. The recon Marine units took more fire as they approached Tasimboko at 0645. At 0815 hours, their APD support was withdrawn as the ground units were within 0.5 km of the village, but the Japanese defenders were tenacious and held their ground. Three American platoons went left to flank the defenders, and air support ramped up significantly; however, the Japanese received reinforcements from the 4th Infantry Regiment, 2nd Infantry Division at 1030. By 1100, hand-to-hand combat was rampant in the village itself, a battle that was to continue for 5 ½ hours. Noon brought paratrooper reinforcements for the US that moved eastward from the disembarkation point, while Marine Raiders moved west of the village to confront the Japanese HMG platoon that was staging there to enter Tasimboko. At 1245, a thunderstorm rolled in and soaked the area for the next hour as the US cleared the area west of the village and surrounded it. More Marine reinforcements landed at the LZ for the US at 1330 hours, and the paratrooper platoons reached the village at 1415. Then, one Japanese infantry platoon found a gap in the perimeter and headed southwest from the village to aid an embattled engineer unit, but they were cut off and eliminated. The last Japanese unit in the village fought to the last man and was finally eliminated by a combined paratrooper/raider force at 1630; the US troops then destroyed the supply base and returned to their encampment by nightfall. The battle was considered to be a draw as casualties were high on both sides. Analysis: This 50-turn scenario, which involves either US or Japanese hex control and American step loss for victory, was played using 4th edition rules and village rules from the Kokoda campaign. Even though the US has significant firepower advantage, particularly with air support, the Japanese made them pay for every inch of advance. By the end of 16 turns, or roughly 1/3 of the game, the Japanese had eliminated the American six steps necessary for victory. Then, it became a slow but steady advance for the Americans, who no longer had to be cautious about losing steps. Over the next 29 turns, they systematically eliminated Japanese units through a series of air attacks and assaults. However, air support was not used on several turns since all Japanese units were either adjacent to or in assault with US ones. In the end, the Japanese had lost 38 steps to the Americans’ 14, but there were no Japanese units left to contest the village. This resulted in a draw. |
||||||||||||
| 0 Comments |
| Just out of reach | ||||||||||||
|---|---|---|---|---|---|---|---|---|---|---|---|---|
This was a very close one up until the final turns and it ultimately ended in a Japanese victory though in most cases the American player can at least expect a draw. One deciding factor that came into play was choosing to use the optional rule that can randomly either increase or decrease the amount of Japanese forces alotted to the 2nd Field Artillery Regiment before the start of play. In this case a 6 was rolled giving the Japanese an additional 2 platoons of INF and a platoon of HMGs along with a Lieutenant added to the defense of Tasimboko. Had those additional units not have been added to the line-up then the outcome would of certainly been different. The initial American advance was stalled by Japanese units who flung themselves haphazardly into the way and blocked or slowed passage along the trail. It took quite a while to clear the way of these units and by the time the Japanese screening force was eliminated it had achieved it's goal of delaying a good deal of American forces and even managed a step loss before the Americans reached the Tasimboko perimeter. In fact, due to one prolonged assault combined with fog of war, a few platoons of raiders from the initial force never managed to catch up with the rest of the marines, not even the reinforcments. Also, the Japanese reinforcements arrived early, only one turn after they became available and were able to dig-in ahead of Tasimboko's defenses which also succeeded in biding more time and inflicting a few more marine losses. The Americans had a lot of airpower available to them to begin with, in lieu of any OBA but those units were used up trying to weaken the the Japanese screening forces and by the time the raiders had made it to the village area they only had one aircraft unit available which wasn't much help by then. By 10:30/turn 21 all American air-support had ceased. In hindsight I should of held onto the air-support until the village was reached because as long as they aren't used they can be held back for later use up until 16:30/turn 45. Each time an aircraft is used, with 6 initially avaiable and being able to draw 3 each turn, a dice is rolled and a 6 removes the aircraft from the pool. Saving those air units for later would of really helped later on in reducing enemy firepower and American casualties -without them the marines were subjected to a lot of effective opportunity fire and indirect fire from on-board artillery units. Initially, once the village perimeter was reached, Japanese resistance began to crumble along the outer defenses and it looked like the Japanese were going to get driven into the sea but then the marine attack began to run out of steam for a while. The Japanese counterattacked with some desperate suicide charges and managed to bite back; eventually causing enough Amercian losses to prevent an American victory by 13:15/turn 32 and cause more delays as the marines attempted to rally for one final push. Now the Americans had to eliminate or drive off all Japanese units from within 3 hexes of the village to salvage a draw. The second marine attempt went much better and Tasimboko did eventually fall under American control but time was on Japan's side ultimately, and in the end there were still 4 Japanese units left in the vicinity of the village; a platoon of HMGs along with an 81mm and two batteries of 75mm guns -not much left but just enough to spoil a draw. I liked this scenario though it did seem to drag on for while during the course of 50 turns. There were were more high than low points though it was quite frustrating for the marines, especially the the last few turns being so close to forcing a draw and knowing that if the optional Japanese deployment rule wasn't used that it would of been much more balanced; a few extra platoons available really did make a difference. But I liked the overall challenge knowing that the Americans had to face the full force of the 2nd Field Artillery Regiment. I think this one merits a replay, at least for a shared match though it would be a very long one as most likely all 50 turns would have to be played out should the Americans find themselves on the losing end fighting for a draw as this play panned out. |
||||||||||||
| 0 Comments |