
|
Gavutu-Tanambogo Guadalcanal #5 |
||
|---|---|---|
| (Defender) Japan | vs | United States (Attacker) |
| Formations Involved | ||
|---|---|---|
| Japan |  |
3rd Kure Special Naval Landing Force |
| Japan |  |
Yokohama Air Group Personnel |
| United States |  |
1st Marine Parachute Battalion |
| United States |  |
2nd Marine Regiment |
| United States |  |
2nd Marine Tank Battalion |

| Total | |
|---|---|
| Side 1 | 3 |
| Draw | 1 |
| Side 2 | 10 |


| Overall Rating, 14 votes |
|---|
|
2.21
|
| Scenario Rank: 900 of 913 |
| Parent Game | Guadalcanal |
|---|---|
| Historicity | Historical |
| Date | 1942-08-07 |
| Start Time | 11:30 |
| Turn Count | 195 |
| Visibility | Day |
| Counters | 97 |
| Net Morale | 0 |
| Net Initiative | 3 |
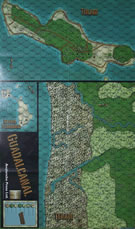
| Maps | 1: Guad-TTGT |
| Layout Dimensions | 84 x 55 cm 33 x 22 in |
| Play Bounty | 175 |
| AAR Bounty | 135 |
| Total Plays | 14 |
| Total AARs | 7 |
| Battle Types |
|---|
| Amphibious Landing |
| Conditions |
|---|
| Caves |
| Hidden Units |
| Naval Bombardment |
| Randomly-drawn Aircraft |
| Reinforcements |
| Terrain Mods |
| Scenario Requirements & Playability | |
|---|---|
| Guadalcanal | Base Game |
| Introduction |
|---|
|
Following the 1st Raider Battalion's landing on Tulagi, the Marines of the 1st Marine Parachute Battalion used the same boats to land on the small twin islands of Gavutu-Tanambogo joined by a causeway. As a consequence the Japanese defenders had several hours in which to contemplate their fate and prepare a reception for their guests. It was clear that the Americans were going to land. The only question was on which island and in what strength. |
| Conclusion |
|---|
|
The Paratroopers landed against stiff, but uneven opposition. By late afternoon Gavutu had been all but cleared, although at high cost to the small (less than 400 men) battalion. In late afternoon the Parachute Battalion's XO, in command after the wounding of the CO, called for reinforcements to complete the capture of Tanambogo. The Florida Island landing force, Company B (reinforced), 1st Battalion, 2nd Marine Regiment, was directed to land on Tanambogo Island. Approaching in the dark in six boats, the company met much fiercer opposition than the few snipers they had been led to believe occupied the island. Only about 30 men under the company commander managed to land and they were forced to withdraw in the boats and retreat across the causeway to Gavutu. The failed assault on Tanambogo led to the release of the 3rd Battalion, 2nd Marines from Divisional Reserve. At 1000 the following morning the battalion landed on Gavutu and took Tanambogo under fire. Reinforced by two M5 tanks from the 2nd Marine Tank Battalion, the three rifle platoons of Company I effected a landing on Tanambogo at 1600. Stiff fighting prevented the rapid securing of the island and the better part of the 9th of August was required to complete its capture. |

|
|
|---|
| AFV Rules Pertaining to this Scenario's Order of Battle |
|---|
|
| Imperial Japanese Army |
|---|
|


| Imperial Japanese Navy |
|---|
|


| Marine Corps |
|---|
|


| Navy |
|---|
|


| 1 Errata Item | |
|---|---|
| Scen 5 |
The causeway should be identified as Hex 0303, not 0403 as noted in the preamble to the scenario. In Special Rule 3, Hex 0503 is mentioned as a hex that could not have hidden units; since this is a water hex, the authors presumably meant Hex 0504. (Schoenwulf
on 2017 Mar 21)
|
| Gavutu-Tanambogo | ||||||||||||
|---|---|---|---|---|---|---|---|---|---|---|---|---|
Marine paratroopers started on the north shore of the larger islet, close to one end of the causeway. Facing them were Japanese service troops in front of one cave-riddled hill. Hiding in those caves were an ATG and a platoon of elite SNLF. Across the causeway was an SNLF HMG in caves in front of another steep hill, topped by a 75mm battery. All of the non-service troops were hidden. The marines had great success assaulting the front line of Japanese service troops, although naval and air support were largely ineffective and soon withdrew. A platoon of paratroopers and engineers were landed behind the flank of the Japanese line and were able to assault uphill to take out the ATG. As the Marines finished off the service troops, they ran smack into the SNLF in their caves and took their first step losses. The Marines consolidated their position and awaited for the first wave of reinforcements. Just before nightfall a company of Marines supported by 2 platoons of HMGs waded ashore at the far end of the causeway, on the smaller islet, on the only two open beaches there. Braving the fire of both the SNLF HMG and the hilltop artillery they pinned the SNLF down and took out the artillery in a daring assault up the steep hill. Japanese resistance was down to a half-strength HMG on 1 islet and a platoon of SNLF on the other islet as night fell. Both sides rested through the night to avoid unnecessary disruptions, and a pair of M5 tanks clanked up to the causeway to prepare for the renewed assault the next morning. At first light on the 2nd day, both assaults kicked off again. Within 45 minutes both positions were taken. In less than 24 hrs the Marines had eliminated all resistance on Gavutu-Tanambogo, at a loss of only 40 casualties and damage to one destroyer. The Japanese lost too many units early on defending the ground in front of their caves. They should have filled the caves with troops instead, which would make them nearly impossible to root out. I had anticipated the Marines having a tougher time fighting in the open, but that was no problem. The caves were a much more difficult task, even when only lightly held. |
||||||||||||
| 0 Comments |
| Gavutu-Tanambogo - A Brief AAR | ||||||||||||
|---|---|---|---|---|---|---|---|---|---|---|---|---|
Following the historical precedent Gavutu was the scene of most of the initial fighting. The US paras moved cautiously towards the caves on the main hill of Gavutu. A few hidden Japanese units gave the para pause for thought and quickly the US was down a couple of steps (if more than 6 US steps are lost the Japanese win.) The dug-in Japanese defenders were soon swept aside by the more numerous US para. The US became far more cautious after these initial losses. Within a couple of hours of the start of the scenario the Japanese on Gavutu were pinned back in the caves. A Japanese unit had managed to retreat into the caves to bolster the defences, the Banzai rule limits the ability of Japanese units assaulted from exiting assault combat. The caves in hex 0506 were the most heavily defended and so the US deployed their engineers there to assists in the assault, it still took several hours but the Japanese were eliminated from this position just before darkness fell on the first day. The Japanese defenders in the caves on 0406 managed to take out half a platoon of paras as they approached the caves. The US assault on these caves did not go well and soon the Japanese had gained a +2 tactical assault advantage as well as another US step loss before the US decided to call off the attack and retreat, fortunately taking no more damage from the ‘free shot.’ A Japanese sniper shot eliminated a US leader (random event.) A renewed attack on the single remaining cave on Gavutu just as darkness fell was successful but the US did lose another step bringing their total losses to 5, meaning they had to be careful in taking Tanambogo. Not wishing any surprises the US reinforcements landed on Gavutu rather than on Tanambogo. No further action took place until the arrival of the M5 the next day at 12:00. The remaining ships and planes (they have a 1 in 6 chance of being removed after each use) fired onto 0202 for several turns but achieved little. The US player still anxious about further losses awaited the arrival of the remaining reinforcements on the 8th of August (turn 91) In a coordinated attack from land and sea the US stormed Tanambogo. The caves eventually fell but not after the US had lost another step (now on 6 – one more and they would lose.) The last of the Japanese troops were discovered on top of the hill on Tanambogo. The M5 quickly hit reverse as the once hidden Japanese 75mm gun opened fire on it from the summit – however the tank got away without a scratch. Now fully revealed the Japanese did not last long from the awesome amount firepower the large amount of US forces could lay down. US victory but it was a close run thing. Ending on turn 112 the game took about 3 hours to play as a lot of those turns were spent without any action. The game was quite fun for the US player but there was really little the Japanese player could do the whole scenario. Maybe an interesting scenario for solo play. |
||||||||||||
| 0 Comments |
| Two days of cave bashing. | ||||||||||||
|---|---|---|---|---|---|---|---|---|---|---|---|---|
American Goal Eliminate all Japanese with suffering less than 7 steps. Timeframe – 2 whole days! Strategy - With two days to rid the islands of Japanese presence, the Americans can really take their time. They need to move carefully and can “waste” time trying to spy out the hidden Japanese units. Either from LCVP or moving in safe hexes. The lack of Jungle will make attacking the caves much easier and they can use firegroups to get maximum effect. Crossing the causeway may prove problematic. Japanese Goal Inflict casualties (at least 7 steps), survive. Strategy – Hide out and take a pot shot when they have a good chance at scoring a hit. Hide in caves and use first fire to defend in assault. American Casualties will be presented by (x). The Battle1130 – The Americans begin to dig-in on shore as the LCVPs advance. Japanese AA gun and artillery on the west hill opens fire on the LCVPs. One boat is sunk sending the Major and the only engineer platoon to the watery depths! (2). But their hidden status is lost. comment: A great start for the Japanese! American ABDs and Navy target the Japanese guns, but are ineffective. A hidden SER is spotted by the approaching LCVPs. 1145 - 1200 – Air attacks and Naval Barrages smash the Japanese guns eliminating them as the boats begin to land. Another hidden SER is spotted. American troops open fire vs. the dug-in Japanese who, having lost hidden status, try to flee to the caves, under heavy fire. Half a platoon and their Ensign are lost. 1215-1230 – Parachute platoon is reduced by Japanese fire. (3) But the Americans demoralise, assault and eliminate the Japanese SER. A fairly secure beachhead is established. Comment: Japanese have inflicted half the allowable casualties on the Americans. The American decision is whether to assault now or wait for the Marines and their superior firepower. If they wait long enough, they will get repeatedly hit. So they decide to advance… 1245-1300 – Americans advance and the Japanese, instead of fighting in the open, retreat into the caves. There is no assault. American troops flood the south island as the Japanese defenders are pinned inside their caves. Comment: Either the Japanese wait for the Marines to attempt to dig them out or they “counter-attack” fighting outside the cave. They decide to stay inside. 1315-1700 – Nothing happens as the Americans dig-in. 1715 - 1745 – The Marines arrives and move in for the assault. 1800 – The assault on the first cave is attempted. Fire is exchanged but to no effect. This is very scary for the Americans and leaving the result a bit too much to chance. The earlier loss of the only American engineer is costly. 1815 – Assault is retried once more but the Marines suffer a loss (4). 1830-1915 – The Marines recover morale and wait for night to set in. midnight – At midnight the Americans bring a few M5s to shore. errata: I’m not certain when this should have arrived. The scenario says 8 Aug 1200, but then it says turn 36, which is near midnight. It also shows it arriving prior to 8 Aug 1000 (turn 91) when the 3rd battalion arrives. So I opted for a midnight landing. 0530 - 0600 – The sun begins to rise. Welcome Day Two. The Americans begin to manoeuvre for a new tactic. They leave the entrance to cave one and one parachute company is demoralised fleeing. The surrounding fire groups attack! Gameplay note: firegroups attack on the 16 and 11 columns. Japanese counter-attack on the 16. It is a bit risky, but with two attacks to one, the odds seem better than going for an even assault. The Americans are very fortunate as their first volley eliminate one of the Japanese platoons! The defenders fail to recover. 0615 - 0630 - More direct fire and a full assault fails to crack the Japanese defenders who begin to recover. 0645-0715 – The Americans continue to fail to conquer the cave as the Japanese platoon eventually recovers. WHAT A HARD SLOG! 0730-0830 – It takes another hour of assaulting, but eventually the Japanese defender is eliminated. 0845-0900 – Americans dig-in and prepare for the next cave. 0915-1100 – Americans wait for the Marines and more HMG platoons to arrive. They line the outside of the caves with HMGs. 1115-1145 – The attacks begin when the Americans abandon the cave front. After 45 minutes of attacking, the American HMGs finally eliminate a Japanese platoon. 1200-1215 – HMGs deliver another devastating attack (2X). The final Japanese platoon is then reduced from compound morale failure. 1230 – The cave defenders are eliminated. Only one more cave to clear out. 1245 – The American M5 leads the charge across the causeway supported by infantry under fire. 1300-1545 – American armour and infantry advance to the cave entrance. The Japanese defenders decide to hide within instead of assaulting in the open. The Americans keep the Japanese pinned down as the HMGs advance past and dig-in around the cave. 1600 – 1700 – Americans leave the cave front racing across the causeway as the HMGs open fire! The defenders are disrupted, demoralised, rallied, pinned, disrupted and finally eliminated! The Americans are Victorious! AftermathSuffering only 4 step losses, the Americans are finally victorious in their Solomons campaign. Cracking those caves is very tough, but the ability to make firegroups and lack of other cover made these much easier than in Tulagi. Also, the allowable losses for the Americans was more lenient. Combined with the huge timeframe (195 turns), this scenario felt more balanced than the previous ones. The Japanese defence is fairly static, and I would hate to have played this 2-player as the Japanese. This felt more like a “solo puzzle”. |
||||||||||||
| 0 Comments |
| Zero caution begets zero results | ||||||||||||
|---|---|---|---|---|---|---|---|---|---|---|---|---|
Despite the 195 turns given to complete this amphibious assault this play was finished after just 22 completed, ending in utter disaster for the marine paras. The actual landings went surprisingly well without any of the LCVPs being eliminated from any Japanese weapon units and those guns were quickly dispatched by combined air strikes and warship support. The Japanese had most of their units holed up in caves on both islands with a few SER units dug-in at the base of the hills on Gavutu. A random event occured early on with a change in American orders allowing 2 more step losses than the original VCs stated. Foolishly the paras advanced adjacent to the defenders on both islands hoping to get lucky first with DF and got nil results. Instead, the Japanese defenders easliy picked off step after step of the invading force, most benefiting from a +1 Df modifier from firing at higher elevations. The first American loss did not occur until 13:15/turn 8, but after that casualties continued to multiply. The best overall American leader, a Major with a 9-1-2 rating was also soon eliminated by 14:30/turn 13, with 2 more para step losses and dropping the American initiative down a notch. The Japanese were able to roll "snake eyes" more than once firing on the 16 column of the DF table while the Americans were only lucky enough to cause a few disruption and demoralization on the defenders but those always managed to quickly recover before further results could be gained. More than once I considered withdrawing the paras further back to wait for the turn 24 reinforcements to arrive which had better direct fire values but instead pressed on the futile attack. Ultimately, as a result, the Japanese were able to claim a victory from American step losses reaching 10 before those reinforcing units would even make it to their LCVPs. So my advice to anyone reading this is to not do as I did playing the Americans. The paras are just not strong enough to cause too much damage on their own. It occured to me, too late, that with the caves on Gavutu being at a higher elevation that it was not necessary to get so close, that the same ineffective results could of been done from two or three spaces away instead of adjacently. The one cave on Tanambogo was an exception as it was on level ground. In retrospect that one cave should of been singled out first but only 2 platoons of paras had landed there to take advantage of the higher ground. For all their efforts not one step of SER or SNLF Japanese foot units were eliminated. When American losses totalled 10 at 16:30/turn 22, there was no point in going on any further as there was no longer a chance of an American victory or draw. This one requires a lot of patience on the part of the American player and if they are bent on winning most likely that would have to wait until the second day since once night falls, all American units are disrupted no matter what they do; even after firing. |
||||||||||||
| 0 Comments |
| Grass grows, paint dries, Japanese play this scenario | ||||||||||||
|---|---|---|---|---|---|---|---|---|---|---|---|---|
In this scenario a large Marine force that arrives piecemeal must clear a pair of connected islands of Japanese defenders. The Japanese forces are not strong, and made up of primarily service units, but they have caves to help with the defense. The Marines start with weak paratrooper units on the island, and gradually more powerful units arrive, to include one step of tanks. The Japanese set up with the AA gun and the one platoon of SNLF Inf in the cave on Tanambogo, the SNLF HMG and one Ser in one cave on Gavutu, and one Ser in the other cave, and the remaining four Ser units hidden adjacent to the Marine starting locations. The arty sets up on the far end of Gavutu, not in a cave so it can indirect fire. The Marines have six Paras on the island, two in “town” (Japanese base) and two each in the hexes outside of the town. I tell myself I should be patient with the Marines (reinforced by other AARs), but as I bring more Paras to the island the Japanese hidden units open up with opfire. The Marines go wild, and decide to fire upon, assault, and chase down the Ser units. Supporting fire from the AA gun on Tanambogo gives more Marines a chance to charge that position since it is already activated. The battle against the Ser units goes well for the Marines, but charging the AA gun turns out to be a bad idea. The Ser units crumble, but as the few survivors run for the caves the Marines pursue. Now the real reason for the Ser unit attack and retreat shines. As the Marine assault wipes out all but one step of Ser units (that one makes the caves), the Japanese HMG position rips into the Marine stack, rolling a ‘1’ on the 16 column, taking out two steps of Paras. Meanwhile, the rush onto Tanambogo also sees an end result of one Lt and two steps of Paras going down. The supporting aircraft and ships have been helping the Marines attacks, and manages to knock out the arty very quickly, but all aircraft and the CL leave the battle. By the end of ten turns the Japanese have lost eight of 18 steps, but the Marines have lost four steps, all air support, and some naval support. The Marines withdrawal and hunker down, cramped into the northern end of Gavutu, dug in, waiting for nightfall. Both sides quiet down, since all fire is from too far away to do anything more than harass each other. Finally, the Marines use the cover of darkness to prepare for an attack on Tanambogo. As the first rays of light break the horizon, Marines landing craft, approach Tanambogo. The DDs prep fire against the caves, and eventually cause some disruption of the Japanese units. The landing craft go in, the AA gun blows one to bits with a one step unit and Lt on board, and the rest of the Marines form up supporting fire teams around the caves. The SNLF unit takes a step loss pretty quick, but the AA gun cannot force anything heavier than another disruption before it also disrupts. At this point the Japanese cannot recover fast enough to overcome the Marine firepower, and eventually the stronghold is destroyed at the cost of one step (five total now). The Marines shift units around, bringing the strongest units into positions facing the Gavutu defenders (but they dig in and are far enough away to prevent real damage), while stacking excess forces on Tanambogo. Once again, the Marines wait for even stronger reinforcements, accepting the eight-step-guaranteed-Japanese-victory condition in exchange for multiple HMGs. Night arrives, and the Marines position on-island units adjacent to the defenders and have them dig in before first light, while landing more forces around the defenders and also digging in. The two landing units on the southern extreme (one Mar, one HMG) suffer horribly, taking repeated disruptions and demoralizations from the fire of both cave positions. Once the sun arrives, all Marines except the southern units are dug in and ready to fight with massive firegroups against the caves. The remaining DD never really accomplishes anything before withdrawing during the battle. The firegroups keep shooting at the Japanese, while the Japanese continue to pound the southern units. They finally inflict the sixth step against the southern Mar unit, but the firegroups eventually crack the HMG (plus 1.5 Ser platoons) position. Once the Japanese crack, they cannot stand up to the massive firepower pouring into the caves, and they die to the last man. The remaining Ser platoon, with two ensigns, continue to try and resist, but they cannot stand up to the huge Marine force now surrounding their position. The Ser troops demoralize, then die in the Marine assault, and only the two ensigns are taken alive. Looking at the victory conditions again, I realize the Japanese needed to inflict more than six losses, not just six, so it is a Marine victory! But at such a cost! It took 142 of the 195 turns to complete. Time is definitely on the Marine side, and they should use it to be patient and use the night to their advantage. Clear Tanambogo first since it is hard to approach without the landing craft, while Gavutu actually has some maneuver room. Overall, though, I give this scenario a 2. I really don’t suspect the Japanese can survive with any forces intact for 195 turns, so steps is really their only path to victory or a draw. I suspect they can do it, and the scenario is reasonably balanced that way, but that isn’t the real problem with the scenario. I cannot imagine this in face to face play if you are the Japanese. You can mostly watch the grass grow while the Marine player decides the timing and tempo. Of the 142 turns, really only about 40-50 had actual action going on. This scenario would be boring for the Marine player, and don’t be surprised if the Japanese player offered capitulation within 20 turns just to avoid the boredom. I’ve seen a squad level game on this, and while better, the players had the same complaints of lack of maneuver and little activity for the Japanese player. Nice piece of history, but not the best battle for wargamers. |
||||||||||||
| 0 Comments |
| Small Islands, Big Victory! | ||||||||||||
|---|---|---|---|---|---|---|---|---|---|---|---|---|
On August 7th, while the main US force was engaged on Tulagi, Marine paratroopers from the 1st Parachute Battalion landed on the north shore of Gavutu with support from Fire Group Mike at 1130 hours. They faced stiff resistance from Japanese units from the 3rd Kure Special Naval Landing Force (SNLF) and the Yokohama Air Group. The Axis forces had a service platoon on the top of the hill on Tanambogo protected by an SNLF unit in a cave below, a 75mm howitzer platoon on the eastern point of Gavutu, and an SNLF HMG unit with two service platoons in a cave on the southern tip of Gavutu. There were also three service units and a 37mm AA platoon hidden on the two islands. A squadron of SBD’s dispatched the pesky Axis 75mm unit before noon, but then a thunderstorm broke out slowing movement on Gavutu for half an hour. When the sun came back out, service troops were spotted scurrying into one of the south caves so the troops from A & B Companies set up a perimeter. As C Company reinforcements landed, Major Conforti and his causeway para group eliminated the recently discovered 37mm AA platoon on the northeast shore of Tanambogo. By 1430 hours, one service platoon has been expelled from its cave and was eliminated. The other cave on Gavutu held both service platoons and a SNLF HMG group, so the paras held the perimeter until the reinforcements from Company B, 1st Battalion, 2nd Marine Regiment arrived. A combined arms group from that regiment then assaulted the remaining cave on Gavutu, but was repelled. After regrouping, they stormed the cave again and eliminated the remaining Japanese troops, securing Gavutu by 1700. A brief attempt was made to cross the causeway before dark, but the strike force was quickly disrupted by heavy fire from Japanese troops emerging form the cave on the south end of Tanambogo. So, the newly arrived M5 took point on the east end of the causeway, while the remainder of the Allied forces spent the night in relative quiet. When dawn broke, the Marines reassembled and assaulted the cave at the base of the hill on Tanambogo at 0600 hours. They forced the Japanese service/SNLF group to flee to the top of the hill and eliminated them shortly thereafter. By 0645 hours, both islands were free of Japanese troops and secured for an Allied victory. This scenario was played using 4th edition rules (including the updated cave rules), and the special rules regarding Hidden Units (#4) from the Kokoda Campaign scenario book. It basically requires the Japanese to eliminate at least 7 American steps, while the Americans must clear the Japanese from the island while not losing more than six steps. The early turns broke well for the Marines since they were able to identify most of the hidden units quickly with some fortuitous hits. The early elimination of the 75mm artillery unit also was a great break. Much of the early game after that involved waiting for the Marine HMG support to help in the cave assaults. The initial morale check of the paras worked out well with only one disruption, and they were able to secure most of Gavutu except for the caves, which were then cleared later on with a loss of two steps. After the night break, the Tanambogo cave was cleared as the Marines rolled a two-step loss on the second assault and drove the disrupted Japanese units out in the open, where they were quickly dispatched. The Japanese have two options, to either confront the paras and hope for some quick step losses, or to hold out in the caves where they have an advantage with the automatic 2-column shift. This scenario used the latter approach, but the quick discovery of the hidden units compromised the Axis firepower. The cave assaults have the potential to be brutal for either side, but the Marines clearly had the best of those actions. The scenario went a total of 88 turns, but the Japanese have little to do on many of them, similar to the Marines at night. The Japanese lost 18 steps to the three lost by the USMC, and it was an American victory. |
||||||||||||
| 0 Comments |
| Caves are a pain in the butt! | ||||||||||||
|---|---|---|---|---|---|---|---|---|---|---|---|---|
When I started this scenario, I never realized how much I would despise the Japanese access to caves, nor how much punishment they can dish out during the multiple attempts to destroy the units within the caves. With the very small map area, it was not apparent at the outset how many turns would be necessary to narrowly win the small island. This better get easier as I advance in time playing PG in the PTO, it's got to get easier! |
||||||||||||
| 0 Comments |