
|
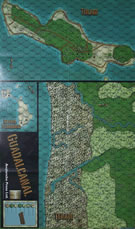
Tulagi Guadalcanal #4 |
||
|---|---|---|
| (Defender) Japan | vs | United States (Attacker) |
| Formations Involved | ||
|---|---|---|
| Japan |  |
3rd Kure Special Naval Landing Force |
| United States |  |
1st Marine "Edson's" Raider Battalion |
| United States |  |
5th Marine Regiment |

| Total | |
|---|---|
| Side 1 | 1 |
| Draw | 3 |
| Side 2 | 8 |


| Overall Rating, 12 votes |
|---|
|
2.75
|
| Scenario Rank: 835 of 913 |
| Parent Game | Guadalcanal |
|---|---|
| Historicity | Historical |
| Date | 1942-08-07 |
| Start Time | 08:00 |
| Turn Count | 137 |
| Visibility | Day & Night |
| Counters | 119 |
| Net Morale | 0 |
| Net Initiative | 3 |
| Maps | 1: Guad-TTGT |
| Layout Dimensions | 84 x 55 cm 33 x 22 in |
| Play Bounty | 167 |
| AAR Bounty | 147 |
| Total Plays | 12 |
| Total AARs | 5 |
| Battle Types |
|---|
| Amphibious Landing |
| Conditions |
|---|
| Caves |
| Hidden Units |
| Randomly-drawn Aircraft |
| Scenario Requirements & Playability | |
|---|---|
| Guadalcanal | Base Game |
| Introduction |
|---|
|
The invasion of Tulagi was a footnote in the Guadalcanal campaign, but the fighting on it and the small twin islands of Gavutu-Tanambogo were far better indicators of the struggles the Americans would face in their advance across the Pacific. At 0800 the 1st Raider Battalion and 2nd Battalion, 5th Marine Regiment began landing on the western coast of Tulagi. In the battle that raged for the next two days (more for the final mop up) neither side asked or gave quarter, and no pauses for rest were permitted. |
| Conclusion |
|---|
|
The Raiders landed without a casualty and quickly secured two-thirds of the island. the remaining one third proved to be a much more difficult task. The special Naval Landing Force troops counter-attacked in strength on the first night. The battle was unrelenting and casualties mounted on both sides as the last of the defenders were destroyed or driven east. By the end of the second day only a few Japanese remained on the island. as many as forty escaped by swimming to nearby Florida Island and the remainder were hunted down over the next few weeks. |

|
|
|---|
| Imperial Japanese Army |
|---|
|


| Imperial Japanese Navy |
|---|
|


| Marine Corps |
|---|
|


| Navy |
|---|
|


| One of the longest PG scenarios | ||||||||||||
|---|---|---|---|---|---|---|---|---|---|---|---|---|
This one is only for the real die hard PG fan. The reason 137 turns. I play this one shortly after getting the game 4 years ago and I have some of my notes to go back to. I found the first day to be fun, amphibious assault, air attacks, naval support, but for the Japanese I found it very hard. First Tulagi is not very big so there is not many places you can put hidden troops. Second, once the Americans are on shore they can form groups to hunt and kill the isolated troops. All this happened on the first day and by the end the Americans had secured most of the island. During the night, the Japanese were able to mount some assaults, but at that point it was suicide charges, there was no hope for them holding out. The caves were impressive, very hard for the Americans to counter the shifts on the DF/BF and assault tables for that. I took time and stacks of 3 platoons to rout them out. Over all it was good, but I may suggest staying with scenario 1 as this will cover most of the battle and you won't have to have the same scenario on the table for two months. |
||||||||||||
| 0 Comments |
| No island paradise here | ||||||||||||
|---|---|---|---|---|---|---|---|---|---|---|---|---|
First off, I'd like to say that the Tulagi island map is simply beautiful and comes complete with a cricket field and a few scenic views from atop it's hills but that is where the beauty ends. As a battlefield it is a miserable place for both the attacker and defender. This scenario was long though it was completed after 97 turns of the potential 137. It's probably not for everyone and it will test your patience whether you play it out solo or (perish the thought) shared; or as the Americans or Japanese. As the other AAR writers suggested, if you are in the mood for an amphibious assault and want to endure the Tulagi experiance then you can bypass this one and just stick with the first Tulagi scenario "Tulagi - The First Day". However, this one is different, even with the initial landing, available forces and VCs; it is not exactly the same as the first scenario as far as the first day goes as you have a few more options with the Japanese in deployment. In this scenario the Americans are allowed up to 7 step losses to secure their victory by eliminating all but one of the Japanese SNLF or Tulagi Seaplane Base personnel units. There is no real rush to accomplish this for the Americans with the time allowed but it would be best if the objective was reached before nightfall because by then the battle will become very static as Americans are restricted in movement then and disrupted if they choose to move at all. Then there is the penalty of adding +1 to American recovery rolls during night turns along with the increased chance of fog of war occuring. The first few turns of the battle will decide a lot as to how the Americans will proceed with organizing, manuevering and attacking. The best that could be hoped for is that the Americans not only get sufficient air support but that it is able to wipe out the Japanese 37mm AA gun before it can fire at the landing craft. This is where it is advisable for the Americans to play it safe. You don't need all of the marine units on shore right away and the AK troop transport can hold an unlimited amount of troops at sea and out off range of the AA gun until it is eliminated. Here, after air-support failed to eliminate that threat, I went on with the landings and sure enough the AA gun sank an LCVP carrying 2 steps worth of marines on the second turn with a potential 135 turns left to go! Of course that gun was eliminated soon after with the cruiser and destroyer task force but it had served it's purpose well. From then on the Americans would proceed with a little more caution in securing the island as they were only allowed 5 more step losses for VCs. The west end of Tulagi was not secured until 14:45/turn 28 and the east end of the island put up fierce resistance before it succumbed later but only after inflicting a few more marine step losses. Then there were the caves to deal with. Because American losses were high enough already units did not triple stack during the daylight hours of the first day to get the maximum amount of DF. The island would not be secured entirely before nightfall. However, by that time, there was only one stubborn unit of SER units left holed up in the village on the northern end and one of the caves had been cleared of HMG units by then. But soon, American losses had reached 6 steps going into the night phase. The Americans did a good job of organizing their forces before nightfall and finally did triple-stack to flush out the two remaining caves but after hours of static fighting tragedy struck the marines when a random event occured and at 21:45/turn 56, "snake eyes" were rolled after friendly fire occured and the marines eliminate a step of their own HMGs! Now the Americans could only afford one more step loss and it seemed inevitable that before those last caves were cleared that the Japanese would get lucky enough to roll "snake eyes" on the 7 column of the DF table before they would eventually be eradicated. At 01:00/turn 69, that is exactly what happened and with 8 step losses the Americans were battling for a draw instead of a victory. During the remaining night hours the caves kept holding on while marines did slowly manuever in disrupted fashion to form a firing ring, dug-in and out of sight on the beach, east of the remaining caves. It was hoped that they wouldn't be needed and that the last cave would fall before sunrise of the second day. Instead, the battle continued to drag on but by daybreak there was just one cave left holding out and barely. Exactly 24 hours after the invasion began at 08:00/turn 97, on the second day, the Japanese were reduced to just one demoralized and reduced unit of fanatical SNLF troops. All Japanese Naval and Army leaders had been eliminated or captured except for an Army Sergeant that had been promoted from within the ranks by a random event. Perhaps by that point the remaining SNLF units had had enough being led by a lowly Army leader and either committed ritualistic suicide or even surrendered. So after about five days of nibbling away at this one it was finished. It could of ended a lot sooner but then it would of been a Japanese victory. I suppose that is really the only way the Japanese player could win this one; by inflicting 8 or more step losses on the Americans and wearing out the actual American player's resolve to finish the scenario to secure a draw. It's not a question of "if" but "when" all of the Japanese will be eliminated to just one unit. However, there were times when I really started to ponder if the Japanese could of held out until turn 137. For what it's worth I cannot rate this one low, it gets an average "3" for a solo play but only if someone has the endurance. In a shared match, if the Japanese were able to inflict the 8 step losses I could see the American player forfeiting a draw from actual exhaustion and frustration and letting the Japanese win it. The American friendly fire random event is what made this slugfest a draw instead of an American victory as it was the difference between 8 and 7 American steps lost. |
||||||||||||
| 0 Comments |
| A Phalangeal Island Sweep | ||||||||||||
|---|---|---|---|---|---|---|---|---|---|---|---|---|
Battle Report: In the early morning hours of August 7, 1942 (“Dog Day” for Operation Watchtower), units from the US 1st Raider Battalion began landing at “Beach Blue” on the southwestern shores of Tulagi Island in the Sealark Channel. An unfortunate friendly fire incident during disembarkation and marshalling decimated an entire platoon. Rebounding from that, they split forces to search the western third of the island and to move east toward the central ridge. They encountered elements of the Japanese 3rd Kure SNLF at 0900 hours in the south-central highlands, where they were hiding in both elevated jungle and caves. SBD Dauntless squadrons of VF16 from the USS Wasp took out a 37mm AA platoon above the beach at 0930 and subsequently managed to disrupt operations at the seaplane base on the southeastern end. By 1130 hours, all marine landings were completed, and the west end of the island had been secured. At 1215, an unexpected squall brought thunderstorms that drenched the island for the next 45 minutes. Primary battles raged at both the north seaplane base and in the central hills, with marine units beginning to clear Japanese units in the caves on the southeastern ridge. By 1345, both seaplane bases were under US control, but cave assaults continued with vigorous hand-to-hand fighting that resulted in serious casualties to both sides. By 1430 hours, the east end of the island was secured, with elimination of the final SNLF platoon from the caves at 1345. Historians consider the battle a draw due to the high price paid in troops lost to secure the island. Analysis: This classic invasion scenario was played using 4th edition rules including the updated cave rules. A friendly fire event on the second turn cost the US a quick 2-step loss, which is difficult to recover when only eight steps are needed for Japanese victory. It is hard to see how the Japanese can do anything more than get a draw in this scenario, given the long length (137 turns) and high morale of the US invaders. By organizing US troops with officers with morale bonuses, practically every US unit has a maximum morale value of 10. A US strategy of forming a 6-hex wide phalanx across the island from north to south that moves slowly east will pick up all the hidden Japanese units, and there are enough extra Marine units in later landings to make sure there are no “sleepers” on the western third of the island. The Japanese gain their best advantage by eventually ending in the caves whether they begin there or not, since the forced assault with a negative 2-column shift provides a fighting chance of getting the eight steps needed for a draw. After that, this just becomes a battle of attrition that strongly favors the US. In this playthrough, a draw resulted primarily because of the friendly fire event that went against the US on the third turn. Since the US ended up with a total loss of 8 steps, which is the minimum number needed for a Japanese draw, it is easy to see how this could have been a clear victory. The game only lasted 32 turns, far short of the 137 available, and it is hard to see how the game could go the full length with the US strategy used here of a phalanx sweep across the island. Since the US has no choice but to eliminate Japanese units in caves through assault, it boils down to the die rolls for both sides once final assaults are underway. Step losses were US (8) versus Japanese (27). |
||||||||||||
| 0 Comments |
| Guadalcanal, scenario #4: Tulagi | ||||||||||||
|---|---|---|---|---|---|---|---|---|---|---|---|---|
I played this shortly after playing the first scenario about Tulagi, as it was already setup and used pretty much the same counters but had a much longer playing time and different victory conditions. I won’t go into too much detail, but it didn’t take 137 turns and I was able to weed out the Japanese with less then eight steps lost. It wasn’t a bad scenario but I liked Tulagi: The First Day better and like other gamers, I would recommend that one first. Guadalcanal has many better scenarios but I had to try this. BTW, Red Warriors has a scenario with a 216 turns, which believe is the current longest scenario in the PG series. |
||||||||||||
| 0 Comments |
| The first Tulagi scenario is better... | ||||||||||||
|---|---|---|---|---|---|---|---|---|---|---|---|---|
It had been over a decade since I played (face to face) the opening Tulagi scenario. I remember as the Japanese player I fought for the beach, and inflicted three step losses on the Marines in the opening moves. I decided to retry that strategy, but the impact was much less stellar this time… The die rolls in this scenario were incredible. I’ve never hit the extremes so often as I did this game. The Marines, firing more often than the Japanese, benefited heavily. The Japanese could not manage an assault on the beach due to the heavy firepower unleashed into their positions. The Japanese managed to inflict two step losses on the Marines in the first turn, but return fire was awesome with five Japanese steps falling on turn one, and two more on turn two. The Japanese had enough, and the pitiful remains ran into the jungle where eventual destruction awaited. In the first ten turns the flower of the Japanese defense had been plucked. Eleven steps of Japanese cleared out with two steps lost for the Marines. Only the Japanese Commander survived, and that would have consequences for the Marines later. The Marines split to cover the island, most of the force heading east while a smaller but strong force headed west. Most of the rest of the Japanese were hiding in caves, except half the service troops hiding in the east village (one unit hidden), the other service troops in the jungle trying to reach the caves, and one SNLF unit hidden in the west (with the very good Commander trying to reach them without exposing them). The Marines are methodical. Even so, the western force fails to spot the hidden SNLF troops and the resulting ambush knocks out another step of Marines. At this point the Commander slips into the assault hex and provides his combat bonus to the platoon, adding an entire column shift. The Marines assaults to kill the platoon take another step loss from defensive fire, but they do also inflict a step on the Japanese. At this point it’s just a question of time until the Japanese force is wiped out, but the casualty count is four for the Marines, placing them in danger of losing. Having learned from earlier plays that assaulting the caves is suicide, I build the biggest fire groups I can, surround the caves, and spend turn after turn with the exciting static action of die roll for combat, dice rolls for morale checks (with occasional step losses), die rolls for recoveries, and so on. The incredible die rolls appear again, the Japanese are always taking just enough damage to prevent a decent assault opportunity, and over time the Marines whittle down the Japanese force, often from compound demoralization. The service troops do attempt a breakthrough, but are caught just past the Marine line and, despite shaking the morale of the Marines multiple times, eventually die while trying to escape assault hexes in a demoralized state. Still, they last almost as long as the three platoons of SNLF hidden in the caves, which is a huge testimony for their bravery. Once the caves are clear the Marines advance in earnest to the eastern extreme of the island. The hidden unit in the village is eventually seen and tries to join the other unit and leader who were forced up onto the hill. They never manage to combine as a full force (only three steps manage to combine), and they are wiped out fairly quickly, again while trying to flee in a demoralized state. Before sunset the Marines have completely cleared the island, and not one Marine step loss during the entire battle for the eastern end of the island. Unfortunately I’m still stuck giving this a 2. It’s actually better than that for a solo scenario, but I try to judge against two player since that was the game design. As the Japanese player this would be a long boring play watching the Marines swarm the island. As others have mentioned, the first Tulagi scenario gets you all the benefit of the Tulagi experience without the extreme play time. Perhaps I should re-score the first to a 3, but that would be a strictly relative scoring. The map of Tulagi is awesome, and I love the premise, but Japanese players are stuck facing overwhelming odds with only so much decision space. I certainly had more fun playing the Japanese in scenario one than I would have here, but I can’t say it was awesome back then only because the Marine conditions were easy to overcome, so my opponent felt frustration playing for a draw after the first turn. The Tulagi scenarios deserve a second look to perhaps follow less history and make a more fun scenario using the excellent island map. |
||||||||||||
| 0 Comments |