
|
Kursk - South Flank Scenario 34: With Reckless Abandon Variant Panthers #5 |
||
|---|---|---|
| (Defender) Germany | vs | Soviet Union (Attacker) |
| Formations Involved | ||
|---|---|---|
| Germany |  |
2nd SS "Das Reich" Division |
| Soviet Union |  |
183rd Rifle Division |
| Soviet Union |  |
2nd Guards Tank Corps |

| Total | |
|---|---|
| Side 1 | 1 |
| Draw | 0 |
| Side 2 | 0 |


| Overall Rating, 1 vote |
|---|
|
3
|
| Scenario Rank: --- of 913 |
| Parent Game | Variant Panthers |
|---|---|
| Historicity | Alt-History |
| Date | 1943-07-12 |
| Start Time | 11:15 |
| Turn Count | 30 |
| Visibility | Day |
| Counters | 281 |
| Net Morale | 0 |
| Net Initiative | 2 |
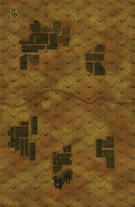
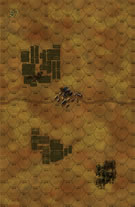
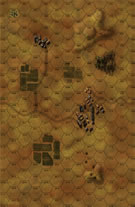
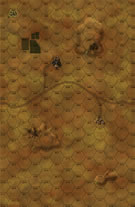
| Maps | 4: 36, 37, 38, 39 |
| Layout Dimensions | 86 x 56 cm 34 x 22 in |
| Play Bounty | 248 |
| AAR Bounty | 171 |
| Total Plays | 1 |
| Total AARs | 1 |
| Battle Types |
|---|
| Hill Control |
| Inflict Enemy Casualties |
| Urban Assault |
| Conditions |
|---|
| Off-board Artillery |
| Randomly-drawn Aircraft |
| Severe Weather |
| Terrain Mods |
| Scenario Requirements & Playability | |
|---|---|
| Variant Panthers | Base Game |
| South Flank | Maps + Counters |
| Introduction |
|---|
|
The “Germany” Regiment’s records state they were attacked with a reckless abandon the moment they started their own attack. Complicating matters for them was the fact that Colonel A. K. Brazhnikov’s 4th Guards Tank Brigade was spearheading the counterattack, and as a commander Brazhnikov had few equals on either side. The only saving grace for the Germans was that 2nd Guards Tank Corps had been whittled down to 120 tanks in the previous days fighting. |
| Conclusion |
|---|
|
The Soviets drove right through the “Germany” Regiment’s 3rd Battalion and overwhelmed the 1st Battalion. They then pushed aside 1st Battalion of Der Führer Regiment and reached Iasnaia Poliana itself. Much cursing in II SS Panzer Corps HQ did little to help the situation, but the reinforcements sent by SS Reich Division did. They reported driving the enemy from the field despite heavy losses. Unknown to the Germans, heavy rain and events farther south had forced the Soviets to pull 26th Guards Tank Brigade out of the fight and send it south immediately. |
| Additional Notes |
|---|
|
The Skoda Panther counters replace the PzIIIj or PzIVe and PzIVf2 tanks in this scenario. |

|
|
|---|
| AFV Rules Pertaining to this Scenario's Order of Battle |
|---|
|
| Schutzstaffel |
|---|
|


")
")
")
")
")


| Army (RKKA) |
|---|
|


| Guards |
|---|
|


| 5 Errata Items | |
|---|---|

|
All SS 75mm IG guns are direct fire weapons (black), not indirect (white). (Shad
on 2010 Dec 15)
|

|
The reduced direct fire value of the SS HMG is 5-5 in Beyond Normandy and Road to Berlin. (plloyd1010
on 2015 Jul 31)
|

|
The Units in Beyond Normandy were misprinted with a movement factor of 5. The movement factor should be 8. (rerathbun
on 2012 Mar 21)
|
|
|
Liberation 1944's counters are mislabeled 'PzIVF2.' The counter's ratings are correct (Armor 5, Move 8, DF 11-6, AT 6-8). (rerathbun
on 2014 Feb 14)
|

|
The reduced direct fire value in Kursk: Burning Tigers is 4-4. (plloyd1010
on 2015 Jul 31)
|
| Fire and Rain | ||||||||||||
|---|---|---|---|---|---|---|---|---|---|---|---|---|
This scenario uses Scenario # 34 (“With Reckless Abandon”) from Kursk: South Flank with the Skoda Panther variant in play. This substitutes six Pz42t units for the six PzIIIJ ones called in the German scenario reinforcements. The Germans set up their defensive line with units in the woods and town hexes on Maps 36 & 37 with a INF, HMG, & StuGIIIG platoons in town and 50mm & StuGIIIG platoons covering the clear advance routes for Soviet armor in the hopes of getting crossfires. The balance of the German units set up a fairly strong defensive line on the hills running north to south on Maps 38 & 39 with the 88mm and mortar platoons available for bombardment of approaching Soviet units. The Soviets set up on the east edge of the maps with the Guards units forming the north force and the RKKA the south; they formed a continuous front across the edge of the maps. The 2nd Guards Tanks Corps advanced on the town on Map 37, as the RKKA plodded westward at a very slow pace. FOW rules were in play, and a number of early turns ended prematurely, but the Soviets were withing firing range of the town and ready to strike by Turn 4. German OBA and Nebelwerfer fire slowed the general Soviet advance, taking four steps in the process and really slowing the RKKA, who were also slowed by FOW. The Soviets proceeded to surround the town and controlled three of the four town hexes by Turn 9, but they had lost 18 steps to only 12 for the Germans. They decided to continue the push west, leaving a small force to contain the two remaining German platoons to a single town hex. German reinforcements arrived on Turn 12 while the weather remained clear until Turn 15. During that time, the German units moved east and were just beginning to engage the Soviets in the north sector. When the thunderstorm hit, the Soviets were forced to pull back some of their better units, but the Guards forces still made progress upslope toward the high hill hex on Map 38. As German units moved forward and reinforced the 40-meter hilltop, the Guards, now with reduced forces due to the storm, were pushed back off the hill. RKKA forces on the south flank encountered similar problems as they were rebuffed in trying to capture the south ridge. The weakening of Soviet forces from the storm and the poor morale of the RKKA units prevented any further progress. This left the Germans with 52 VP’s from hills & towns versus 12 VP’s for the Soviets. Step losses were 99 for the Soviets versus 66 for the Germans, resulting in total VP’s of 151 (German) versus 78 (Soviet), a Major German Victory. This scenario is driven by German setup, as it is tough for the Soviets to break a line of dug-in MG42’s protected by upslope or settled in the towns. The arrival of German reinforcements is key for German success; if they get on the map before the Soviet armor can make a strong push westward, the tank battle is on and the Panthers can be tough. Also, the arrival of the thunderstorm is a problem for the Soviets if the Germans have had time to get their tanks into the field of battle. One thing the Soviets should probably have done here is to bypass the town on Map 37 and just press westward with all haste to the north ridge. That would have given them a better chance of taking more hill VP’s, but the opp fire from those dug-in Germans on the hill still could slow progress. Swarming may be the best approach! |
||||||||||||
| 0 Comments |