
|
Over the River Grossdeutschland 1946 #5 |
||
|---|---|---|
| (Defender) Germany | vs | Soviet Union (Attacker) |
| Formations Involved | ||
|---|---|---|
| Germany |  |
Grossdeutschland Fusilier Regiment |
| Soviet Union |  |
57th Guards Rifle Division |

| Total | |
|---|---|
| Side 1 | 0 |
| Draw | 0 |
| Side 2 | 1 |


| Overall Rating, 1 vote |
|---|
|
4
|
| Scenario Rank: --- of 913 |
| Parent Game | Grossdeutschland 1946 |
|---|---|
| Historicity | Alt-History |
| Date | 1946-04-01 |
| Start Time | 06:00 |
| Turn Count | 20 |
| Visibility | Day |
| Counters | 120 |
| Net Morale | 0 |
| Net Initiative | 1 |
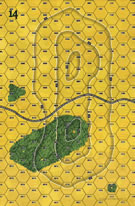
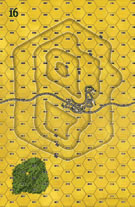
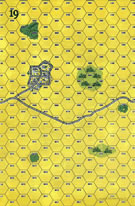
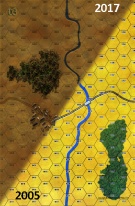
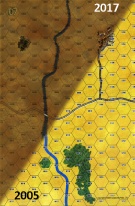
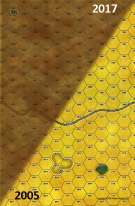
| Maps | 6: 14, 16, 19, 3, 7, 8 |
| Layout Dimensions | 86 x 84 cm 34 x 33 in |
| Play Bounty | 202 |
| AAR Bounty | 171 |
| Total Plays | 1 |
| Total AARs | 1 |
| Battle Types |
|---|
| Bridge Control |
| River Crossing |
| Conditions |
|---|
| Off-board Artillery |
| Randomly-drawn Aircraft |
| Scenario Requirements & Playability | |
|---|---|
| Eastern Front | Maps |
| Grossdeutschland 1946 | Base Game |
| Iron Curtain | Counters |
| Red Warriors | Counters |
| Road to Berlin | Maps + Counters |
| Introduction |
|---|
|
Tanks got the headlines and later the wargame scenarios, but infantry did most of the real fighting during the Second World War. Even mobile formations found themselves tied to defending fixed positions, and the slow but thickly armored tanks planned by the Germans would have been formidable mobile pillboxes. |
| Conclusion |
|---|
|
The Tiger III, sometimes called the Tiger-Maus or E-100, was a competing design drafted to the same specifications that resulted in the even slower and more thickly armored Maus. On the offensive it would have been nearly useless (though better than its competitor) but on defense it would have given very useful support to other defenses. |

|
|
|---|
| AFV Rules Pertaining to this Scenario's Order of Battle |
|---|
|
| Grossdeutschland Division |
|---|
|


| Heer |
|---|
|


| Army (RKKA) |
|---|
|


| Guards |
|---|
|


| 3 Errata Items | |
|---|---|
| Scen 5 |
Soviet Guard ENG and 76.2mm are different in RtB and RW. As counters are required from both of these modules, the values from RtB should be used. (ie. Guard ENG are 2-step counters and artillery is 10-22 5-6AT) (GeneSteeler
on 2012 May 17)
|

|
The morale and combat modifiers of German Sergeant #1614 should be "0", not "8". (Shad
on 2010 Dec 15)
|

|
Kommissars never get morale or combat modifiers. Ignore misprints. (Shad
on 2010 Dec 15)
|
| Soviet aircraft tip the scales (IMHO) | ||||||||||||
|---|---|---|---|---|---|---|---|---|---|---|---|---|
Introduction1946 - Hypothetical The main objectives: Soviet forces need to create a bridgehead over the river. VPs are awarded for casualties inflicted and for ownership of bridges and Soviet units ending play west of the river. Time = 5 hours (20 turns) Opening Thoughts The Germans have a fairly small force which they need to use to defend a pretty long stretch of river and the two bridges. Their 2 Tiger platoons will dig-in at the bridges supported by a little bit of infantry. The HMGs will set up to cover the river as the Soviets have a number of engineer platoons and could easily make their own crossing. Soviets decide to split their force in 3, with some men heading to either bridge (north and south) and the center infantry accompanied by the engineers will head straight to the river. The Tiger IIIs and the German AT Guns can cover the majority of the board, so the APCs will “hide” out of range while the infantry advances for 5 turns on foot. Both sides have quite nasty artillery. Soviets also get an air strike every 30 minutes. BATTLE SUMMARYAs the Soviets enter the Soviet IL-10 draws first blood knocking out a German Anti-tank gun battery. German artillery scores a hit versus the oncoming Soviet infantry and the score is tied at (1-1). Soviet artillery scores a kill and another IL-10 reduces the German Tiger III in the south! (4-1) M3 that wandered too far is hit by long range German ATG fire. The rest of the APCs withdraw out of range. Soviet OBA proves deadly again. (5-2) In the south the IL-2-37 hits a Tiger but can’t penetrate its armour. The Soviet infantry charge the bridge and a platoon is lost. A second M3 is hit and in the north the Soviets also take casualties from the Tigers. (5-7) Soviets win initiative and eliminate the reduced Tiger in the south capturing the bridge. In the north they aren’t as successful as another platoon is eliminated by the German monster tanks. (7-9) In the south the Soviets are cut down and pinned on the bridge as the German HMGs use long range opportunity fire. (7-13) Protecting the north bridge the Germans come under heavy fire. (8-16) Close combat fighting begins on both flanks. Soviet armour makes a break for the bridge in the south (as the Soviet infantry is almost all depleted or routed) despite the fact that they are still facing a nasty AT Gun battery (which garners much attention from the Soviet artillery!) (10-21) The AT Gun misses the Su-122 and is in turn eliminated by Soviet artillery. The Germans are out of AT fire that can hit the south bridge and the Soviets armour creates a bridgehead. (12-24). Although suffering from twice the casualties at the half-way mark, I believe the Soviets are going to win this one! Soviet armour eliminates the dug in Germans near the south bridge and the southern route is completely open The Soviet mortars and artillery with their APCs begin to make way for the south bridge. The situation quickly begins to look dire for the Germans whose Tigers in the north are just too slow to make it to the south (and besides, they are still needed in the north!) Tigers in the north repel the Soviet infantry as the German Stormtroopers die. (20-30) In the South the Soviet armour minces the German infantry in the town who are subsequently overrun by the Soviet guards. The Soviet center (who have been constantly handcuffed by FOW) finally begin their river crossing as a few platoons are sent north to help against the Tigers. Only an hour to go as the Soviet armour drives the German mortars out of the woods as the Soviet artillery works against the German AT Guns on the hill. The Tiger in north is finally reduced but still manages to hold against the Guard infantry. The first Soviets successfully ford the river under constant German fire. The German mortars are eliminated as the fighting winds down across the board as most of the German defenders have been lost. SOVIET MAJOR VICTORY AftermathGermans get 49 VP for Soviet Steps Soviets get: 33 VP for German losses, 8 VP for capturing a bridge and 56 VP for troops on the west side of the river. The first hit on the Tiger by the IL-10 reducing it was pivotal for the Soviet infantry to overrun the damaged unit. I really enjoyed this scenario as the set-up and strategy was very open-ended for both sides. I tend to like the “multiple” prong attack, although this scenario warrants reply with alternative German set-ups and Soviet attack prongs. Which is why I’m giving it a 4 instead of a 3. Scenario Rating: 4/5 – A solid and fairly balanced scenario with good replay potential. |
||||||||||||
| 0 Comments |