
|
The Road to Lutsk Fire in the Steppe #6 |
||
|---|---|---|
| (Attacker) Germany | vs | Soviet Union (Defender) |
| Formations Involved | ||
|---|---|---|
| Germany |  |
13th Panzer Division |
| Germany |  |
14th Panzer Division |
| Soviet Union |  |
135th Rifle Division |
| Soviet Union |  |
19th Tank Division |
| Soviet Union |  |
1st Antitank Brigade |

| Total | |
|---|---|
| Side 1 | 1 |
| Draw | 0 |
| Side 2 | 3 |


| Overall Rating, 5 votes |
|---|
|
4
|
| Scenario Rank: 123 of 913 |
| Parent Game | Fire in the Steppe |
|---|---|
| Historicity | Historical |
| Date | 1941-06-24 |
| Start Time | 08:00 |
| Turn Count | 28 |
| Visibility | Day |
| Counters | 159 |
| Net Morale | 0 |
| Net Initiative | 0 |
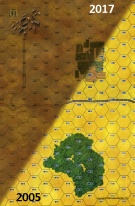
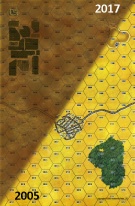
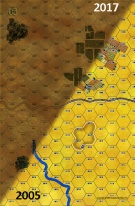
| Maps | 4: 1, 4, 5, 6 |
| Layout Dimensions | 112 x 43 cm 44 x 17 in |
| Play Bounty | 191 |
| AAR Bounty | 159 |
| Total Plays | 4 |
| Total AARs | 3 |
| Battle Types |
|---|
| Inflict Enemy Casualties |
| Road Control |
| Urban Assault |
| Conditions |
|---|
| Off-board Artillery |
| Randomly-drawn Aircraft |
| Reinforcements |
| Smoke |
| Terrain Mods |
| Scenario Requirements & Playability | |
|---|---|
| Fire in the Steppe | Base Game |
| Introduction |
|---|
|
Caught by surprise, the Red Army's Southwest Front had suffered terrible defeats in the war's first two days, but a number of relatively undamaged formations had finally brought themselves into position to make a defensive stand and counter-attack. Maj. Gen. F.N. Smekhotvorov placed his 135th Rifle Division across the highway leading to the city of Lutsk on the river Styr with powerful support behind him and armored formations ready to strike. |
| Conclusion |
|---|
|
The German attack made good progress against the 135th Rifle Division's forward positions, but the Soviets did not allow a breakthrough nor did they panic, falling back under the cover of the 1st Anti-Tank Artillery Brigade's positions. The anti-tank gunners fought their guns heroically, mounting what the Germans would later in the war term a "PAKfront." By the Soviet count the Germans lost 70 armored vehicles before breaking off the assault, while four complete anti-tank batteries were annihilated in close-quarters fighting. Had 19th Tank Division arrived on the battlefield the Soviets might have inflicted even more damage, but the tankers would have to wait. |

|

|
|---|
| AFV Rules Pertaining to this Scenario's Order of Battle |
|---|
|
| Heer |
|---|
|


| Army (RKKA) |
|---|
|


| 7 Errata Items | |
|---|---|
| Scen 6 |
One of the victory conditions states that "The German player controls twice as many town hexes as the German player at the end of play." This should be "the German player controls twice as many town hexes as the Soviet player at the end of play." (J6A
on 2023 Feb 15)
|

|
The reduced direct fire value of the Heer HMG became 5-5 starting with Fall of France. (plloyd1010
on 2015 Jul 31)
|

|
The Pz IVe appearing in the original Panzer Grenadier game had an Anti tank value of 4-7. As of Afrika Korps (2002), continuing onward through the 3rd and 4th edition games, the anti tank value has been 4-4. (plloyd1010
on 2016 Jul 25)
|

|
The morale and combat modifiers of German Sergeant #1614 should be "0", not "8". (Shad
on 2010 Dec 15)
|

|
All SPW 251s have an armor value of 0. (Shad
on 2010 Dec 15)
|

|
The reduced direct fire value in Kursk: Burning Tigers is 4-4. (plloyd1010
on 2015 Jul 31)
|

|
Kommissars never get morale or combat modifiers. Ignore misprints. (Shad
on 2010 Dec 15)
|
| Historical | ||||||||||||
|---|---|---|---|---|---|---|---|---|---|---|---|---|
This one is among the best scenarios I've yet played in PG. It played very much like the actual battle with the exception that the Soviet tanks did come in in this battle where they didn't in the actual one. The key to this one is that the Soviets need to withdraw while eating time for Germans. I decided that the Soviets would be best to concede the town control VC with the goal of not allowing the Germans to get the road VC not the casualty VC. The Soviets set up with just a company delaying in Lokachi (Bd 4 town) with a company, the bulk of their infantry and all the 45mm AT guns dug in in a line on Board 5 using the hill as the AT defense. Two companies defended Lutsk (Bd 1 town) and then the AT Brigade set up in the woods on Board 6. The Germans attacked and cleared Lokachi and then moved to take out the center Soviet line. They attacked the hill and easily took out the defense there but his allowed the rest of the Soviet infantry to withdraw along the road back to the AT Brigade defense. The German reinforcements took Lutsk and the Russians simply delayed and them pulled back into the AT Bde defense. Soviet artillery pounded the Germans along the way causing many casualties among the German infantry. In the latter half of the game, the Germans were stuck with the dilemma of only having one VC and thus had to attack into the strong AT-Infantry defense on Board 1. They tried and did gain a foothold in the north, but Russian artillery battered the infantry again and the arrival of the Soviet tanks doomed the Germans. I enjoyed this one as there was lots of maneuver. the need to capture town hexes did not dominate the game. The scenario is clever as the Soviets have to do what they did historically, withdraw in good order under pressure. |
||||||||||||
| 0 Comments |
| Road-bound Blitzkreig in the Steppe | ||||||||||||||
|---|---|---|---|---|---|---|---|---|---|---|---|---|---|---|
Inspired by my cunning PG Mentor’s in-depth example of movement-to -ontact planning, and blackcloud6’s Soviet hold & fall back tactics as described in his AAR, this play-through was fought over 3-sessions in solo mode on VASSAL, but with both sides present and alternating their respective turns. This was clumsy as we both had to be present and alternate at the computer, but with plenty of beer, salsa and chips it was good fun! I played the Soviet side on the defensive. As I have slowly learned, many PG scenarios require the weaker side to conduct fighting withdrawals, and delay onrushing German panzers and their accompanying mechanized infantry. As suggested by others, I chose to basically concede control of the town of Lokachi on Map 04 rather than making a major fight for it with more than a single company of infantrymen. In the event, this kept my forward-deployed units from getting shot up and bypassed by the fast-moving central column of German mechanized troops. I hoped that my OBA would substantially reduce the number of German infantry for sake of victory points and I also planned for the arrival of the 19th Tank Division on Turn 22 to be able to seriously distract the Germans and get some of its tanks onto or adjacent to the main road on either Map 05 or 01. As luck would have it, this did happen, as unlike the historic battle, all reinforcing forces arrived on time. My boldly-aggressive opponent chose to push as quickly as possible straight down the major east-west road, and attacked Lokachi right off the bat, so my delaying tactics ended up working in Russia's favor. As described in other AARs, I started with the bulk of the Soviet infantry and the weaker AT guns dug in along a dispersed line on Map 05, emplacing the light AT guns on the adjoining hill. Two Soviet infantry companies were deployed to defend Lutsk, the town on Map 01. The AT Artillery Brigade mostly deployed in the woods on Map 06. The Germans attacked and occupied Lokachi and then moved quickly to take out my scratch Soviet defensive line on Map 05. They attacked the hill, and with Luftwaffe support, easily unhinged the defense. In the process, the bulk of the remaining Soviet infantry were able to withdraw along the main road back to the AT Brigade defensive line. Subsequently, German reinforcements took Lutsk on Map 01 and the Russians simply delayed as long as possible and then pulled back to support the strong AT defensive positions. Thanks to a number of fine bombardment die rolls, Soviet OBA effectively targeted Germans on most turns resulting in many German infantry and SPW casualties. My opponent’s bombardment rolls were relatively deadly the first 6 turns, but then the fates intervened, and he had miserable luck with his OBA die rolls in later turns. After Turn 11, the Germans were in a dilemma of only having occupied Lokachi and thus had to attack into the strong AT-Infantry defense on Map 01. They tried and did gain footholds in both the north and south edges, but Russian artillery battered the infantry repeatedly and the eventual arrival of the Soviet tanks doomed the German cause. My opponent conceded on game turn 23. I like that this scenario featured a significant amount of fire and maneuver, and there was less emphasis on the capture of town hexes than is usually the case with PG victory conditions. In the end, it proved a very costly scenario to both sides, but with a few exceptions, the Soviet side was able to conduct a fighting withdrawal in decent order, ahead of a powerful, but headlong German attack. |
||||||||||||||
| 0 Comments |
| The plan is the plan! (until the plan changes) | ||||||||||||||
|---|---|---|---|---|---|---|---|---|---|---|---|---|---|---|
This game was played with my rewritten 4th edition rules. As always, I played for a minor victory. The Germans begin with a formidable force, 3 panzergrenadier companies, a motor infantry company and 3 tank companies. The Soviets have a good artillery force, both on and off board. (Due to a misreading of the Soviet setup, even better than what they started with.) They are however, short on troops and leadership, are largely pedestrian, and have a lot of ground to defend. My plan was to send 1 PG company, the motor infantry company and a panzer company against the town on board 4. The remainder of the force was to drive deep along the south edge of the map and engage the board 1 town. The board 4 town was held by a Russian rifle company. The board 1 town had another, with engineer support. Another company was on the board 5 hill, with an anti-tank gun covering the road. Things started off reasonably well. The southern march had a minor traffic jam going around the woods. The board 4 town was approached on 2 sides. Soon Soviet artillery messed up the motor infantry company moving on the town from the north, but they kept advancing while leaving stragglers behind. German artillery took out the AT gun on board 5 allowing the mechanized force to close on the board 1 town with little trouble. The board 4 town fell mostly to gunfire. A soviet rifle company in the north of board 4 retreated off the hill to join another in the swamps of board 5. Not wishing to expose my troops in the southern drive to artillery fire they waited as half-tracks and German artillery shot up the town. Soviet casualties mounted as I concentrated fire on town hexes exposed on 3 sides. One panzer company diverted back to engage the exposed Russian on the board 5 hill. The Soviet company tried to get to the board 4 woods and almost made it. The Soviet lieutenant (the son of a politburo member I'm sure), cot into woods and took up a observation position. He called down artillery on the town until a couple of PzII's ran him down. The Germans fighting for the board 1 town eventually shot their way in and took 4 hexes. The remaining one was left pinned down in assault and leaderless. The 13th Panzer reinforcements entered to make sure board 4 stayed safe as the Soviet tank force entered from the north. A tank battle erupted around the board 4 hill. The Soviet armor got the worse of it, by far. The Germans had reduced the Soviet tanks by more than half while losing 2 steps of their own. On the last turn, the Soviet armor was surrounded and about to annihilated. We never played that last turn. The Germans had killed over 50 steps to the 24 they had lost and controlled 11 of the 12 town hexes, more than securing their minor victory. |
||||||||||||||
| 0 Comments |