|
Slovakia's Battle: Phase One First Axis #9 |
||
|---|---|---|
| (Attacker) Slovak Republic | vs | Soviet Union (Defender) |
| Formations Involved | ||
|---|---|---|
| Slovak Republic |  |
Mobile |
| Soviet Union |  |
44th Rifle Div |

| Total | |
|---|---|
| Side 1 | 2 |
| Draw | 0 |
| Side 2 | 1 |
| Overall Rating, 3 votes |
|---|
|
3.67
|
| Scenario Rank: --- of 913 |
| Parent Game | First Axis |
|---|---|
| Historicity | Historical |
| Date | 1941-07-22 |
| Start Time | 05:00 |
| Turn Count | 36 |
| Visibility | Day |
| Counters | 98 |
| Net Morale | 0 |
| Net Initiative | 1 |
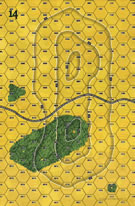
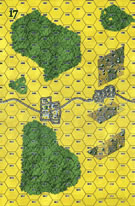
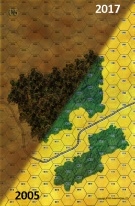
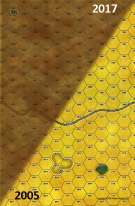
| Maps | 4: 14, 17, 6, 8 |
| Layout Dimensions | 112 x 43 cm 44 x 17 in |
| Play Bounty | 169 |
| AAR Bounty | 171 |
| Total Plays | 3 |
| Total AARs | 1 |
| Battle Types |
|---|
| Road Control |
| Urban Assault |
| Conditions |
|---|
| Off-board Artillery |
| Reinforcements |
| Scenario Requirements & Playability | |
|---|---|
| Eastern Front | Maps + Counters |
| First Axis | Base Game |
| Road to Berlin | Maps |
| Introduction |
|---|
|
After spending several weeks absorbing reinforcements in the rear areas, the Slovak Mobile Brigade finally was attached to the German 49th Mountain Corps and ordered into action. The German Corps command sent the brigade to the town of Lipovec to block the retreat routes of Soviet units coming from the north. The town was believed to be Soviet-occupied, and the Slovaks were to eject the defenders and hold the position. |
| Conclusion |
|---|
|
Despite the help of tank support, the Slovaks had trouble fighting their way through the first Soviet lines. The "brigade" was very small and lacked sufficient infantry for the task, and when Pilfousek sent tanks forward without infantry support several were shot up by Soviet anti-tank guns. By late afternoon the Slovaks reached the edge of Lipovec, only to be thrown back later. Their colonel ordered the tanks to pull back and refuel, and had not issued any further orders when the Soviets took the decision out of his hands. |
| AFV Rules Pertaining to this Scenario's Order of Battle |
|---|
|
| 1 Errata Item | |
|---|---|

|
The reduced direct fire value in Kursk: Burning Tigers is 4-4. (plloyd1010
on 2015 Jul 31)
|
| Slow Motion | ||||||||||||
|---|---|---|---|---|---|---|---|---|---|---|---|---|
Have you ever watched the slow motion footage of a large structure falling to one side? It seems as though they linger forever at the tipping point. At times for both the Slovak and Soviet player, this scenario can feel that way. Each side has trouble putting together enough force to be able to accoplish their goals and managing the troops and assembling attacks will try your patience. But that was the reality of a Slovak/Soviet battlefield. Put simply this is a scenario in which one lousy force, with tanks, must cross a large open space without any protection against OBA to come to contact with another lousy force and make their opponents run away. The difficulty for both sides is that the attacker has a tough time bringing a coherent force to bear on the opponent. Leadership, and most importantly morale modifiers, is critical to this effort and each force, to complicate matters further has only a few and, this being Slovakia against 1941 Soviets, remarkably poor quality leaders. So, as I look at this one having set up the maps and pulled the combat units for each side I have the immediate impression that the Slovaks do not stand a chance to win but as I am trying to see the full arc of the Slovak war experience I resolve to grit my teeth and go ahead and pick the leaders. The Soviets are predictably abysmal, including my favorite, a lieutenant with a morale of "6" but they do have two leaders with combat and morale modifiers. They will be placed to the rear of the formation to provide a backstop to the force and a rallying point. Then I pull the Slovaks, and sit stunned as fully 5 of the leaders have morale modifiers. Suddenly there is hope. That hope is quickly tested as the Slovaks enter the board and quickly become disrupted and demoralized by the Soviet OBA. It takes the better part of 3 hours to clear the paltry Soviet forces off the wide open board, during which time nearly every Slovak infantry unit has spent some time rallying. The one saving grace has been the terrible die rolls for the Soviets on their AT fire. The Slovaks did not expose their tanks needlessly but the Soviet gunners just couldn't take advantage. The Slovaks then close their collective eyes and run a large force straight down the road towards the large hill to their front and try to find some, any, cover to hide from the Soviet OBA. A trail of disrupted and demoralized units in their wake testifies to the willingness of the Slovak infantry to try to accomplish this and the small group of five platoons that make it (out of ten that started the trip) is an indication of the effective Soviet gunners. We are now nearly 1/2 way through the scenario and the Soviets are well ahead of the game but that pesky Slovak armor has made it to the hill and has disrupted some of the Soviet forces dug in on the crest. They are standing off and attacking with DF from three hexes at once and getting their target disrupted and demoralized. The firing AT gun is quickly dispatched by the Slovak OBA leaving the Slovak tanks nearly invulnerable at a two hex range. A Soviet counterattack is crushed by Slovak Opp Fire as the Soviets attempt to get within assault range. At this point I come to the realization that the Soviet troops, which seemed so invincible as the Slovaks tried to get across that large open space, are just as likely to run away as the Slovaks and, without leaders with any decent morale modifiers, are less likely to recover quickly. The Slovaks continue to push troops across the opon space and with each arriving company they can exert more force on the slowly crumbling, Soviet position. It is critical for the Slovaks to have a nine hour window within which to pursue their objectives. They only pulled to a draw on turn 26, a minor win on turn 30 and a major win on turn 35. Only the Soviet inability to pull off any form of coutnerattack kept this from being a draw. If the leader pull for the Slovaks had been any worse I don't see them having enough time to get enough troops across the open space to be able to cause the crumble of the Soviet position. If the Soviet AT fire had been able to cause any Slovak tank losses we would be reading a very different AAR. Still a very entertaiing scenario with both sides having intriguing puzzles to solve. I am getting better at understanding the Slovak forces and, in doing so, how to use the masses of Soviets in some larger scenarios against the Germans. I give it a 4 for the lessons learned. |
||||||||||||
| 0 Comments |

 FiAx008


