Panzer Grenadier Battles on April 27th:
Arctic Front Deluxe #40 - Children's Crusade Broken Axis #14 - Târgu Frumos: The Second Battle Scenario 3: Sledge Hammer of the Proletariat
Army Group South Ukraine #6 - Consternation Road to Berlin #73 - She-Wolves of the SS
Errors? Omissions? Report them!
First Battle
First Axis #7
(Attacker) Slovak Republic vs Soviet Union (Defender)
Formations Involved
Slovak Republic Mobile
Soviet Union 92nd Border Guard Regiment
Display
Balance:


Overall balance chart for FiAx007
Total
Side 1 0
Draw 0
Side 2 2
Overall Rating, 2 votes
5
4
3
2
1
2.5
Scenario Rank: --- of 913
Parent Game First Axis
Historicity Historical
Date 1941-06-25
Start Time 10:00
Turn Count 30
Visibility Day
Counters 61
Net Morale 1
Net Initiative 1
Maps 3: 16, 17, 18
Layout Dimensions 84 x 43 cm
33 x 17 in
Play Bounty 153
AAR Bounty 171
Total Plays 2
Total AARs 1
Battle Types
Urban Assault
Conditions
Off-board Artillery
Scenario Requirements & Playability
Eastern Front Counters
First Axis Base Game
Road to Berlin Maps + Counters
Sinister Forces Counters
Introduction

The Slovak mobile group met its first opposition near Wojtkowa, in formerly Polish territory just to the northeast of the Slovak border. They found Red Army troops of 8th Rifle Corps who had been bypassed by the advancing German spearheads a few days earlier, undamaged and still ready to fight. Col. Rudolf Pilfousek sent his tanks forward to support an infantry assault.

Conclusion

Eighth Rifle Corps remained full of fight, and most importantly well-supplied with corps-level artillery and ammunition. The border guards put up fierce resistance and the Slovak infantry balked at advancing even when accompanied by their tanks. Pilfousek pulled his troops back without having put a dent in the Soviet line.


Display Relevant AFV Rules

AFV Rules Pertaining to this Scenario's Order of Battle
  • Vulnerable to results on the Assault Combat Chart (7.25, 7.63, ACC), and may be attacked by Anti-Tank fire (11.2, DFT). Anti-Tank fire only affects the individual unit fired upon (7.62, 11.0).
  • AFV's are activated by tank leaders (3.2, 3.3, 5.42, 6.8). They may also be activated as part of an initial activating stack, but if activated in this way would need a tank leader in order to carry out combat movement.
  • AFV's do not block Direct Fire (10.1).
  • Full-strength AFV's with "armor efficiency" may make two anti-tank (AT) fire attacks per turn (either in their action segment or during opportunity fire) if they have AT fire values of 0 or more (11.2).
  • Each unit with an AT fire value of 2 or more may fire at targets at a distance of between 100% and 150% of its printed AT range. It does so at half its AT fire value. (11.3)
  • Efficient and non-efficient AFV's may conduct two opportunity fires per turn if using direct fire (7.44, 7.64). Units with both Direct and AT Fire values may use either type of fire in the same turn as their opportunity fire, but not both (7.22, 13.0). Units which can take opportunity fire twice per turn do not have to target the same unit both times (13.0).
  • Demoralized AFV's are not required to flee from units that do not have AT fire values (14.3).
  • Place a Wreck marker when an AFV is eliminated in a bridge or town hex (16.3).
  • AFV's do not benefit from Entrenchments (16.42).
  • AFV's may Dig In (16.2).
  • Closed-top AFV's: Immune to M, M1 and M2 results on Direct and Bombardment Fire Tables. Do not take step losses from Direct or Bombardment Fire. If X or #X result on Fire Table, make M morale check instead (7.25, 7.41, 7.61, BT, DFT).
  • Closed-top AFV's: Provide the +1 modifier on the Assault Table when combined with infantry. (Modifier only applies to Germans in all scenarios; Soviet Guards in scenarios taking place after 1942; Polish, US and Commonwealth in scenarios taking place after 1943.) (ACC)
  • Tank: all are closed-top and provide the +1 Assault bonus, when applicable
  • Prime Movers: Transports which only transport towed units and/or leaders (May not carry personnel units). May or may not be armored (armored models are open-top). All are mechanized. (SB)

Display Order of Battle

Slovak Republic Order of Battle
Slovenská Armáda
  • Towed
Soviet Union Order of Battle
Army (RKKA)
  • Mechanized
NKVD
  • Towed

Display AARs (1)

Colonel, they aren't beaten...
Author Matt W
Method Solo
Victor Soviet Union
Play Date 2011-05-03
Language English
Scenario FiAx007

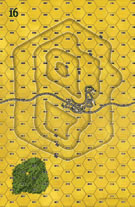
Let's start out by noting that Col. Pilfousek was an idiot. One quick look at the opposing forces will point out that the only, and I mean only, Slovak edge is that they have some tanks and some messy terrain to deal with in their immediate front which will help them by screening the antitank guns of the Soviets who, with a clear field of fire, would savage the Slovak tanks. Given the expectation that the Soviets would be demoralized by the battles that had surrounded them for the past several days (this was the fourth day of Barbarossa) we may be able to give him "some" credit but ultimately Pilfousek was an idiot.

The Soviet commander, thinking of defense in depth, put a small but fiesty detachment in the first town with the idea of delaying the Slovaks until their design could be determined. Pilfousek, not reading his manuals about combined arms raced his entire armored component to the town and through miraculous die rolls managed to oust the NKVD troops and quickly pull to within 4 VPs of the Russians (23-19). At this point, the Slovaks were out of options. It was clear that any movement outside of the town would expose the tanks to AT fire and that the pitifully small infantry support would be hard pressed to move forward. Therefore an hour after contact, the Slovaks were a spent force.

Caution would have dictated that the "assault" stop right there with a signal success, albeit tremendously unlikely. However, being only one victory point away from a draw spurred Pilfousek on.

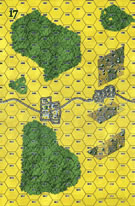
So, with very few options available, Pilfousek decided to try two things at once. The infantry would approach one antitank position through an adjoining woods and a detachment of LT35 tanks would try to flank the Soviets to the north where a hole in the AT shield was noted.

The attack through the woods quickly became mired in morale issues. The Soviet artillery was able to smash through the trees and demoralize the majority of the troops. Once their cohesion was shot the Soviet reserves counterattacked and chased the Slovaks out of the woods, back towards their starting point.

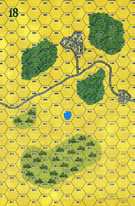
The light tank force fared somewhat better but the Soviets quickly moved AT support to the north and were able to assault the tanks, cause 10 of them to be abandoned on the field and the rest chased back to whence they came.

After only 4 hours of contact, the Slovaks were battered, bruised and running from the field. The Soviets had some losses but had seriously dented Col Pilfousek's dream of chasing a demoralized force away.

In my play of the scenario it is clear that I was much more aggressive than the actual Col. Pilfousek historically was. Perhaps he wasn't the idiot that I have portrayed him to be. However, given the incredible statistics at this point where (prior to this attack) the Slovaks had won in 75% of the cases in which they had attacked I felt I had to uphold their honor. I have failed...

In order to win as the Slovaks, however, they should consider a deep penetration by their tanks. They will be unsupported when ultimately chased down by the Soviets but their hope is in mobility, not in stand up fighting. The Soviets should focus their initial efforts on destroying the infantry force and then chase down the tanks. If the Slovak player chooses this approach. With a thirty turn scenario there is plenty of time for both efforts.

0 Comments
You must be a registered member and logged-in to post a comment.
Errors? Omissions? Report them!
Page generated in 0.857 seconds.