Panzer Grenadier Battles on April 27th:
Arctic Front Deluxe #40 - Children's Crusade Broken Axis #14 - Târgu Frumos: The Second Battle Scenario 3: Sledge Hammer of the Proletariat
Army Group South Ukraine #6 - Consternation Road to Berlin #73 - She-Wolves of the SS
Errors? Omissions? Report them!
Hell on Wheels
Elsenborn Ridge #32
(Defender) Germany vs United States (Attacker)
Formations Involved
Germany 2nd SS "Das Reich" Division
United States 2nd "Hell on Wheels" Armored Division
Display
Balance:


Overall balance chart for ElsR032
Total
Side 1 2
Draw 0
Side 2 4
Overall Rating, 6 votes
5
4
3
2
1
4.17
Scenario Rank: 49 of 913
Parent Game Elsenborn Ridge
Historicity Historical
Date 1945-01-03
Start Time 07:00
Turn Count 36
Visibility Day
Counters 68
Net Morale 0
Net Initiative 1
Maps 4: 22, 23, 24, 25
Layout Dimensions 86 x 56 cm
34 x 22 in
Play Bounty 106
AAR Bounty 171
Total Plays 6
Total AARs 1
Battle Types
Road Control
Urban Assault
Conditions
Off-board Artillery
Severe Weather
Scenario Requirements & Playability
Elsenborn Ridge Base Game
Introduction

When the German offensive had run its course, the Americans struck back with force. Rather than allow his troops to pull back to their much defensible starting line, Adolf Hitler ordered them to remain in place. First Army's Omar Bradley urged his subordinates to look not at their December 16th positions as the objective, but rather the Rhine River. First, however, they would have to slog their way through the thick snows that had fallen in the Ardennes over the past week.

Conclusion

The fresh 2nd Armored Division slogged steadily southwards, but found it heavy going thanks to the ever-deepening snow. Previous snowfalls had frozen, making the roads icy, while drifts had piled several feet deep in the woods. By felling trees to block the roads the SS forced the Americans to clear each roadblock with infantry fighting on foot before the tanks could skitter forward - but over and over the GI's did so, pressing the Nazis steadily back.


Display Relevant AFV Rules

AFV Rules Pertaining to this Scenario's Order of Battle
  • Vulnerable to results on the Assault Combat Chart (7.25, 7.63, ACC), and may be attacked by Anti-Tank fire (11.2, DFT). Anti-Tank fire only affects the individual unit fired upon (7.62, 11.0).
  • AFV's are activated by tank leaders (3.2, 3.3, 5.42, 6.8). They may also be activated as part of an initial activating stack, but if activated in this way would need a tank leader in order to carry out combat movement.
  • AFV's do not block Direct Fire (10.1).
  • Full-strength AFV's with "armor efficiency" may make two anti-tank (AT) fire attacks per turn (either in their action segment or during opportunity fire) if they have AT fire values of 0 or more (11.2).
  • Each unit with an AT fire value of 2 or more may fire at targets at a distance of between 100% and 150% of its printed AT range. It does so at half its AT fire value. (11.3)
  • Efficient and non-efficient AFV's may conduct two opportunity fires per turn if using direct fire (7.44, 7.64). Units with both Direct and AT Fire values may use either type of fire in the same turn as their opportunity fire, but not both (7.22, 13.0). Units which can take opportunity fire twice per turn do not have to target the same unit both times (13.0).
  • Demoralized AFV's are not required to flee from units that do not have AT fire values (14.3).
  • Place a Wreck marker when an AFV is eliminated in a bridge or town hex (16.3).
  • AFV's do not benefit from Entrenchments (16.42).
  • AFV's may Dig In (16.2).
  • Open-top AFV's: Immune to M, M1 and M2 results on Direct and Bombardment Fire Tables, but DO take step losses from X and #X results (7.25, 7.41, 7.61, BT, DFT). If a "2X" or "3X" result is rolled, at least one of the step losses must be taken by an open-top AFV if present.
  • Closed-top AFV's: Immune to M, M1 and M2 results on Direct and Bombardment Fire Tables. Do not take step losses from Direct or Bombardment Fire. If X or #X result on Fire Table, make M morale check instead (7.25, 7.41, 7.61, BT, DFT).
  • Closed-top AFV's: Provide the +1 modifier on the Assault Table when combined with infantry. (Modifier only applies to Germans in all scenarios; Soviet Guards in scenarios taking place after 1942; Polish, US and Commonwealth in scenarios taking place after 1943.) (ACC)
  • Tank: all are closed-top and provide the +1 Assault bonus, when applicable
  • APC – Armored Personnel Carrier: These are Combat Units, but stack like Transports. They can transport personnel units or towed units. They are not counted as combat units for the +1 stacking modifier on the Direct Fire and Bombardment Tables (4.4). They may be activated by regular leaders and tank leaders (1.2, 3.34, 4.3, 5.43). They do not provide the +1 Assault bonus (ACC).

Display Order of Battle

Germany Order of Battle
Schutzstaffel
  • Mechanized
  • Towed
United States Order of Battle
Army

Display Errata (3)

3 Errata Items
Overall balance chart for 424

The reduced direct fire value of the SS HMG is 5-5 in Beyond Normandy and Road to Berlin.

(plloyd1010 on 2015 Jul 31)
Overall balance chart for 408

The Units in Beyond Normandy were misprinted with a movement factor of 5. The movement factor should be 8.

(rerathbun on 2012 Mar 21)
Overall balance chart for 408

Liberation 1944's counters are mislabeled 'PzIVF2.' The counter's ratings are correct (Armor 5, Move 8, DF 11-6, AT 6-8).

(rerathbun on 2014 Feb 14)

Display AARs (1)

Hell on Ice
Author campsawyer
Method Solo
Victor Germany
Play Date 2012-02-03
Language English
Scenario ElsR032

A rather large scenario but worth the play as it provides for some good chances to maneuvering, albeit slow moving. It has an American armored battalion trying to clear a set of roads to relieve the pressure on the bulge. The problem is that the weather has snow and ice severely limiting movement. The Germans have a small SS force to attempt to stop the Americans. You will get to have some interesting tank battles as the Germans only have a Panther and a PzIVH to stop seven American tank platoons. The Americans also get decent OBA with VT fuses which will keep the Germans sticking to the woods. The setup will favor the Germans as they will be able to setup to cover 75% of the boards and with the slow movement it will take time for the Americans to get into battle. In my play leadership favored the Germans.

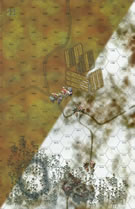
The Germans setup as close to the east-west roads on boards 23 and 25 as possible covering the roads and gaps in the woods. There is some depth to the defense with possible hidden AT guns on boards 22 and 24 as well as a couple of SS GREN's. The Americans advance will come on the split of boards 23 and 25 to bypass the German forward defenses. The American advance is slow and the Germans have a chance to reposition units to cover the areas around the board split. A Ostfr and GREN move into the north town on board 23 while the PzIVH repositions to cover the road junction on board 23. The Panther advances up the north hill on board 25 with a Hpstfr and GREN. Soon German OBA is harassing the American advance, forcing the Americans to the cover of the woods on board 25 and wooded town on board 23. The German Panther gets a chance to strike and destroys an American M4 and M3. The other American armor ducks into the town and woods.

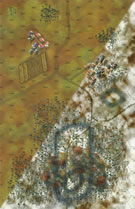
The Americans are soon attacked by the Ostfr and GREN in the town on board 23 but the weight of the American INF and armor destroy the GREN and capture the Ostfr. A German AT gun is discovered in the woods south west of the town. OBA and DF demoralized the AT gun and a rush by American INF capture the gun. Meanwhile, American OBA scores a kill on the hex with the PzIVH, destroying a GREN and demoralizing the tank. American armor positions for a kill shot on the PzIVH but the Panther positions for a reply shot on any American tank that fires. The Americans take the shots killing PzIVH but the Panther returns fire destroying a M4/76 platoon. American INF moving up on board 25 get a chance to close on the Panther but OP fire disrupted/demoralized the Americans. More INF's move to attack the Panther, but German OBA reduce one platoon and demoralize the other.

Back to board 23 the Americans move to attack the a HMG positioned on the lower elevations of the hill on 23. OBA and DF are used to disrupt the HMG and then they close for the assualt, but luck is not with them and losses are taken in the hill assault. But the road is clear to the summit, where a lone dugin GREN awaits. The lone Osftr fled the assault hex back to the support to try to stabilize the defense. The American LT's move up a company of INF's, HMG and M5's to push down the road. Initial, DF on the defending GREN's is ineffective and OBA is called in. But this also has no effect, then German OBA hit back demoralizing and eventually killing American INF's. Soon the company is reduced to all half platoons and the American Major moves to take command. He scraps together enough troops for a overwhelming assault after a heavy OBA attack disrupted the Germans. The SS GREN is killed but the Ostfr survives and moves back to a reduced GREN that had dugin on the reverse side of the hill. From here the Osftr continues to direct accurate OBA on the Americans and they are force back to recover from the demoralization.

At this point, the western American attack stalls and the only other chance is to rush the Panther and force the eastern north-south road. The American Captain musters an INF force to attack the Panther while the M4's rush past to take the road. The reduced INF's advance and take heavy OP fire by supporting SS GREN's and the one good INF move next to the Panther, but it takes heavy fire and is destroyed. The American armor races up and get into cover but on the next turn one M4 is destroyed and the other stays put. At this point it is turn 32 and the Americans have no chance to take either road.

0 Comments
You must be a registered member and logged-in to post a comment.
Errors? Omissions? Report them!
Page generated in 0.245 seconds.