
|
St. Vith: The Fall Elsenborn Ridge #22 |
||
|---|---|---|
| (Attacker) Germany | vs | United States (Defender) |
| Formations Involved | ||
|---|---|---|
| Germany |  |
18th Volksgrenadier Division |
| Germany |  |
506th Heavy Panzer Battalion |
| United States |  |
7th "Lucky Seventh" Armored Division |

| Total | |
|---|---|
| Side 1 | 6 |
| Draw | 2 |
| Side 2 | 2 |


| Overall Rating, 10 votes |
|---|
|
4.3
|
| Scenario Rank: 29 of 913 |
| Parent Game | Elsenborn Ridge |
|---|---|
| Historicity | Historical |
| Date | 1944-12-21 |
| Start Time | 15:00 |
| Turn Count | 30 |
| Visibility | Day & Night |
| Counters | 121 |
| Net Morale | 0 |
| Net Initiative | 0 |
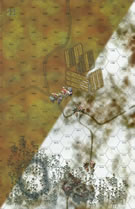
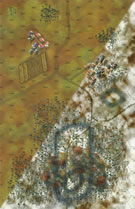
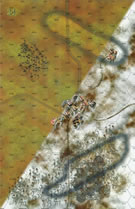
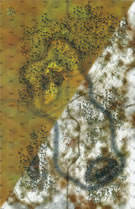
| Maps | 4: 22, 23, 24, 25 |
| Layout Dimensions | 86 x 56 cm 34 x 22 in |
| Play Bounty | 115 |
| AAR Bounty | 153 |
| Total Plays | 10 |
| Total AARs | 4 |
| Battle Types |
|---|
| Urban Assault |
| Conditions |
|---|
| Off-board Artillery |
| Reinforcements |
| Severe Weather |
| Scenario Requirements & Playability | |
|---|---|
| Elsenborn Ridge | Base Game |
| Introduction |
|---|
|
The American 7th Armored Division had raced to St. Vith and flung its units into defensive positions haphazardly as they arrived. A handful of troops from the shattered 106th Infantry Division joined them, and a few small units of the 9th Armored Division also became intertwined. Nevertheless they put up stout resistance, but when the Germans sorted out their own confusion and launched a mass attack numbers made a difference. |
| Conclusion |
|---|
|
Though unsettled by the rocket fire, the Americans resisted with the aid of tanks and tank destroyers. When the huge Royal Tiger tanks finally rumbled into the battle zone, the Germans blinded the American tankers with flares and while there were still stunned the huge 88mm guns annihilated the Shermans. The American commander apparently suffered a nervous breakdown and fled the battlefield, yet his junior officers refused to give up the now-uncoordinated fight and 7th Armored Division's Combat Command B lost over 900 men in fierce close-quarters fighting. By midnight the Germans had secured St. Vith. |

|
|
|---|
| AFV Rules Pertaining to this Scenario's Order of Battle |
|---|
|
| Heer |
|---|
|


| Schutzstaffel |
|---|
|

| Army |
|---|
|


| 4 Errata Items | |
|---|---|
| Scen 22 |
The Americans are listed as having 2 x 16 for off board artillery. American OBA is not 16 in any other scenario, so this should be 2 x 18. (J6A
on 2015 Dec 09)
|

|
The reduced direct fire value of the Heer HMG became 5-5 starting with Fall of France. (plloyd1010
on 2015 Jul 31)
|

|
The morale and combat modifiers of German Sergeant #1614 should be "0", not "8". (Shad
on 2010 Dec 15)
|

|
The M18 has a special rule in Battle of the Bulge but it applies globally: "A two-step M18 unit can fire one anti-tank shot and move half its movement allowance (retain fractions) in a single impulse. The order in which it does these two actions is the player's choice." (Shad
on 2010 Dec 15)
|
| Battle of the Bulge 2: Elsenborn Ridge, Scenario #22, St Vith: The Fall | ||||||||||||
|---|---|---|---|---|---|---|---|---|---|---|---|---|
Well, I won’t write as detailed of an AAR as I usually do, as AP already posted an AAR on this same scenario and I didn’t take the needed time to document my play in detail. This scenario has everything I wanted in a Battle of the Bulge Battle: Tiger II Tanks, Nebelwerfer rocket launchers, Assault Guns, Sherman’s, M18s & M36s Tank destroyers, AT Guns, tons of Infantry, the I&R unit and lot of Engineers on both sides, not to mention off-board artillery and a big snow storm. Two major factors about this scenario besides different strategies can make this battle play out very differently each time, which makes replay value on this scenario very high, not to mention again, it is one the best Battle of The Bulge feel scenarios out there. Oh yeah, the two factors are The Snowstorm which is rolled for and will change Movement and Visibility at some point in play and also rolling for those Tiger II reinforcements, all 8 steps of them, which will really change the shape of the battlefield. My short AAR: • My Tiger Tanks arrived on Turn # one, yes that is correct, I rolled a six on turn one. • The snow didn’t start falling until turn # eight • Though the Americans put up a good defense on the two Eastern Boards, the early arrival of the Tigers squashed that. • The American lost all their armor and the Tank destroyers rolled very poorly against the Tigers. • Two steps of Tigers were lost, one with the cross-fire bonus, hit by a 57mm AT, 3-inch AT & a Sherman tank. The other step was lost to an assault, which had an INF, ENG and a Leader. The Engineer bonus helped here. I guess the Tigers can be taken out but eight steps is a challenge when they come on board this early. One step of the StugIIIG was also lost. • When visibility went down to two hexes, this benefited the Germans, as they were able to regroup for that second assault on the western town hexes and St. Vith, out of sight of Artillery. Bring the Engineers up, mixing them with Armor, to get the two column modifiers in assaults is great. • Those American HMG’s are critical in defense and bring a lot of fire power on German Infantry units. • In the end, I cut the scenario short by about 8 turns, as the German were on top taking out 40 American steps and controlling 18 points of town hexes, where the American took out about 21 steps of German and controlled 8 points of town hexes and there was another one or two town hexes that were contested but about to fall. In the southwest, is kind of stalemated but in the northwest, the Germans were steamrolling. Tigers arriving on turn one and no snow until turn eight, not really effecting play until turn 12, really hurt the Americans in this game. Next time, I’ll use some different setup strategies on my initial American setup. In fact I am not sure how to bring my German forces on board next time either. In the End this one was a Major German Victory by 5 points, as they won by 20 points. If I would have played out the last 8 turns, maybe in the south the Americans could have gotten back 4 point or so, maybe changing it to a minor German victory but maybe not but in any case it was a German victory. This Scenario has a lot of options for both sides and variable which makes playing this over and over again very high, with different outcomes. I really like this scenario, all the way around, it’s not a small one but the interest level and the situations that came up throughout the battle makes it not seem so big, as time flies. I am glad I finally took the time to play this one and I used the Winter Maps. Go for this one guys, it’s too cool to pass up! |
||||||||||||
| 0 Comments |
| Bloody Tigers | ||||||||||||
|---|---|---|---|---|---|---|---|---|---|---|---|---|
This scenario has been played at bit so there is a number of good write ups already, but truly is a gem in the Elsenborn box. It has all elements of a challenging scenario, the Germans have the numbers in men and material, but low morale and mud will slow them. The Americans have the setup and better morale, but cannot take heavy losses or else the Germans will overrun them. Also, the dilemma of setup, all units forward to blunt the attack or in depth to keep the advance slowed down. In my solo play the Americans setup forward with units on the ridge of board 25 and the woods or board 23. No units were on 22 or 24 so a breakthrough will bdevastatingng for the Americans, but they will maximize their firepower on the advancing Germans. The Germans setup adjacent to board 25 for their initial advance. The two variables of Tiger entry and weather would dictate the advance. Turn 1 has the Germans moving on to board 25 with the Americans on 23 advancing to the town to provide added defense. But on turn 2 the Tiger II's appear and advance on board 23 and Volksgrenadiers move south to pinch the Americans in the town. The trap nets the Germans a company of American troops as the Tiger II fire and GRENs assault takes the town and force the Americans to flee. To the north the Germans slowly move toward the American defenses on the ridge. Soon the Americans open fire but accurate NW41 fire knocks out the American picket line. German GREN's advance toward the American lines but OBA and mortars demoralize them and they start taking losses. Leaders try to rally them but it takes time. German OBA and NW41's start to take there toll on the Americans but the biggest losses come from the four platoons of Tiger II's. In total the Tigers account for 9 infantry steps, an M4, M36 and M18 without getting a scratch. The Tigers are devastating but are slowed by mud and can only capture the towns on board 22 before the end of the game, but they accounted for 19 vps out of the 61 total steps the Germans accumulated. The Americans were tough as well, they racked up 28 German step losses. Taking all opportunities to double demoralize the low morale GREN's as well as scoring well placed kills were able to keep the game close. The overwhelming factor was the well targeted NW41 and OBA which disrupted and demoralized the Americans so that the GRENassault assualt them. The final count was German 61, American 44, but this does not show how close the game was as most points came from the losses of the town hexes at the end of the game. Factoring these out the 49 to 28. The main GREN force never made it off board 25, but a small reinforced company with the Tigers was able to turn the American flank to win the game. |
||||||||||||
| 0 Comments |
| St. Vith: the draw | ||||||||||||
|---|---|---|---|---|---|---|---|---|---|---|---|---|
Draws do not necessarily lack excitement. This is the fifth of the five in the St. Vith mini-series (now completed). As this is perhaps one of the better documented scenarios, I'll only comment where my play was unique. Visually, playing on the winter maps and having the Black SS pieces alongside the grey of the Heer made for an effective contrast with the olive green of the US. I thought of this particularly during this scenario as the images from Doug McNair's play are so iconic. Also of note, I used the "consolidation" optional rule along with Fog-of-War (FOW). Also used the "winter fields" rule from Winter Soldiers. Set-up: one previous AAR here stated "In my solo play the Americans setup forward with units on the ridge of board 25 and the woods or board 23. No units were on 22 or 24 so a breakthrough will bdevastatingng for the Americans, but they will maximize their firepower on the advancing Germans." Perhaps this was a solecism of sorts, but the scenario set-up instructions are that the US armored units must set-up in town hexes on board 24 and that six units of the remaining force must set up on each of the four boards with no more than two units per hex. In any case, I had a strong six-unit blocking force at the crossroads on board 25 and a company holding the board 25/23 edge. Unlike Doug McNair's set-up, I placed my mortar stack on the reverse slope of the SW hills of board 25 eschewing the possibility of self-sighting, but hopefully avoiding counter-battery fire. Particular dramas: A M18 got in a some good blows, killing both a StuGIII step early and later a Tiger II using a crossfire bonus set up from a M4 (which survived as the visibility was dropping and thus the SS lost sight of it) and a dart adjacent and fire move for a net +1. Alas, the brave crews of the M18's did not survive long to celebrate their Pyrrhic victory of sorts. DSC's posthumously awarded. A Congressional Medal of Honor Citation for LT 10-1-1 whose lone surviving platoon in the inter board region of 25/23 essentially laid waste to an entire battalion of Volksgrenadiers. Read this as three separate company assaults on the dug-in LT+INF. First Fire rolls of 5's and 6's on the nine and/or thirteen assault column along with some pip-heavy morale checks left carnage that, ultimately, saved a draw for the US (as the Germans only arrived at the towns of board 24 by the last turn. With 7/6 morale, the 18th Volksgrenadier division took almost two hours to get itself back into shape. Interestingly, it was DF from the 506th SS Heavy Tank Battalion that finally killed the posthumous CMH recipient. The US M36 sold itself dearly, killing a step of PzVIb on turn 27 before falling to counter fire. 90mm vs. 88mm was sort of like King Kong vs. Godzilla. The key random elements were: (1) 506th SS Heavy Tank Battalion arrives on Turn Six; (2) Snow arrives on Turn Seven (reducing visibility by half each subsequent turn): and thus "Slush" conditions - which slow mechanized movement - begins on Turn Eleven. Turn by Turn Summary: Turn Initiative Result German-VP US-VP Notes 1 US+1 1 24 2 G+4 2 29 StuGIII step loss 3 G+3 3 31 4 G+2 4 33 5 G+4 5 37 6 G+1 7 41 506th SS Hvy Tank Battalion arrives 7 G+1 11 42 Snow arrives and slush to follow. US cheers. 8 G+1 14 43 FOW 9 G+1 15 44 FOW 10 US+1 15 47 Tiger's bushwacked 11 G+2 21 48 Slush; init bad news for M18 crews; vis 1 hex. 12 G+1 21 48 Night rules in play. 13 US+1 24 48 14 G+1 27 49 Board 23 now clear of US units 15 G+3 28 49 16 G+2 29 49 FOW 17 US+1 31 50 18 US+1 32 53 Second StuGIII step lost 19 US+1 34 53 20 US+1 34 53 21 G+2 39 53 M4 platoon lost 22 G+1 43 51 US loses town hex 0914 on board 22; FOW 23 G+2 45 51 24 G+1 45 51 FOW 25 G+1 45 54 US OF devastating 26 US+1 47 56 27 US+2 52 58 M36/PzVIb battle 28 G+3 52 56 Germans assault 0809 contesting VP hex 29 G+2 53 57 Assault ongoing with modest rolls 30 US+1 54 55 G's assault hamlet on the hill on board 24 literally just as 2xPzVIb arrive adjacent. The US did just what it needed to do to slow down the Germans, particularly the slow-moving king tigers, given the weather conditions in this particular reality. Very much enjoyed. Probably would rate a five save for my general ambivalence regarding scenarios with die-roll contingent factors. |
||||||||||||
| 0 Comments |
| Tormenta de hielo y fuego sobre St. Vith |
|---|
|
En este escenario una poderosa fuerza alemana, integrada por aproximadamente dos batallones de infantería de la 18ª Volksgrenadier Division, apoyados por dos baterías de cohetes ("Nebelwerfer 41"), cuatro secciones de morteros, una sección de cañones de asalto (StugIIIG), artillería fuera del mapa (3 x 16) y sobre todo una compañía reforzada de los tanques superpesados "König Tiger" (506 SS Schwere Pz Bat.), ataca las posiciones americanas en torno a St. Vith, defendidas por aproximadamente una compañía de tanques "Sherman", dos secciones de vehículos cazatanques (M36 y M18) y un batallón reforzado de infantería de la 7ª División Blindada, apoyados por tres secciones de morteros, cinco secciones de cañones AT (3-inch y 57mm) y artillería fuera del mapa (2 x 16). Los americanos dividen sus fuerzas entre los cuatro mapas del campo de batalla, protegiendo especialmente los hexes de población de los mapas 24 y 22, la carretera este-oeste en la meseta del mapa 25, la carretera este-oeste en los bosques del mapa 23 y en las proximidades de las poblaciones del mapa 23. Los alemanes entran por el este del campo de batalla. Los alemanes entran a lo largo de todo el frente y acometen inmediatamente al enemigo. Las posiciones americanas en la parte oriental de la meseta del mapa 25 son rápidamente desbordadas tras una contundente cortina de fuego de la artillería germana. Los defensores son aniquilados. En la población grande del mapa 23 los americanos entran antes que los alemanes y la defienden enérgicamente. Sin embargo, las unidades americanas que entran en la población pequeña del mismo mapa son rápidamente atacadas por el enemigo y expulsadas de allí. Los alemanes empiezan a coordinar el fuego de sus morteros y "Nebelwerfer" sobre las posiciones enemigas en la carretera del mapa 25 y las piezas AT allí situadas por los americanas son destruidas sin poder disparar contra los blindados enemigos. En ese momento entra en escena la compañía de "König Tiger", que divide sus fuerzas entre las carreteras este-oeste de los mapas 25 y 23. Los americanos en la población grande del mapa 23 resisten bien, pero el enemigo evita el asalto directo y empieza a rodear la ciudad por el norte, desbordándola. Ante el temor de quedar copados, los americanos se retiran. En ese momento los alemanes hacen caer sobre ellos un diluvio de fuego con su artillería, morteros y "Nebelwerfer" y a continuación lanzan al asalto a su infantería. Las consecuencias son catastróficas para los americanos, que sufren enormes bajas. En torno a la carretera de la meseta del mapa 25 sigue el avance implacable de los germanos, apoyados aqui también por el fuego devastador de media compañía de "König Tiger". Se produce una nueva sangría entre los americanos y los supervivientes escapan como pueden. En ese momento se desencadena una tormenta de granizo y lluvia que disminuye la visibilidad al mínimo. Esto no retrasa el avance de la infantería alemana, pero sí el de los tanques, que son enlentecidos por el barro. En este momento una sección de "Sherman" y cazatanques americanos deciden atacar a dos secciones de "König Tiger" en la carretera este-oeste del mapa 24. Las consecuencias son catastróficas para los americanos: todos los atacantes son destruidos y los gigantes blindados alemanes siguen ilesos. Dada la enorme cantidad de bajas sufrida y la impotencia de los americanos para parar a los colosos alemanes, la batalla está decidida. Los alemanes avanzan y llegan hasta la pequeña población en la carretera del mapa 22 y la población grande del mapa 24. Los americanos se defienden valientemente, pero no pueden impedir que la guarnición de la población de la carretera del mapa 22 sea aniquilada y ocupada por enemigo. Tampoco pueden impedir infiltraciones enemigas en la población grande del mapa 24 y la consiguiente pérdida de dos hexes de dicha población. Ante lo irremediable del desenlace, el comandante americano se da por vencido y se retira con los supervivientes. Victoria mayor alemana. |
| 0 Comments |