
|
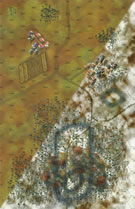
An Operation Named Mist Elsenborn Ridge #2 |
||
|---|---|---|
| (Attacker) Germany | vs | United States (Defender) |
| Formations Involved | ||
|---|---|---|
| Germany |  |
277th Infantry Division |
| United States |  |
99th "Battle Babies" Infantry Division |

| Total | |
|---|---|
| Side 1 | 8 |
| Draw | 6 |
| Side 2 | 12 |


| Overall Rating, 25 votes |
|---|
|
3.52
|
| Scenario Rank: 385 of 913 |
| Parent Game | Elsenborn Ridge |
|---|---|
| Historicity | Historical |
| Date | 1944-12-16 |
| Start Time | 06:00 |
| Turn Count | 18 |
| Visibility | Day |
| Counters | 82 |
| Net Morale | 0 |
| Net Initiative | 1 |
| Maps | 2: 23, 25 |
| Layout Dimensions | 56 x 43 cm 22 x 17 in |
| Play Bounty | 78 |
| AAR Bounty | 141 |
| Total Plays | 26 |
| Total AARs | 6 |
| Battle Types |
|---|
| Road Control |
| Rural Assault |
| Conditions |
|---|
| Entrenchments |
| Off-board Artillery |
| Reinforcements |
| Scenario Requirements & Playability | |
|---|---|
| Elsenborn Ridge | Base Game |
| Introduction |
|---|
|
While part of the Volksgrenadier division struck down the Schwarzenbruch Trail toward the village of Krinkelt, another regiment attacked into the woods to the south in hopes of flanking the American defenders. The Germans had numbers on their side, but the Americans had not been surprised. |
| Conclusion |
|---|
|
The initial German bombardment did little damage to American positions in this sector, and the advancing Volksgrenadier walked into a torrent of rifle and machine-gun fire. A single barefoot BAR gunner killed over a dozen Germans. But German numbers told and the assault had begun to make headway by mid-morning, when the Americans threw in their last reserve, the regimental anti-tank minelaying platoon. Lt. Harry Parker led his men in a wild, screaming bayonet charge, and after he skewered one Volksgrenadier dozens of others threw down their weapons and fled. |

|
|
|---|
| AFV Rules Pertaining to this Scenario's Order of Battle |
|---|
|
| Heer |
|---|
|


| Army |
|---|
|


| 2 Errata Items | |
|---|---|

|
The reduced direct fire value of the Heer HMG became 5-5 starting with Fall of France. (plloyd1010
on 2015 Jul 31)
|

|
The movement allowance on the counters in Airborne is misprinted. It should be "3." (rerathbun
on 2012 Jan 30)
|
| Another close battle | ||||||||||||||
|---|---|---|---|---|---|---|---|---|---|---|---|---|---|---|
I played the Americans trying to hold the east-west road against the overwhelming German assault. My face-to-face opponent ended up with a Major Axis Victory, but it came right down to the last turn and could just have easily ended in a draw with a few lucky dice rolls. We used the Fog of War optional rule and played on the winter versions of the maps. As the Americans, I put some heavy machine gun teams in the larger town near the middle of map 23. I also put some entrenched infantry and heavy machine guns across the road in the light woods tree line around the base of the hill. On map 25, I put my two mortars in the heavy woods of hex 0606 on top of the hill and kept a few infantry and leaders nearby as reserves. My reinforcement rolls worked out well and my leader and IR platoon were eligible to arrive on the first turn allowed (turn 6 or 7 I think). The Germans mainly advanced through the light woods on map 23 at first with a smaller detail taking up positions in and around the small town in 0403, 0404, 0504. 75% to 80% of the game was the knock-down, drag-out slug fest in those light woods around my entrenched position as he picked his way closer while I tried to use my artillery to maintain some distance. Disrupted and demoralized units scattered the woods and the clearings nearby, but eventually the Germans positioned coordinated fire teams across multiple hexes to demoralize and break my units out of their entrenched positions. This finally came together after a few unsuccessful rolls to get the German reinforcements into play. Once my entrenched positions broke and the German reinforcements arrived, the American step-losses began to explode. I managed to use my artillery to somewhat keep up with inflicting casualties, but it was obvious that I would soon be overwhelmed. The German armor took the lead and began assisting (quite successfully) with clearing out my straggling forces trying to secure the road. Here I did make a few tactical errors. Some groups got stranded in the open over-stacked, and I should have kept my IR platoon reinforcements further back to hold part of the road and make my opponent have to drive further into map 25 to clear me out. In the final turn, my artillery managed to get the German step losses to 15 (a requirement for a Minor Allied Victory), but the Germans were able to demoralize my last ditch effort to move some units onto the map 23 east-west road to secure that Minor Allied Victory. In doing so, my opponent secured the Axis Major Victory on some of the final rolls of the game. Great scenario, only 18 turns but it took us a while to get through as we tried to each crack our half of the puzzle of securing that light woods hill on map 23. |
||||||||||||||
| 0 Comments |
| Ankommend!! |
|---|
|
Although my German is above average (for a dutchman), I didn't know the translation for the well known 'get your ass down' phrase: Incoming!! Any of you (germans) know the correct translation? Played this scenario solo over three sessions. Short and simple: deadly artillery (both sides) mixed with a bit of FoW and a late arrival (8:15) of the German reinforcements gave the win to the Americans. The Americans lost 16 steps, the Germans 15. Minor victory for the Amis as a small detachment of them held out on the west side road of bd 25. Tense small scenario in which the victory could easily have swung to the German side, but not this time. A solid 4 for this one. Much fun! |
| 0 Comments |
| An Operation Named Mist | ||||||||||||
|---|---|---|---|---|---|---|---|---|---|---|---|---|
December 16, 1944: It’s a cold, misty dawn in the Ardennes Forest, the first day of the Battle of the Bulge. This is scenario #2 from “Panzer Grenadier: Elsenborn Ridge.” The Americans set up first, on either of two maps. There's a long east-west road running right through the map. The American objectives are to keep US combat troops on or near the roads on both maps, and to destroy German units. But the Americans have only a small force, and lots of acreage to protect. The Germans have 18 turns – from 6:00 til 10:30 – to seize the east-west road, and the roads on the eastern half of the map. PG’s innovative command-and-control system gives one incentive to keep units together, in the chain of command. So I set up in three or four clumps. Infantry dig in forward, on the hills dominating the crossroads in the east. I put HMGs and infantry in a couple entrenchments to the west, with mortar and infantry in the village south of that. The commanding officer, an anti-tank Gun, and a couple infantry set up in the rear. The Germans enter in an efficient line, with senior commanders in the middle, cascading their orders down to lower-rankings leaders on either side. One thing I’ve learned about this game: efficient lines don’t last long. The Germans get lots of offboard artillery in the first hour of the game, but it’s too misty to use any of it. The only units in visibility range are the Americans dug in on the hill, but the US troops have chosen to set up on the “reverse slope,” out of LOS. So the Germans march forward. By 6:30 a.m. (Turn 3), the Germans have made contact with the enemy. They pull up adjacent to the Americans on the hilltop, which I'm nicknaming Little Round Top. Already the German lines are splintering, as slower units fall behind and drop out of the chain of command. The idea behind the German initial assault is to pound the enemy with superior numbers at close-range, demoralize and disrupt them, and then move in for Assaults to finish the job. That’s the idea, anyway. The first round of direct-fire, though, is inconclusive at best. By 7 a.m., a few Grenadiers and HMGs have pushed past the hill to the north, hoping to dash through the open ground to the western woods. At 7:15, a couple of the flanking units have made it safely to the woods, but the mist is starting to lift, making it more uncertain for the HMGs and infantry that are trying to follow. I probably should’ve just used the HMGs to support the assaults at the hill, which still haven’t started yet, as the Americans keep disrupting potential assaulters. At 7:30, a big swath of German reinforcements arrive (thanks to a lucky reinforcement die roll). They are led by a couple of Hetzer tank destroyers. This is my first experience with armor in PG, so I make lots of tank noises as I move these guys around. To the north, American OBA has caught Germans trying to sneak through to the western trees. Disruptions, demoralizations -- it's ugly. German progress is slow, as Fog of War ends a couple turns early. Also, I keep forgetting that I can limber mortars and move them 2 hexes a turn instead of one. They are lagging far behind. Still, by 8 a.m., the German reinforcements push forward into the trees on the western map. They will have to run a gauntlet of OBA once they emerge from the other side of the woods, at which point they'll charge the Americans defending in one of the two villages in the west. At 8:15, the reinforcements do indeed start emerging from the woods in the south, and immediately US artillery rains down on them, demoralizing and disrupting some. Meanwhile, further west, lead elements from the initial German force are in the trees and hills overlooking the road. The wise thing to do would be to sit there and shoot at any Americans that try to move onto the road. But at some point – I don't remember when -- these guys couldn’t resist stepping forward to shoot, which in turn earned them a big shower of arty shells, and a step loss or two. By 8:45 a.m., the reinforcements have charged and surrounded the southernmost town. The Hetzers are careful to stay in the fields, out of LOS of the anti-tank Gun in the western village. The armor is stacked three-high with a supporting infantry unit, but the American is reluctant to rain down OBA on that hex, as it might stray onto the defending American troops. And it’s house-to-house fighting by 9:00 a.m. With no viable target in the village, the Hetzers move back east to pound the entrenched HMGs north of the field. Again, the tank destroyers try to keep the field between themselves and the Gun to the west. Within an hour, the Germans have mostly won the house-to-house fighting, but the Americans put up a surprisingly good fight. They demoralized two German Grenadiers, which had to exit the assault hex in ignominy. But the Germans have enough units to reinforce the assault. Casualties are mounting on both sides. Control over the road in the west is going to be a close thing! As is the casualty count. The Americans need 15 German steps, plus some form of road control, to earn a victory. By this point they were at 12-13 steps or so, which made my Germans more cautious. 9:45 a.m. (Turn 16): In the east, the Americans just need to be adjacent to a road to prevent a German minor victory, and the Germans have just been unable to get the Yanks out of their entrenched position adjoining the road. The Germans have OBA’d it, mortared it, direct-fired it, and assaulted it; no luck. At ten o’clock, turn 17, with one turn to go, it’s looking like a draw. The Germans now have incentive to play it safe to ensure a draw, whereas the Americans have incentives to be reckless and hop onto the east-west road to try to get a minor victory. Even more oddly, the Germans actually have a better shot at a major victory (no US troops on east-west road) than a minor one (eastern roads and adjacent hexes clear). I’m really enjoying the scenario, but as the game approaches its end, I feel the tug of artificial end-of-scenario victory conditions. This sort of end-of-scenario "rush" is not unusual in tactical games, of course. Consequently, on the final turn, the Americans jumped onto the road, in open terrain, when they never would’ve abandoned their safe positions in real life. They barely managed to survive withering OBA, OpFire, tank fire, and small-arms fire. The result is a draw – I think. I count 14 German step losses, one short of the 15 that would give the US a minor victory, and 4 fewer than needed for a major US victory. The Germans have not achieved either of their victory conditions, both involving control of roads. In retrospect, I suppose I should have set up the American entrenchments directly on the road, maybe right by the westernmost village? That would’ve made the end of the game play out more “naturally,” with the US clinging stubbornly to its entrenchments instead of hopping out of them to ensure a draw! Still and all, I had great fun with this scenario. The big swath of territory and relatively low counter density made it really interesting. The US setup is a real brain-twister: all that territory, so few units. And then, as the game developed, I had several stories unfolding at once: the assaults on Little Round Top in the east; the dash through the mist to avoid OBA; the Lost Brigades pushing through the woods in the northwest; the house-to-house fighting in the southern village; the gun duel between the tanks and the entrenched HMGs. Also, as in my first game, the majority of step losses seemed to come from OBA. I know it’s a cliché to say that arty was a top killer in WW2, but it’s still nice to see a game model that so well. I'm rating the scenario as a 3, although I could move toward a 4 if I replay it and set up the Americans better. Mostly my concern is the victory conditions, which seemed to create distorted incentives toward the end of the scenario. That distortion might be eliminated by a different setup. Also, the victory conditions are asymmetrical and a bit hard to remember; I must have consulted them 30 times while playing. One thing I did like about the victory conditions was that it forced me to fight all over the map, which was very cool. I liked having several things going on at once, all of them relevant to ultimate victory. This is a modified version of a photo AAR I posted over at the Geek. http://www.boardgamegeek.com/article/6312525#6312525 . Thanks for reading! |
||||||||||||
| 0 Comments |
| What do you do with a demoralized Volksgrenadier... | ||||||||||||
|---|---|---|---|---|---|---|---|---|---|---|---|---|
Scenario 2 of Elsenborn Ridge is a continuation of the first scenario, with the Volksgrenadiers opening the attack on the American 99th Infantry Division. The grenadiers have the numbers in this scenario with 26 GREN's and 6 HMG's double the American counterparts. But morale is a huge issue for the Germans. With low morale leaders with morale bonuses will be prized. The Germans also have impressive opening OBA but it reduces quickly to half as much. The American OBA is impressive and will be the key to the Americans killing enough German units. One point that makes this scenario rated lower is that the Germans will probably not be able to use their initial OBA strength on the Americans if they setup far enough back to not be seen on the first couple of turns. Possibly forcing the Americans to setup a number of units on board 25 might make it more historical. For my play the Americans setup a small amount of units on the west side of the ridge on board 25. They were positioned to slow the Germans as well as the entrenchments near the road to keep control as long as possible. A line of INF's were arrayed north to south along the ridge to give the Germans so quick fights to slow the advance. Given the low morale this might force them to recover units for several turns. The rest of the Americans were setup around the road on board 23 dug in and waiting. The Germans advanced from the east along the road making it to the east side of the ridge. Given the American setup the first turn of German artillery was useless as the leaders could not get far enough forward to spot the American position. But on the second turn German OBA scored the first kill on an American INF. The Germans moved to take the crossroads on board 25, but this was covered by a entrenched INF and HMG on the west side of the ridge. German OBA and HMG firebases opened fire on the entrenchment with some initial disruptions and demoralizations, but the Americans recovered. Other German units move to capture the 40m hill to the northwest of there positions. Once there they engaged an American LT and INF platoon in the woods on the hill. Quickly demoralizing the LT and disrupting the INF, they overpowered the Americans in a quick assault. At this point American OBA opened fire on the advancing Germans disrupting and demoralizing several German units. An American Sargent moved up the ridge to the so to spot the German units looking to capture the south side of the ridge. Spotting vulnerable mortars called in OBA and demoralized them, effectively putting them out of action for the game. The Germans continue the push to the north west, moving over the 40m hill and down toward the road where dug in Americans awaited. American mortars hit the advancing the Germans once again disrupting and demoralized GREN's. A German Lt Colonel setup on the hill to recover units as they failed, but this proved overwhelming later in the game. American causalities were mounting from the German OBA and assaults on the southern line of pickets, but one platoon of dugin troops held firm. After the American Sargent spotted his initial OBA, he and his platoon moved back after two companies of Germans closed on his position. German OBA briefly disrupted him and his platoon, but he soon recovered at the American picket line. The Germans at this point advanced to the picket line to assault it and captured one set of foxholes but another put up a fight demoralizing a company of GREN's. The American Sargent saw the opportunity to counter attack and he and his platoon reinforced the steadfast INF platoon. In bitter fighting the Americans killed another GREN and demoralized others. This stopped any southern advance by the Germans. To the middle of the fight the Germans, need to assault the entrenchments on the west side of the board 25 ridge. OBA was called in and disrupted the Americans long enough for a crack German LT and GRENs move to assault. They advanced but Americans first fire was better and disrupted the attacking units. Slowly the Americans recovered and now they were stronger than the attacking Germans. Inflicting casualties on the attackers, they were forced to just sit in the assault and shuffle good order GRENs and HMGs in the fight, without results. In the end the Americans held out. The same was true for another entrenchment down the road, denying the Germans of a victory. It was up to the Americans to try to kill enough Germans to get a victory. American OBA and assaults tried but the Germans were good enough to keep the troops recovering each time the Americans demoralized German units. So in the end the Americans came up short as well. A good scenario, but the Germans need good leaders and need to keep recovering troops to stay in the game. The Americans need to keep hitting the Germans as they advance. Low morale will slow them and with a few good dice rolls they can get the win. One point to remember with the Americans is that full strength good order American INF's will get a +1 shift in an assault for the morale difference. This can be very useful in a counter attack. For the Germans mass numbers are key. With key leaders build fire groups and assault groups to overrun the Americans. |
||||||||||||
| 0 Comments |
| A raging blood bath | ||||||||||||
|---|---|---|---|---|---|---|---|---|---|---|---|---|
Set Up: The US set up with two companies forward on Map 25. One dug-in along the reverse slope woods and road. The second company dug-in in the south east woodline in supporting distance of the company defending the road. The BN HQ and weapons company set up HMGs and Mortars on Map 23 along the road and field next to the town and in somewhat supporting distance of the main defense of the road. The AT Gun was set up dug-in on the north east ridge line able to range the road and any units that penetrated the initial defense. German Attack: The US successfully negated the initial turns of artillery due to their set up. However, the Germans took advantage of strategic movement to infiltrate and bypass the main defensive line to get a company across the clear and into the town before visibility increased. Turns 1-7: The German attack went poorly. The regiment lost 6 steps by turn 5, as the US called down artillery virtually on their positions or next to them. Then the Southern US company left their position and counterattacked north up the hil to repulse the Germans. On Turn 6 an amazing 9 German steps were eliminated without a single US loss!!! It seemed like a one sided victory. Turn 8 - 18: The tables then turned with the arrival of the second echelon of the German attack. On Turn 7, the US lost 6 steps while the Germans lost 3. The US defenses began to break and be overwhelmed by the combined assaults of Hetzers and HMGs. The counterattacking US company, left out in the open and exhausted from their successful attack was cut to pieces by the Germans and hunted down in detail off the map. The US AT gun was too far out of range to threaten the Hetzers most of the time, and when it exposed itself, German Artillery silenced it. German HMGs and the infiltrated company proceeded to suppress and disrupt the US weapons company and BN HQ and prevented it from having much impact on the main battle on Map 25. By game end, the Germans successfully cleared Mapboard 25 for a minor victory and had to retrograde off of map 22. Step losses: US: 21 of 33 (64% casualty rate - combat ineffective) Germans: 32 of 54 (59% casualty rate - combat ineffective) US considerations:Consolidate your BN into a single strong point on the reverse slope of clear area of Map 25. Hex 0309 and the surrounding road hexes are Key terrain. Breaking your BN up to cover more of boath map boards makes you susceptible to being defeated in detail. It is better to deny the Germans a single road hex on Map 25 and if you hope to win the scenario. Try not to unveil your AT gun until you have to or else it will be lost to artillery. Consider using it as a mobile reserve or keeping in in an entrenchement where it will have a higher survivability rate. Otherwise, your only option to defeat the Hetzers is to go onto an offensive assault and hope bazookas work. Chances are a smart german player will not let you get that close or leave his hetzers unsupported. German considerations: Leadership, leadership, leadership. Keep your chains of command solid so you can mass your firepower and assault in large waves and overwhelm the US. Also, you need to have leaders designated with recovery operations to get stragglers and disrupted infantry back into the fight. Do not expect your artillery in the beginning turns to have any effect as a smart US player will stay out of observation. Consider mounting infantry on your hetzers as a mobile assault force once they come on. Consider massing your 81mm mortar into one unobservable hex to have FP 24 mortar attack to increase your indirect fire power. |
||||||||||||
| 0 Comments |
| Lt. Colonel "America" holds the line | ||||||||||||||
|---|---|---|---|---|---|---|---|---|---|---|---|---|---|---|
Another ftf with my son Jacob who again manned the American defenders. The leadership draw had a huge impact on this battle. The Americans drew an 11.1.2 Lt. Colonel who provided super hero-like leadership. They were opposed by a woefully inadequately led German force -- the highest German leaders had only 9's for morale. Lt. Colonel "America" set up a powerful defense on the reverse side of the board 25 hill which completely controlled the crossroads. Entrenched, dug-in, and with Lt. Colonel "America" apparently firing the BAR gun from his hip one handed while constantly rallying his men, the Americans never budged from their line. The Germans did some damage on the flanks but spent most of the battle banging their coal-shuttle helmets against the American "wall." This was an extremely frustrating battle for the Germans. However, I still rate it a 3 as I believe that had the leadership been different, the outcome might have been a little more balanced. |
||||||||||||||
| 0 Comments |