
|
Piecestrike DAK '44 #3 |
||
|---|---|---|
| (Defender) Germany | vs | Britain (Attacker) |
| Formations Involved | ||
|---|---|---|
| Britain |  |
2nd Armoured Brigade |
| Germany |  |
15th Panzer Division |
| Germany |  |
5th Light Panzer Division |

| Total | |
|---|---|
| Side 1 | 2 |
| Draw | 0 |
| Side 2 | 0 |


| Overall Rating, 2 votes |
|---|
|
3.5
|
| Scenario Rank: --- of 913 |
| Parent Game | DAK '44 |
|---|---|
| Historicity | Alt-History |
| Date | 1944-04-01 |
| Start Time | 12:00 |
| Turn Count | 24 |
| Visibility | Day |
| Counters | 131 |
| Net Morale | 0 |
| Net Initiative | 1 |
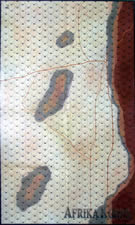
| Maps | 1: AK2 |
| Layout Dimensions | 88 x 58 cm 35 x 23 in |
| Play Bounty | 191 |
| AAR Bounty | 171 |
| Total Plays | 2 |
| Total AARs | 1 |
| Battle Types |
|---|
| Hill Control |
| Rural Assault |
| Conditions |
|---|
| Off-board Artillery |
| Randomly-drawn Aircraft |
| Reinforcements |
| Terrain Mods |
| Scenario Requirements & Playability | |
|---|---|
| Afrika Korps | Maps + Counters |
| Beyond Normandy | Counters |
| DAK '44 | Base Game |
| Introduction |
|---|
|
Putting Germany's best weapons into the hands of the Afrika Korps' experienced crews would have created a formidable fighting force. But Britain could counter with hard-bitten fighters of her own. As yet another tank battle rages to the south of Tobruk, superior British numbers continue to push back 21st Panzer until 15th Panzer launches a counterattack. |
| Conclusion |
|---|
|
In the wide-open spaces of the Western Desert, tanks like the Panther and Firefly would have been extremely dangerous opponents. Two short years after Gazala and Alam Halfa, tank battles might have played out very differently thanks to the greater ranges of the new weapons. |

|
|
|---|
| AFV Rules Pertaining to this Scenario's Order of Battle |
|---|
|
| Army |
|---|
|


| Heer |
|---|
|


| 7 Errata Items | |
|---|---|

|
The "Optional Values" for the 17-Pdr given in an Avalanche Press Daily Content piece on the 17-Pdr Anti-Tank gun (and printed on a replacement counter sheet Download) are now the Official Ratings, published in games like Cassino '44, Grossdeutschland 1946, and Indian Unity, as shown in one of the two counter images. These are: 5-5 / 8-8 MA 0 (Towed). (caryn
on 2012 May 03)
|

|
All Bren carriers should have a movement value of 7. (Shad
on 2010 Dec 15)
|

|
The "Optional Values" for the Firefly given in an Avalanche Press Daily Content piece on the 17-Pdr Anti-Tank gun (and printed on a replacement counter sheet Download) are now the Official Ratings, published in games like Cassino '44, Grossdeutschland 1946, and Indian Unity. These are: 5-5 / 8-8 Full Strength and 3-5 / 8-8 Reduced Strength. (caryn
on 2012 May 03)
|

|
Ignore the direct fire values. (Shad
on 2010 Dec 15)
|

|
The reduced direct fire value of the Heer HMG became 5-5 starting with Fall of France. (plloyd1010
on 2015 Jul 31)
|

|
All SS PzIVH tanks should have a movement of 8. (Shad
on 2010 Dec 15)
|

|
All SPW 251s have an armor value of 0. (Shad
on 2010 Dec 15)
|
| Attack and Counter-attack | ||||||||||||
|---|---|---|---|---|---|---|---|---|---|---|---|---|
The objectives:
Time = 6 hours (24 turns) Synopsis British attack a German occupied hill which overlooks the road to Tobruk. The Germans call for reinforcements… BATTLE SUMMARYThe Battle British enter from the east and begin to move toward the German occupied hill. British airplanes begin to target the German AT Guns. British infantry disembarks the trucks and APCs and advance on foot (The unspotted German AT Guns and tanks would shred the fragile vehicles). The British armour likewise holds back. British continue to move forward on foot as the RAF can’t seem to hit anything. They get almost within range but still no Germans are spotted. A British Typhoon spots some panzers. The British foot move within their direct fire range and the British tanks roll forward at full steam as the German tanks finally begin to open fire. The battle has now truly began! (turn 5). British infantry charges the hill. A very lucky FOW hits just after the Shermans advance as the Germans are caught by surprise. But the Germans take the initiative and a German platoon is destroyed. A Typhoon strikes and hits some Infantry and reduces a Panzer platoon. The Churchills advance to set up a crossfire on the easternmost PzIV. The Panthers are unable to hit the Churchills at long range. As the German tanks are now under threat the APCs begin to advance. (4 British losses to 3 German losses) Germans win the initiative but miss the Firefly. Their PzIVF2 comes under heavy crossfire and is eliminated by the Firefly and Shermans. The easternmost side of the hill is free of German armour and the infantry advances. The Churchills fire 10 volleys and eliminate the reduced PzIVH. The German lower armoured tanks are eliminated as the deadly Panthers sit on the back half of the hill and reduce one of the Churchill platoons. The Reinforcements are delayed. German AT Gun is hit by direct fire. Firefly is reduced by the Panthers as the British armour rushes the hill. Casualties are nearly tied at 10 German losses to 9 British losses. German reinforcements arrive in the west led by a number of Panthers and PzIVHs. The RAF is now deterred and the Germans gain offboard artillery and +2 initiative. The British are scared. Shermans on the southern side of the hill are eliminated by the Panthers as the Churchills advance toward the summit. German infantry on the eastern side of the hill are getting overrun by the British. British direct fire eliminates the German HMG nest. The Churchills are engaged by the Panthers as the reinforcements move to flank the east side of the hill. Churchills take the high hill and reduce a Panther. But the reinforcements make their presence know and respond ferociously. The remaining Shermans engage and reduce a reinforcement platoon of PzIVH. 3 hours have passed (halfway) The British armour comes under huge fire but manage to reduce both Hetzers. The Churchills hang in strong at the summit because of their good armour. In the east the German infantry is eliminated in assault. Germans win initiative and the British tanks are almost all eliminated. The M3 and Bren drivers who have been assisting the British infantry piss their pants! (as they know they’re next!) The British have done well getting half the hill but now with their armour gone they are in humungous trouble. British infantry eliminates the German mortar. Another quick FOW again stops the German infantry reinforcements from advancing. The M3s come under heavy fire as they have no chance against the Panthers. The British have almost cleared the hill of all the initial German infantry but with 2 hours to go quiver in their boots. Over the next 45 minutes the Germans advance en force. The British manage to take out a Panther in close assault but are being overwhelmed as the Germans outnumber them enormously and begin to simply overpower them in close combat. Over the next 30 minutes the Panthers clear out the British mortar teams and soon the British are down to a single HMG who is locked in assault. With one hour to go still, the British surrender. GERMAN MAJOR VICTORY Aftermath This was a very fun scenario of attack and counter-attack. If the German reinforcements were: less numerous, later, missing Panthers or if the scenario was only 4 hours instead of 6. This could have been a British victory and would have been much more balanced. As it was, it was a very enjoyable and tense scenario until around the 3 armour mark where it became evident the British attack was over and it was now time for them to try desperately (and with little hope) to stop the German counter-attack. Scenario Rating: 3/5 – Fun scenario which almost gets a 4/5 except that the British really don’t seem to have a chance once the German reinforcements (and Panthers) arrive. |
||||||||||||
| 0 Comments |