|
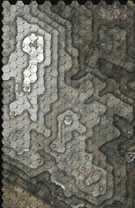
Cavendish Road Cassino '44 #19 |
||
|---|---|---|
|
(Attacker)
New Zealand
(Attacker) United States |
vs | Germany (Defender) |
| Formations Involved | ||
|---|---|---|
| Germany |  |
1st Fallschirmjäger Division |
| New Zealand |  |
20th Infantry Battalion |
| United States |  |
760th Tank Battalion |

| Total | |
|---|---|
| Side 1 | 2 |
| Draw | 1 |
| Side 2 | 4 |
| Overall Rating, 7 votes |
|---|
|
3.29
|
| Scenario Rank: 553 of 913 |
| Parent Game | Cassino '44 |
|---|---|
| Historicity | Historical |
| Date | 1944-03-19 |
| Start Time | 12:00 |
| Turn Count | 12 |
| Visibility | Day |
| Counters | 25 |
| Net Morale | 1 |
| Net Initiative | 2 |
| Maps | 1: CassUR |
| Layout Dimensions | 43 x 28 cm 17 x 11 in |
| Play Bounty | 103 |
| AAR Bounty | 171 |
| Total Plays | 7 |
| Total AARs | 1 |
| Battle Types |
|---|
| Hill Control |
| Road Control |
| Rural Assault |
| Urban Assault |
| Conditions |
|---|
| Off-board Artillery |
| Illumination |
| Scenario Requirements & Playability | |
|---|---|
| Cassino '44 | Base Game |
| Introduction |
|---|
|
Weeks of backbreaking toil by Indian engineers had turned a mule track that ran up the Cassino Massif into a surface suitable for armor. This was named Cavendish Road. The Indians had completed their work in secret, hidden from the Germans by huge swathes of camouflage material. A mixed Allied tank assault was planned to coincide with an infantry attack from the valley below, but the infantry attack ended up getting delayed. However, nobody told the tanks, and they attacked without infantry support. |
| Conclusion |
|---|
|
The Germans were surprised to see tanks on the Massif as they thought it was inaccessible to vehicles. But they did not take long to recover, knocking out the lead tanks and causing others to divert off the track to move around them. The tankers were hampered by the difficult terrain and the need to remain buttoned-up due to sniper fire, and some tanks became stuck or threw a track. The tanks were able to pour huge amounts of fire into German positions, but could not take them without supporting infantry. The tanks pushed on towards Albaneta Farm but fire from Point 593 was just too intense. Some Honeys (Stuarts) were directed to turn the corner of Point 593 to test the approaches to the Monastery, but most of them were destroyed by artillery and direct fire as they did so. The advance was called off, and the remaining tanks withdrew to a safe area and eventually received the order to withdraw back down the Massif. |
| AFV Rules Pertaining to this Scenario's Order of Battle |
|---|
|
| 1 Errata Item | |
|---|---|

|
Reduce strength direct fire value be came 5-5 in Army at Dawn. (plloyd1010
on 2015 Jul 31)
|
| Cassino: Scenario #19, Cavendish Road | ||||||||||||
|---|---|---|---|---|---|---|---|---|---|---|---|---|
I had to get a scenario in on Cassino, even if it was small one. This one has Allied armor; New Zealand & American trying to get through the Cavendish Road, control it and a few more victory point hexes and eliminated German steps. The German Forces consist of all Infantry and a few small guns but have a very high Morale and terrain on their side and they basically have the same victory objectives. To make a long story short, my Allied armor got chewed to pieces, in mostly assault combat, as I seemed to push them too close to enemy stacks of Infantry to get those adjacent bonus modifiers but would usually pay for it latter in Assault Combat. The Germans just kept feeding fresh Infantry: INF, ENG, HMG right into new stacks with three units plus leader usually in their stacks, why not. Two of the assaults really broke the allies backs, with the Germans rolling 6’s on the dice with one 2x and another 3x result. The wrecks stacked up and the German even scored with a 1 value AT gun, rolling a 12 on the dice. The Germans did loss some Infantry steps as well but nothing like the Allied losses and the German kept possession of most of the victory hexes as well. In the end, it was a Major German Victory. I think I rushed forward too fast with my Allied armor but they had no support what so ever, not artillery, infantry or air and the Germans had nothing but time on their side, which the Allies did not. I kind of saw the hand writing on the wall on this one, but it was so fun to play, an interesting puzzle to try to solve for each side. The big hexes are so enjoyable to play on, especially in assault combat. The terrain took me a little while to read through the scenario book before I could play but this was awesomely fun to play, even if the results were loop sided this time. Hey, it was most likely my aggressive play that made it that way! |
||||||||||||
| 0 Comments |

 Cass018


