
|
No Somos Italianos! Blue Division #18 |
||
|---|---|---|
|
(Defender)
Germany
(Defender) Spain |
vs | Soviet Union (Attacker) |
| Formations Involved | ||
|---|---|---|
| Soviet Union |  |
72nd Rifle Division |
| Spain |  |
262nd Infantry Regiment |

| Total | |
|---|---|
| Side 1 | 6 |
| Draw | 1 |
| Side 2 | 1 |


| Overall Rating, 9 votes |
|---|
|
3.56
|
| Scenario Rank: 369 of 913 |
| Parent Game | Blue Division |
|---|---|
| Historicity | Historical |
| Date | 1943-03-19 |
| Start Time | 08:00 |
| Turn Count | 30 |
| Visibility | Day |
| Counters | 127 |
| Net Morale | 1 |
| Net Initiative | 0 |
| Maps | 2: 1, 3 |
| Layout Dimensions | 56 x 43 cm 22 x 17 in |
| Play Bounty | 153 |
| AAR Bounty | 159 |
| Total Plays | 8 |
| Total AARs | 3 |
| Battle Types |
|---|
| Bridge Control |
| Road Control |
| Urban Assault |
| Conditions |
|---|
| Off-board Artillery |
| Randomly-drawn Aircraft |
| Reinforcements |
| Scenario Requirements & Playability | |
|---|---|
| Blue Division | Base Game |
| Eastern Front | Maps + Counters |
| Introduction |
|---|
|
Despite a good fighting record for most of its stay at the front, the disaster at Krasni Bor had marked out the Spanish volunteers as a weak link in the minds of both Soviet and German generals. The Germans moved a division behind the 250th as a "corset stay," while the Soviets planned a new assault. The Moscow-Leningrad Highway needed to be reopened before the spring rains turned the landscape into mud, and after a short "hurricane bombardment" the Red infantry surged forward. |
| Conclusion |
|---|
|
Determined to prove (especially to any potential German invaders) that Spanish soldiers would fight and die for any position once ordered, the regiment's officers exhorted their men to fanatical efforts. The Soviets came on in repeated waves, equally determined to punish the mercenaries. They overran part of the road and seemed on the verge of rolling back the Spanish line and taking the bridge over the Izhora River, but a prompt counterattack led by Capt. Merry Gordon (one of many descendants of Wild Geese serving in the Blue Division) restored the front. The Blue Division remained a potent fighting force despite its losses at Krasni Bor and the replacement of many of its hardened professionals with unemployed Spanish workers. |

|
|
|---|
| AFV Rules Pertaining to this Scenario's Order of Battle |
|---|
|
| Heer |
|---|
|


| Army (RKKA) |
|---|
|


| Army |
|---|
|


| 8 Errata Items | |
|---|---|
| Scen 18 |
Add two Soviet tank leaders. (Shad
on 2010 Apr 29)
|
| Scen 18 |
Replace the "StugIIIG" in the reinforcement list with "StuGIIIB" found in Eastern Front. (GeneSteeler
on 2011 Feb 17)
|

|
The reduced direct fire value of the Heer HMG became 5-5 starting with Fall of France. (plloyd1010
on 2015 Jul 31)
|

|
The morale and combat modifiers of German Sergeant #1614 should be "0", not "8". (Shad
on 2010 Dec 15)
|

|
The StuG IIb appearing in the original Panzer Grenadier game had an Anti tank value of 4-7. As of Eastern Front Deluxe (2005), continuing onward through the 3rd and 4th edition games, the anti-tank value has been 4-4. (plloyd1010
on 2022 Jul 21)
|

|
The movement allowance on the counters in Airborne is misprinted. It should be "3." (rerathbun
on 2012 Jan 30)
|

|
The reduced direct fire value in Kursk: Burning Tigers is 4-4. (plloyd1010
on 2015 Jul 31)
|

|
Kommissars never get morale or combat modifiers. Ignore misprints. (Shad
on 2010 Dec 15)
|
| A Real Slugfest |
|---|
|
Spanish set up in a long east-west line directly on top of the road, with all their men in entrenchments or dug in. They had single platoons of AT guns covering each of the three approaches. The Soviets entered with their tanks to the east, hoping to capture the bridge first. Their infantry was divided among the eastern and central approaches while the SMG platoons used the woods of board 3 as cover while they approached the large town. As the Soviets advanced they took many losses, which stalled their attacks. The game then centered on the bridge area and the town. Soviet attempts to take these areas was met with fierce resistance, with the higher Spanish morale playing a key role in assaults. At one point the Spanish took some losses and ordered German reinforcements, but they rolled a 6, meaning they only got an Inf and two 81mm mortars. As the game approached its end the Soviets had taken too many losses to mount an offensive to take the road hexes on map 1, so their hope was to keep the Spanish from controlling the town on map 3, thus gaining a draw. The Soviets unleashed three assaults on town hexes the last two turns to insure there would be no Spanish victory. In the end the Soviets controlled the bridge hex, the town had three assaults raging, and most of board 1 was Spanish controlled. A draw. All in all a nice scenario, but one where the Spanish player can always count on German reinforcements if he runs into real trouble. Conversely, if the Soviets had concentrated their initial advance to one area of the board, they wouldn't have had to deal with so much opposition early on. |
| 0 Comments |
| A Vicious Urban Fight - Hold the Bridge! | ||||||||||||||
|---|---|---|---|---|---|---|---|---|---|---|---|---|---|---|
As others have described, this is a, relatively balanced, large-scale, slugfest, This will be an outline AAR only, for our 5-session play-through, of this rather long scenario. I led the defending Spanish/German side, and the doughty & calculating, OldPueblo, played the Soviet side. We used the FOW, smoke/illum, consolidation, extended assault, and excess initiative optional rules. The Soviet & German leader draws were much worse that the exceptional Spanish one. There were 13 FOW-shortened turns in this tournament of death. The Soviet onslaught came from the north in a series of waves. The forward-deployed Spanish force entrenched in the vicinity of the bridge, as well as sparsely on the road, and in the town. Wisely, the Red Army concentrated its OBA on the fiendish AT gun platoons, and eventually eliminated all of them. This freed up the Soviet armor to cause no end of mischief with relative impunity, and to support a 2-pronged pincer attack. Spanish calls for support brought in a series of reinforcing elements including STGIIIB assault guns and infantry. Many of these troops fell to accurate Soviet OBA. Extended close range, adjacent-hex fire fights & close assaults followed, which resulted in the Axis loss of the east-west road to the advancing Bolsheviks. Spanish counterattacks regain the bridge after 4 turns in Soviet hands, and the Reds begin to lose their T-34 tanks in close assaults, while the town's garrison staves off several flanking attacks in costly fashion, especially in terms of leader losses for both sides. By the end of game turn 18, there were 5 eliminated Soviet leaders, as well as 2 more KIA for the Axis. The highly efficient Soviet Kommisar systematically killed off a good number number of routed INF platoons, throughout this match, adding to the overall body count. Soviet OBA is also deadly, and both sides suffer from reduced initiative, and bad morale recovery rolls. By the end, the combined total of combat 7-die rolls is 23. Later contingents of German reinforcements include a better grade of leadership, which strengthens the Axis counter attacks in, and around, the town. Entrenchments change hands regularly through game turn 26, as massive casualties accumulate for both sides. The Axis finally wins the seesaw fight in the town, on the darn bridge, and the east-west road. This results in a very bloody Spanish/German victory. made possible by frequent German reinforcements -- about half of which survive intense Soviet OBA -- to contribute to saving the entrenched Spaniards. As reported elsewhere, the Soviets spent too many resources & time trying to take the town, and repeatedly fell for Spanish/German feints that drained strength away from the 27-turn, seesaw fight for the strategic bridge. This scenario was fun to play with ample maneuver and many decisions to be made by both sides. It easily could have gone the other way for a costly Soviet victory. I give this one a rating of 4. It is suitable for either SOLO or SHARED play, IMHO. |
||||||||||||||
| 0 Comments |
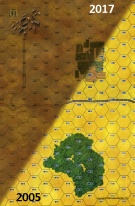
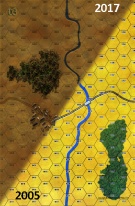
| Entrenched Spanish forces try to hold the road and bridge against Soviet attack. | ||||||||||||
|---|---|---|---|---|---|---|---|---|---|---|---|---|
The main objectives: Spanish
Soviet
Time = 7.5 hours (30 turns) Casualty Count: (x-y), where x=Soviet steps lost and y=Spanish steps lost. BATTLE SUMMARYSoviets enter in the north and advance toward the Spanish forces entrenched at the bridge and road and occupying the town. Soviets continue to advance under HMG, mortar and artillery fire (2-0) A lucky Soviet artillery strike eliminates the Spanish 50mm AT Guns, so the armour is now free to advance. The armour reaches the road and the Spanish call for reinforcements. The Soviet infantry advances toward the town through the forest. The first hour is over (4-1) The second hour sees the Soviets focus on advancing against the east and west flanks of the Spanish position. Near the bridge they are cut to pieces, but led by the armour the Spanish HMG nest is torn apart. German reinforcements arrive in south, a couple foot platoons and some StuGIIIBs. The next 30 mins have the Germans reinforcements advance only to be chewed up by Soviet artillery. The StuG advances into firing range. (15-7) The Soviets win initiative and the StuG is blown to pieces! Soviets capture the entrenchment at the west-east T junction. The Spanish are now cursing that they didn’t set up more entrenchments along the east-west road. The Soviet armour moves against the town as the timer hits the three hour mark. Another StuG platoon and more German foot troops arrive in the south. (18-12) Again, the German reinforcements are shredded by Soviet artillery! The Spanish leave the town to assault the T-34s and manage to eliminate two tanks. They continue the assault and blow it and are hit hard by Soviet artillery. Unlucky for the Russians, the T-34s and KV-1s are spooked by their own friendly fire! (23-17) The Soviet armour is routed, but the Spanish numbers are dwindling. The StuG moves to fire on the fleeing KV-1. Soviet infantry charges the town. Just past the 4 hour mark and the casualty count is too high! (Both sides reduced to 0 initiative, so I stopped counting). The StuG scores a hit against some of the T-34s. But the Soviets lose a 4th officer (only 6 proper officers left). Soviets begin to assault the town as the StuG crosses to the north side of the road. A German Infantry company arrives in the south. The first town hex is captured, while in the northern woods the Soviet Kommisar begins eliminating routed platoons! German infantry platoon moves towards the town to assist, but once again they are smashed by artillery. The KV-1 recovers and advances against the StuG. The German AFV fires but misses and the return Soviet fire takes out half the German unit! In the far east, the few remaining Soviets eliminate the Spanish AT Gun and capture the entrenchment next to the bridge! Just under 2 hours to go and the last batch of German reinforcements arrive. 3 Inf platoons, HMG platoon and some 50mm guns. Led by two fantastic leaders (both with +2 morale bonus!) The StuG runs, but is eliminated. The Soviets attempt to stop the Germans from reaching the road. A mortar strike takes out the 50mm and the KV-1 advances against the Germans. German morale is too good and they reach the western part of the road. The Soviets, despite numerous artillery strikes can’t dislodge them. The battle in the town rages on with both sides taking more and more casualties. In the east the Soviets make a desperate attempt at gaining the bridge but are severely flogged. The battle reaches its conclusion. SPANISH MINOR VICTORY!!! AftermathThe Spanish hold the bridge and have German units controlling some of the east-west road on the western board, which is enough for a minor victory. The town is mostly contested, with a lone hex being in Soviet control. The Death Toll is astronomical. Here is the Dead Pool… Soviets have lost 23 foot platoon out of 33. 70% losses! Spanish have lost 8 out of 16 foot platoons. 50% losses! German reinforcements arrived 4 times, with the first 3 “companies” completely obliterated! Brutal. A few notes on the gameplay:
Scenario Rating: 3/5 – A good scenario. Both sides appear to have a chance at victory. Soviets need to focus more on the bridge. |
||||||||||||
| 0 Comments |